Projects allow you to open any folder as a project. The file tree of the folder is displayed in Project panel. There you can easily open pages, add new ones, delete unneeded files. Note: the use of many template resources requires that you set-up a project folder.
What are Projects in Pinegrow?
Projects group sets of files and folders to keep your web design work organized. Basically, a project is a folder on your hard drive which contains all the files and folders relative to a particular web design project. (HTML, CSS, JS, Images and more …).

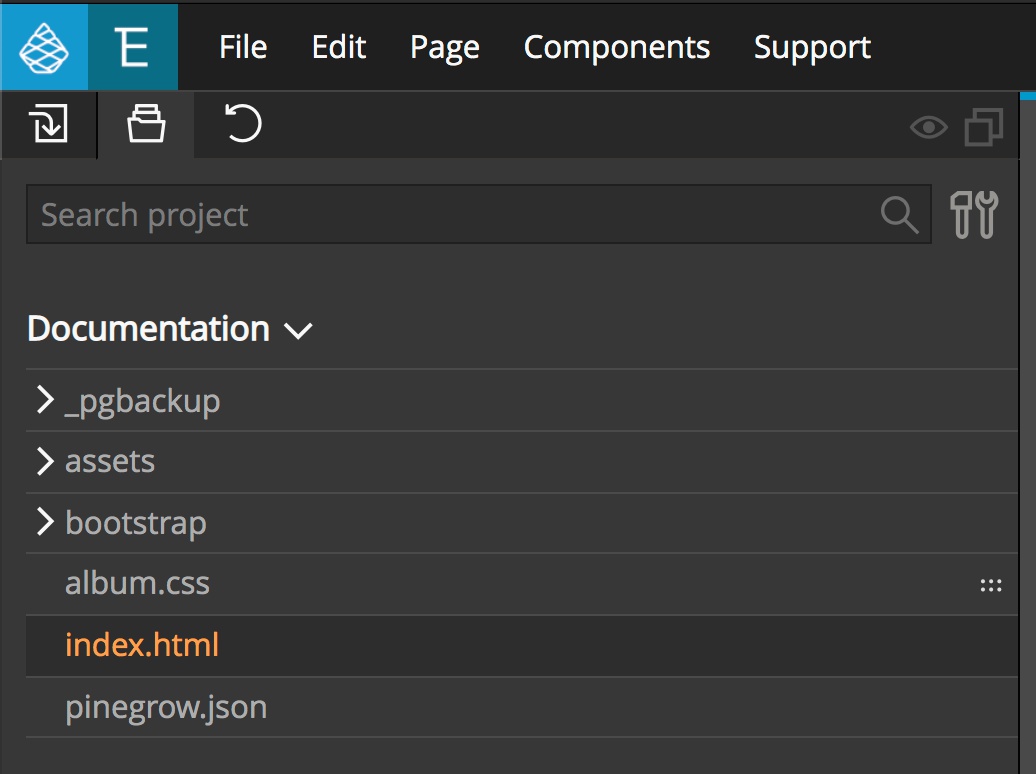
The files and folders in your project are displayed in the Project panel.
Many Pinegrow features only function in the context of a Project
How to start a project?
For an existing project
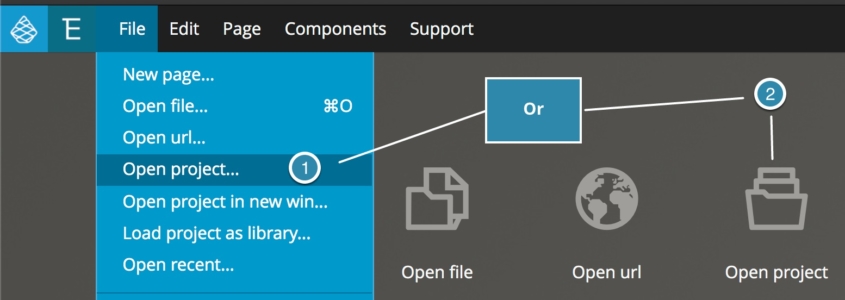
If you already have a folder with your HTML template and resources, you can either use File -> Open project, or from the Home screen, click on the ‘Open project’ icon and then select the Project folder.
Starting a new project
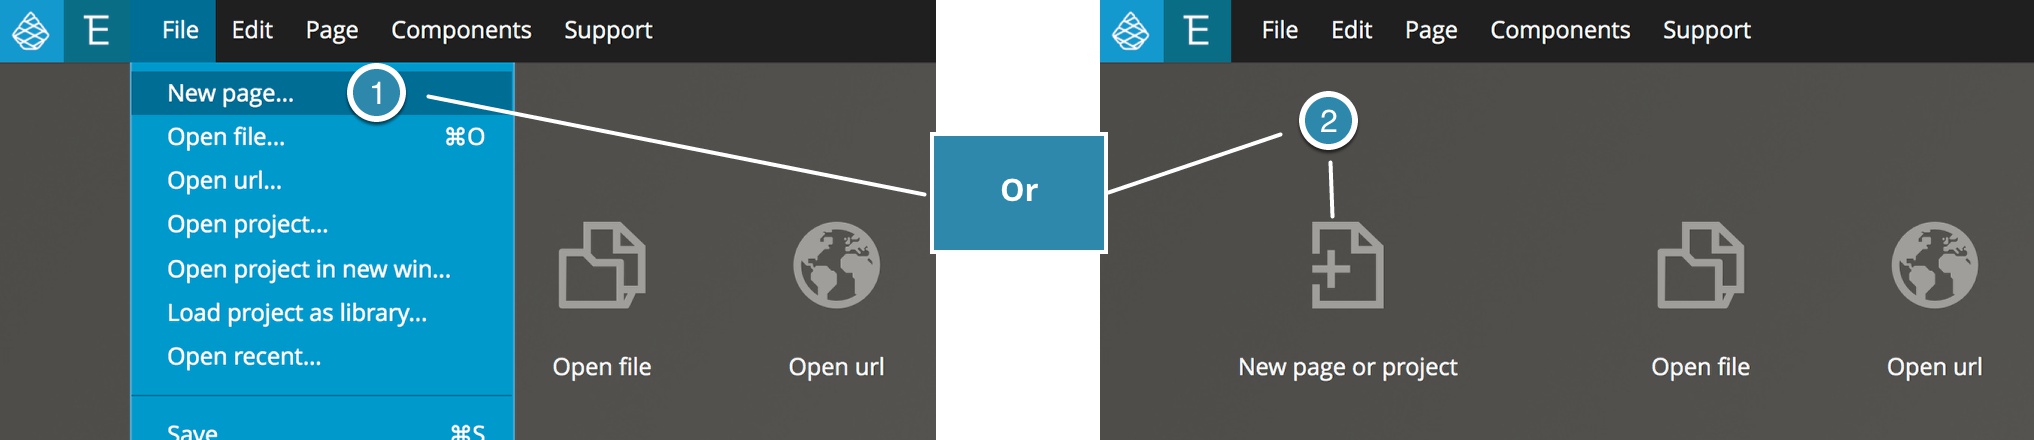
To begin a brand-new project, either use File -> New page or click the ‘New page or project’ icon from the home screen.
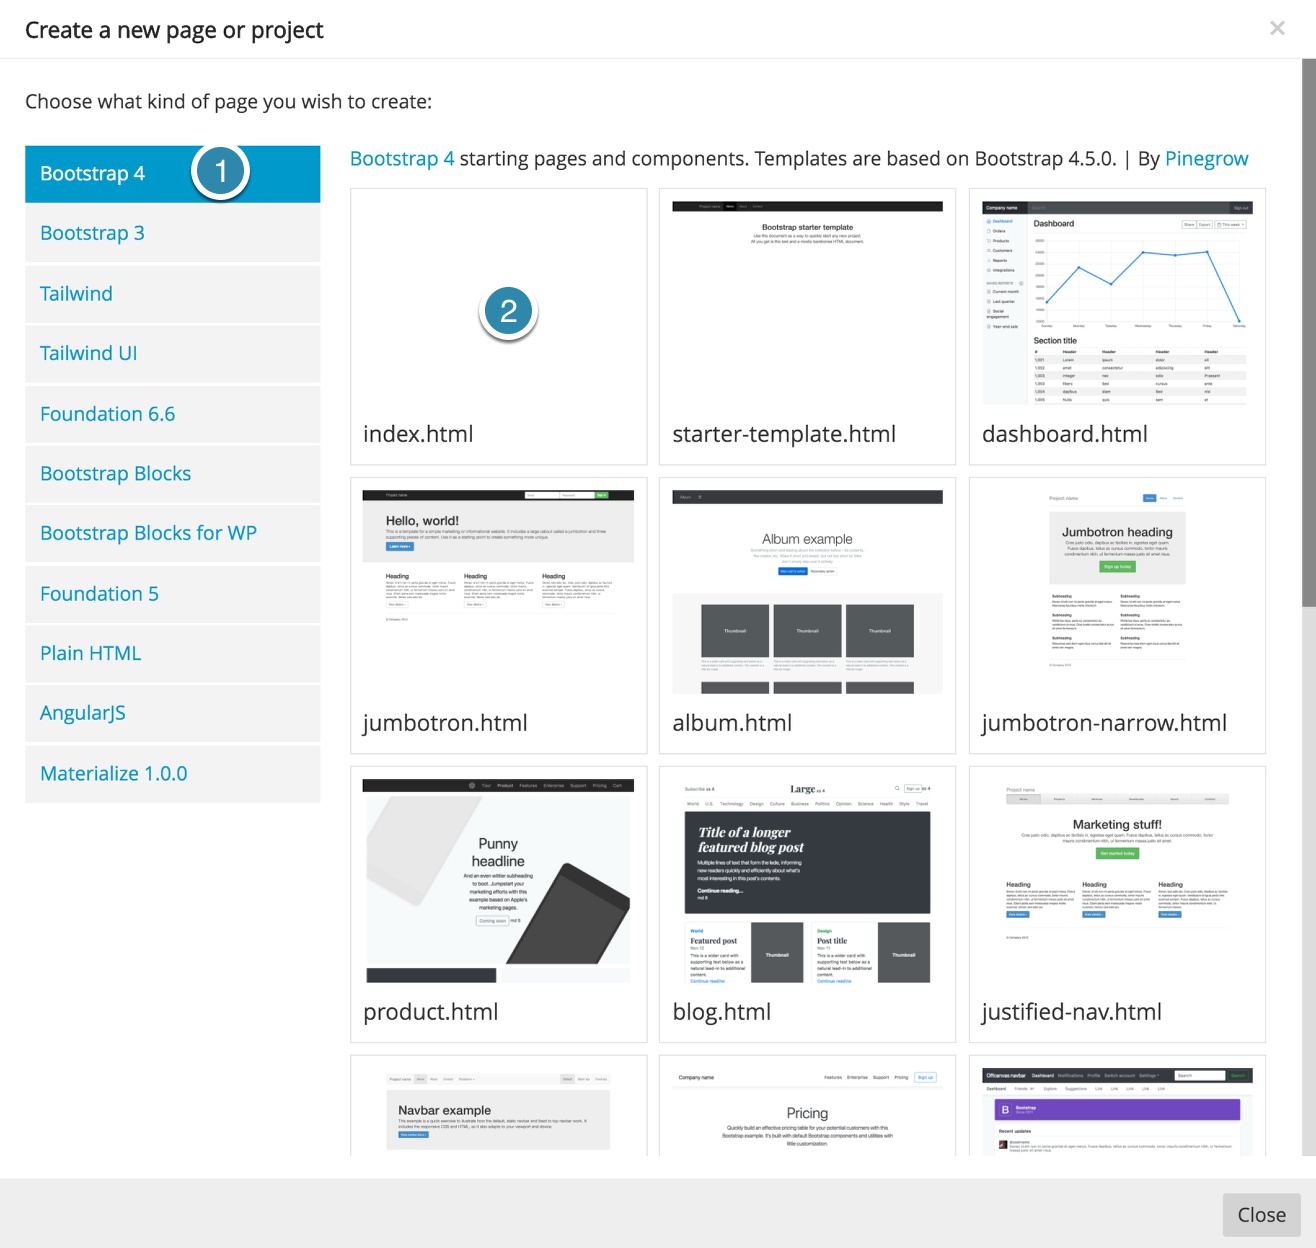
Select the desired framework for your project from the list on the left and then a starter template. Finally, save your new file into a new folder using File -> Save -> New folder -> select a name and folder location for your project.

Pinegrow will now ask if you want to open your new folder as a project, select “YES”.

Alternatively, if this modal does not appear, navigate to the Project panel. There you will have the choice to open your new file as a project.
Using an existing file
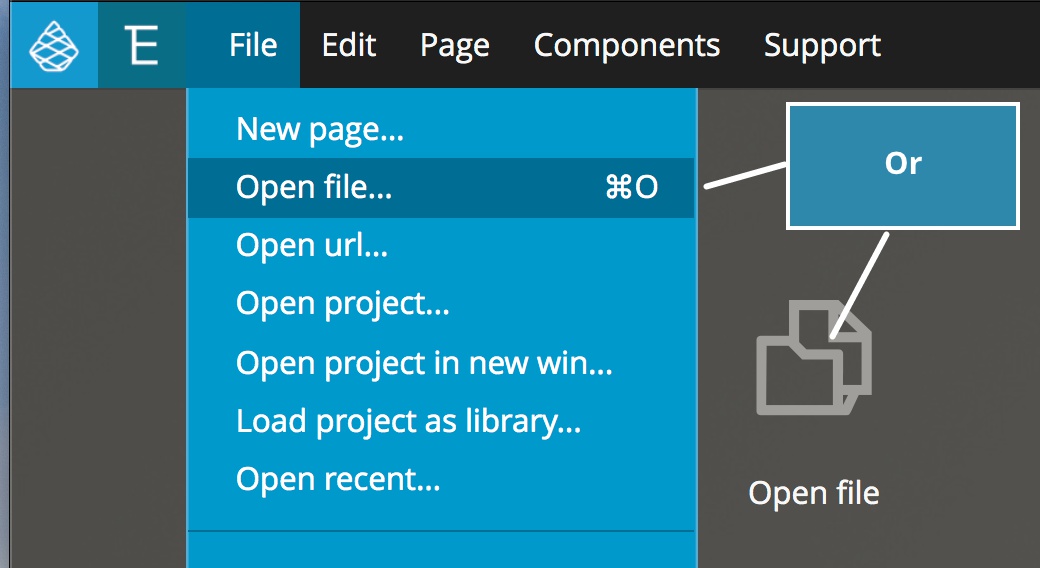
You can also use existing files to create a new project. Simply open the file in Pinegrow using the File -> Open file menu item, or the Open file icon on the home page. Then navigate to the Project panel and click the “Open as project” button.
In Pinegrow, you can set up a project in a way that suits you by adding, renaming files and folders using the Project panel, BUT you can also modify your project (including moving files) from your computer file explorer:
- Explorer for Windows
- Finder for Macintosh
- Nautilus for Ubuntu
- Linuxexplorer_view
Working with projects
The project panel provides a listing of the files and folders within your project folder.
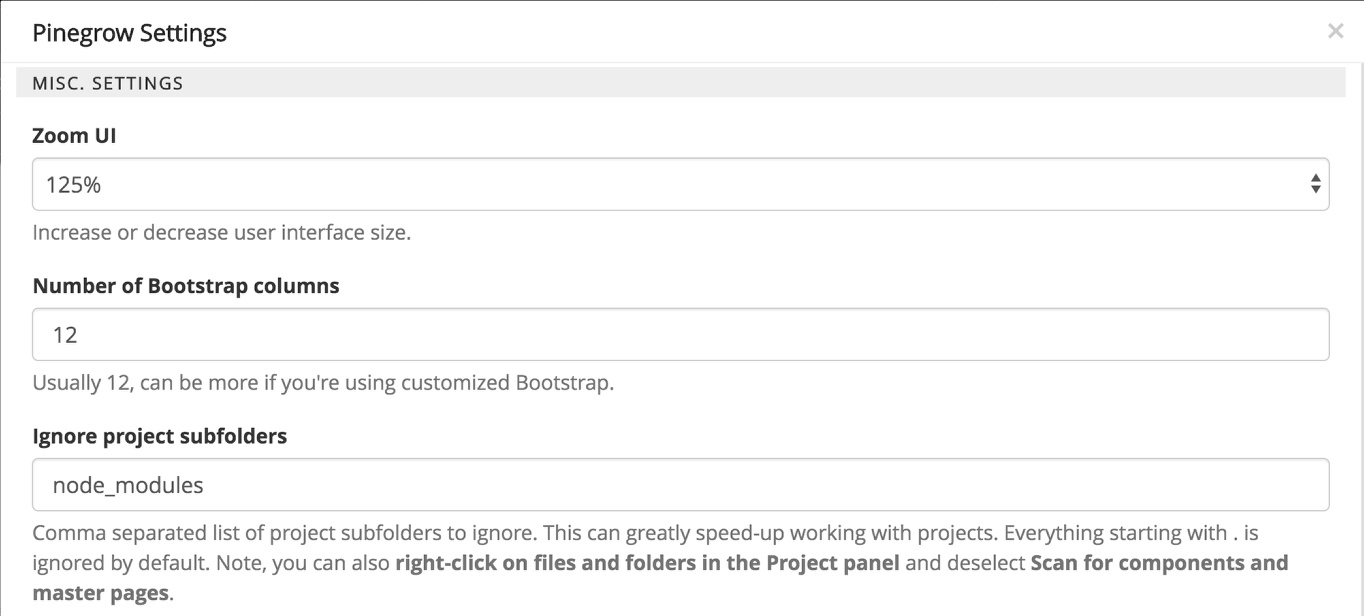
While the panel by default does not display subfolders starting with a dot, if you find that the Project panel is displaying too many other subfolders that you do not want to alter in Pinegrow, you can go to the Support -> Settings menu item. Then scroll down to “Misc. Settings” and add the folder name to the “Ignore Project Subfolders” setting.
In the Project panel you can right-click on the Project name to bring up a context menu. From this menu you can:
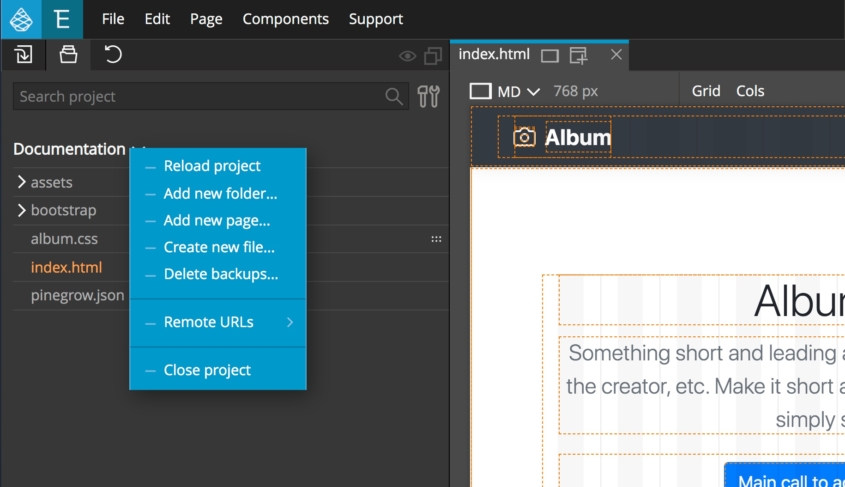
- Reload the project: Useful to activate some of your modifications
- Add new folders to your project structureAdd new HTML pages from the template list
- Create new files for JavaScript or other non-HTML files used in your project
- Delete backups: You can clear the automatic backups that Pinegrow creates (Note: The Support -> Settings menu item allows you to alter the number of backups retained)
- Remote URLs: You can open a remote URL to be used in your project
- Close your project
Depending on the document type that you select, there are a number of different options through a contextual menu (accessed by right-clicking on the file name)
For HTML pages:
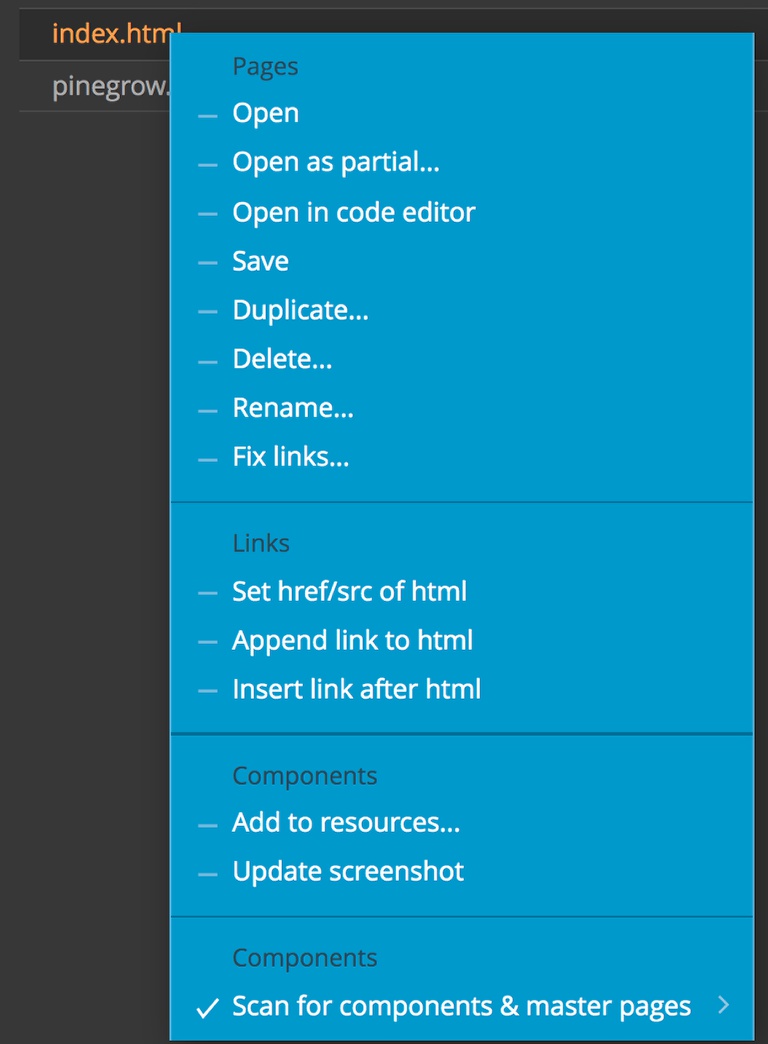
Pages section
- Open document
- Open as a partial to include in another document (deprecated and in the Actions panel)
- Open in the code editor
- Save document
- Duplicate document
- Delete document
- Rename document
- Fix links: Fix broken links and resources references if you move a page and/or the resource of a page in a different location of your project folder. Note: Fix links will not work if you RENAME a page and/or the resource of a page.
Links Section
- Set href/src of …
- Append link to …
- Insert link after …
- The Links section will allow you to select resources in your project and use them to create or replace resources and links in selected elements from the Tree view.
- For example, in your document, you can select an image reference from the tree view, then select an image resource in the project and use Set href/src of Image to use the selected image as resource in your document.
- This is also useful for setting up page navigation. You can select a navigation link element from the Tree panel or Page View, then select a page from the project and use Set href/src of Link to use the selected document as link in your document.
Components Section
There are two components sections. The first has either one or two items:
Add to resources: Read our documentation about Libraries and Resources
Update screenshot: If the page you have selected is a Master page, you can update the screenshot that is used for the document.
The second section has a single control:
Scan for components & master pages: If you have a complex project that is not utilizing Master pages or component objects, you can uncheck this to speed-up project load and refresh times.
Meaning of the icons in the Project panel
While working in project mode, and if you use Master pages and components, you will notice some useful icons beside your files names. Here is the meaning of these icons.