Redesigned element context menu – Copy & Paste actions – SASS fixes – WordPress improvements – Insert actions from the context menu – Visual helpers – Post & Loop settings – Smarter Smart Menu – Reusable Customizer Sections and Fields
Download
Update 5.41
Release 5.41 solves problems with missing WordPress actions in the context menu and problems with SASS compilation if import statements contain .scss extension.
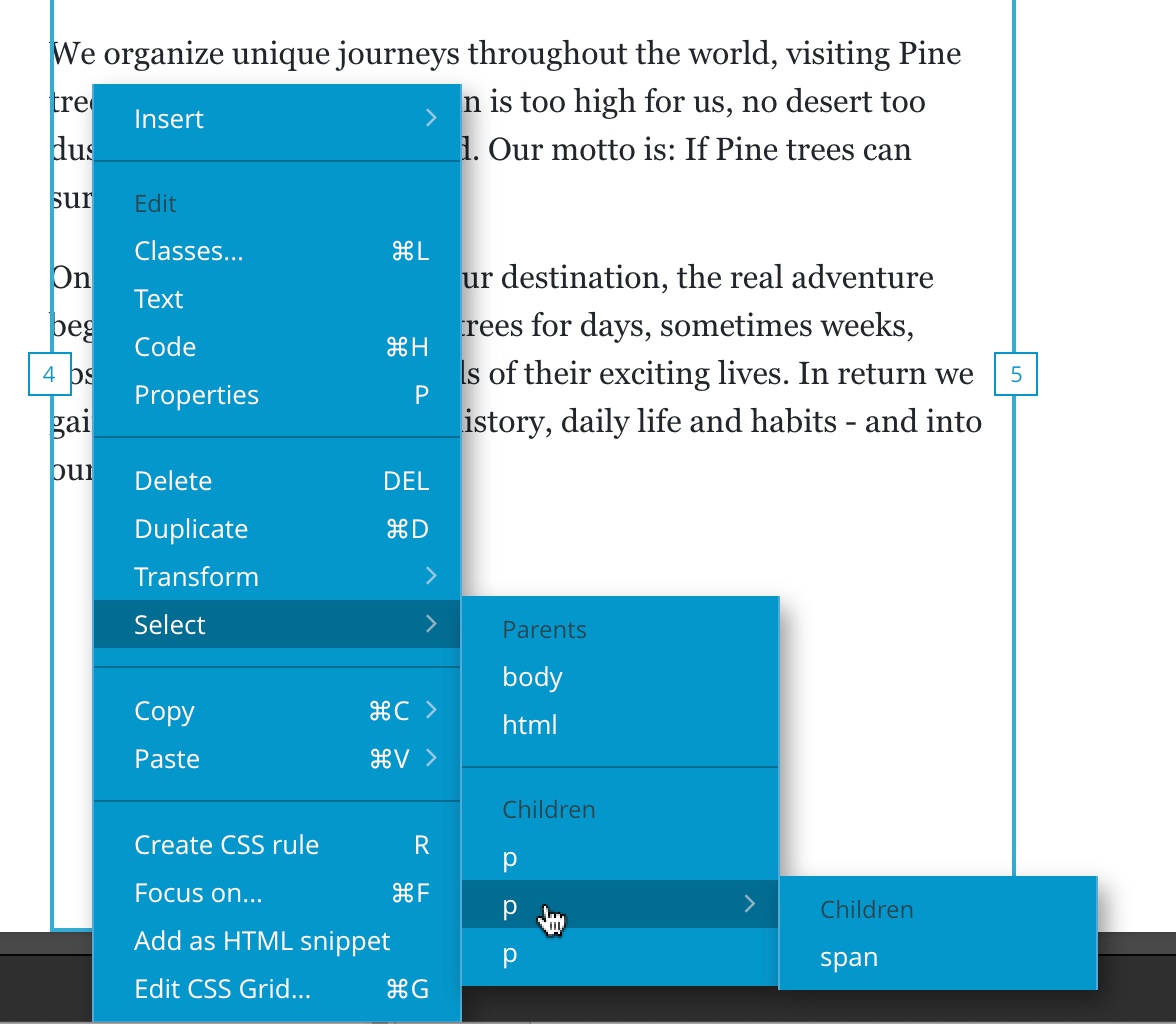
Redesigned element context menu
We redesigned the element context menu that is accessible by right-clicking on elements on the page view or in the Tree panel:
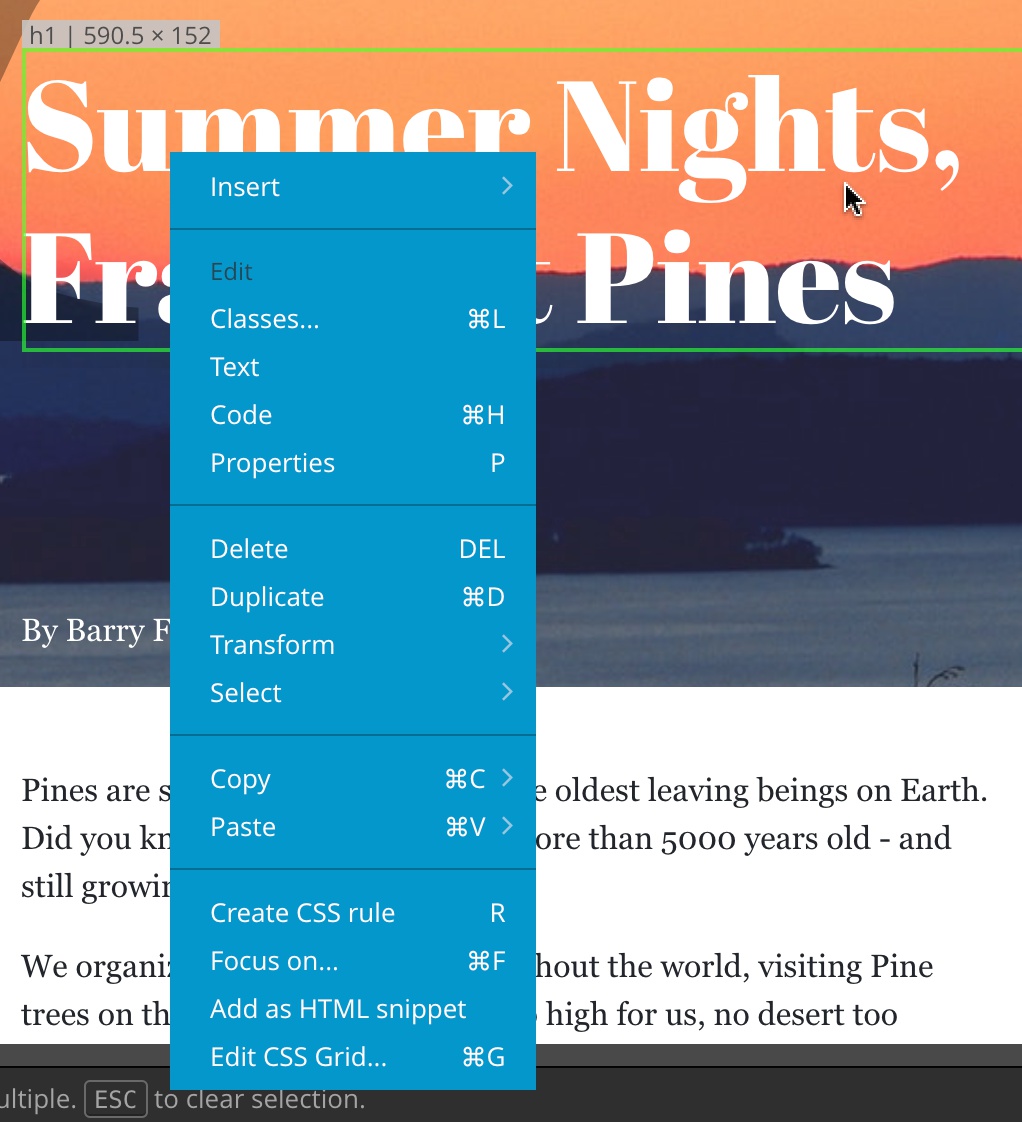
Introducing sub-menus allowed us to better organize the menu and to add more commands.
For example, new elements can be added to the page directly from the menu.
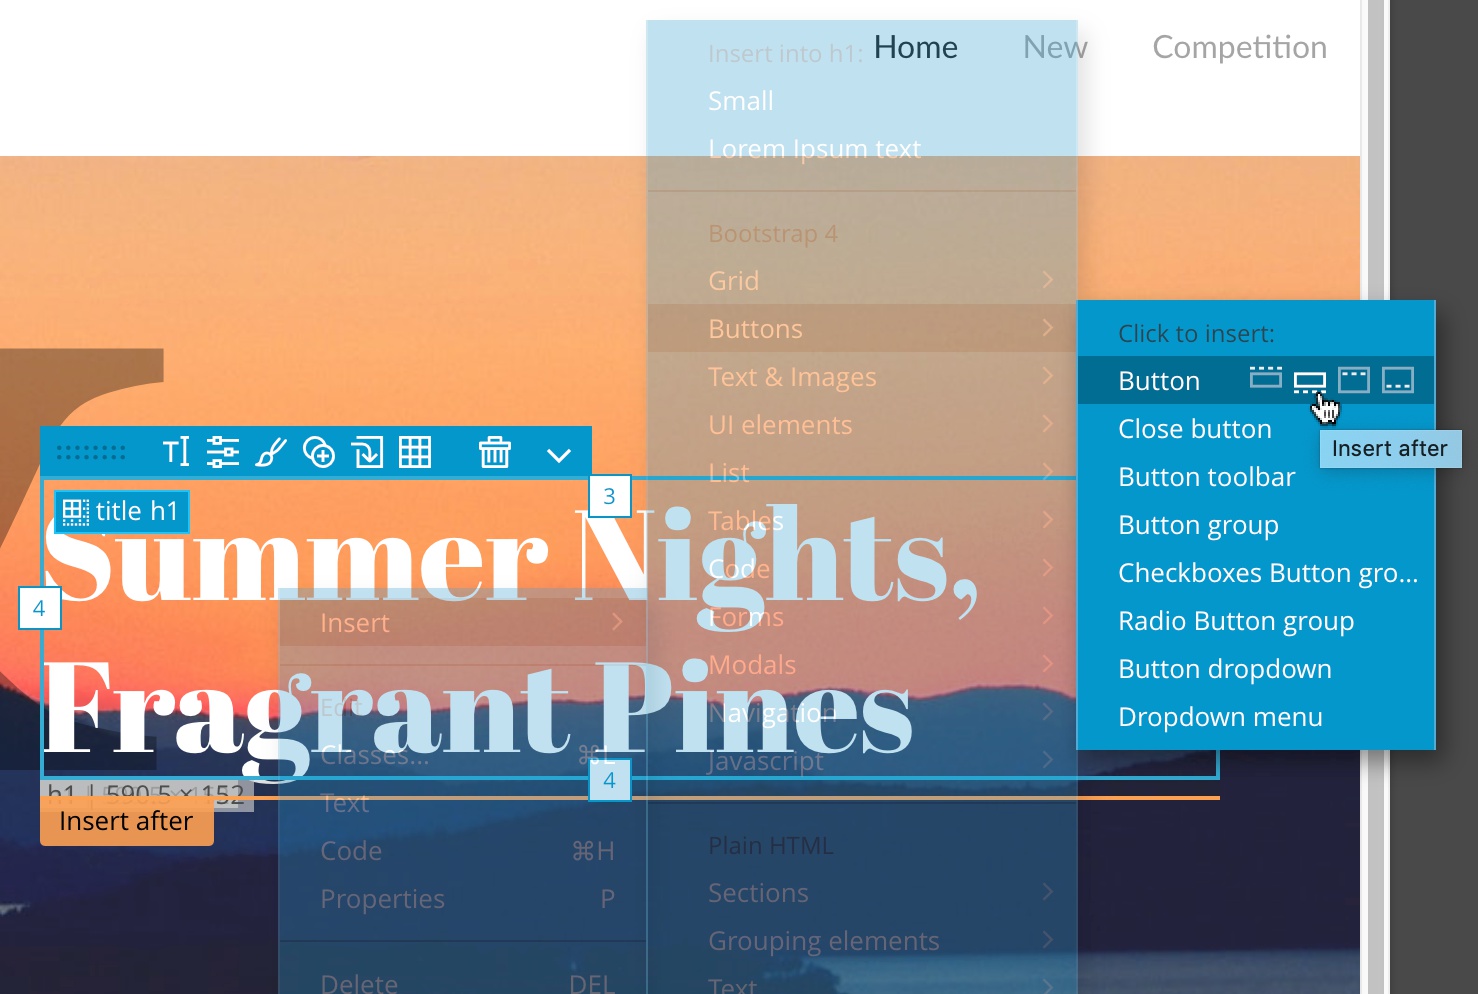
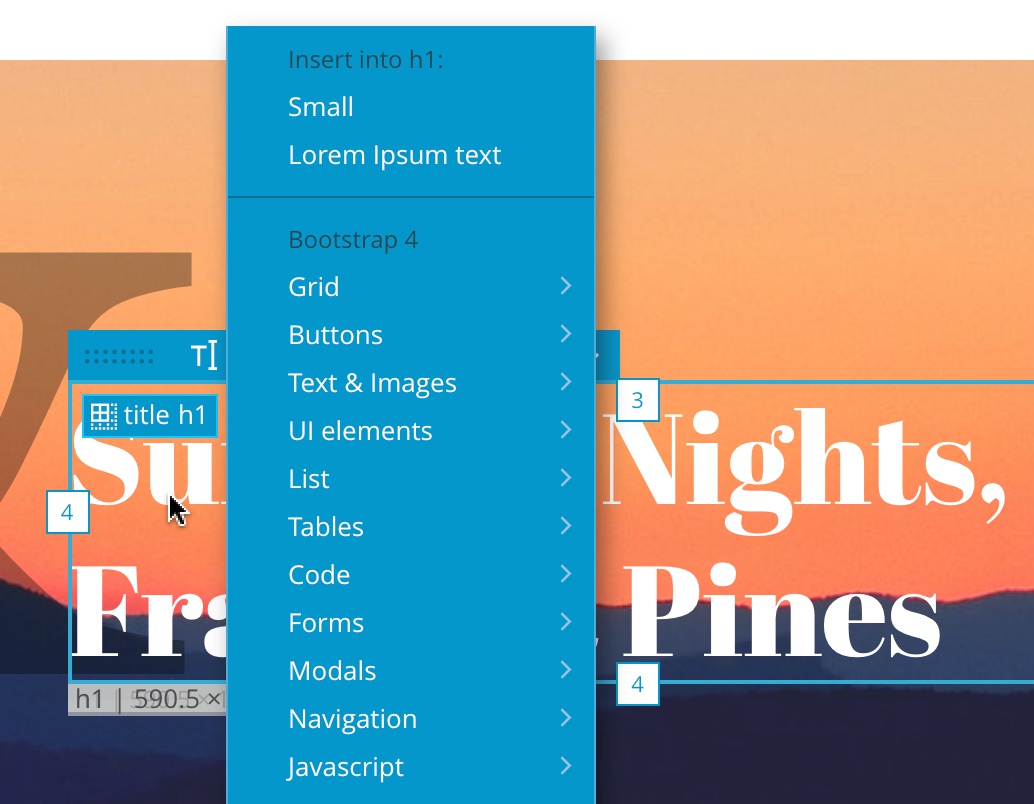
Insert submenu contains all the elements and components from the Library panel:
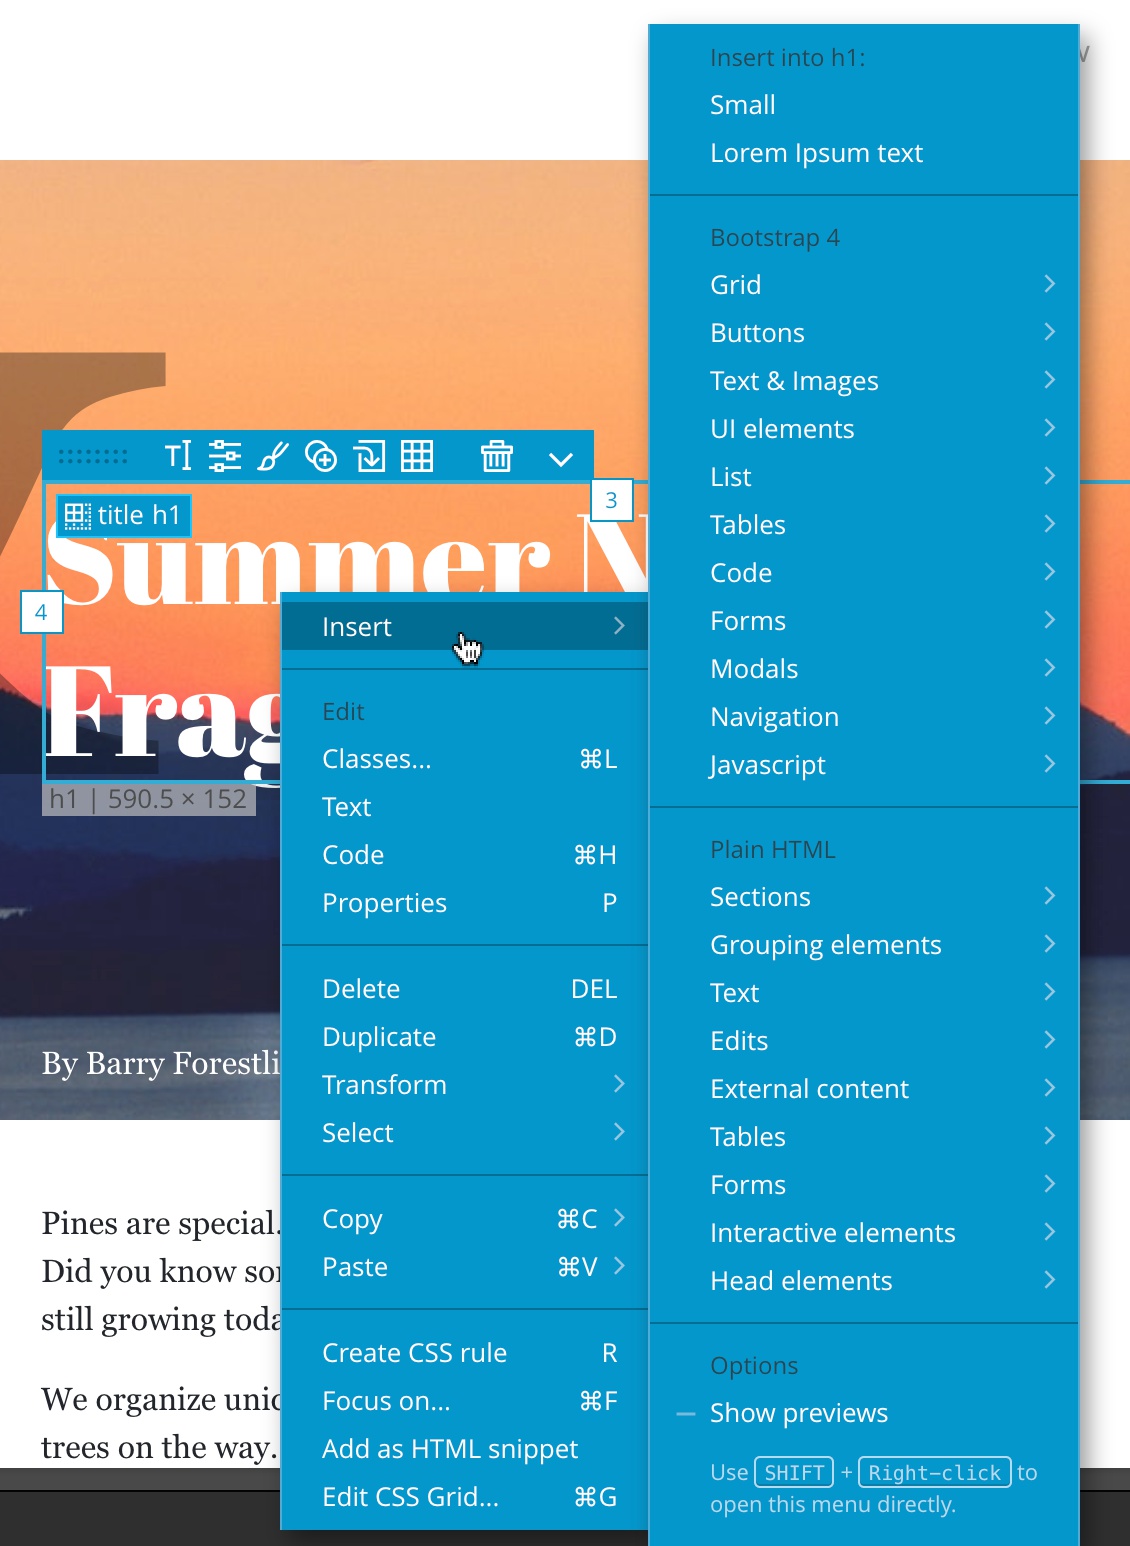
The Insert menu also gives us control and preview of the placement of the new element:
Hint: Hold down the SHIFT key when right-clicking to jump straight into the Insert menu.
Commands that change the HTML structure of the element are tucked under the Transform submenu:
![]()
Select submenu lets us quickly select parents and children of the current element:
Paste submenu lists the most recent items on the internal clipboard and provides control over placement of the HTML elements:

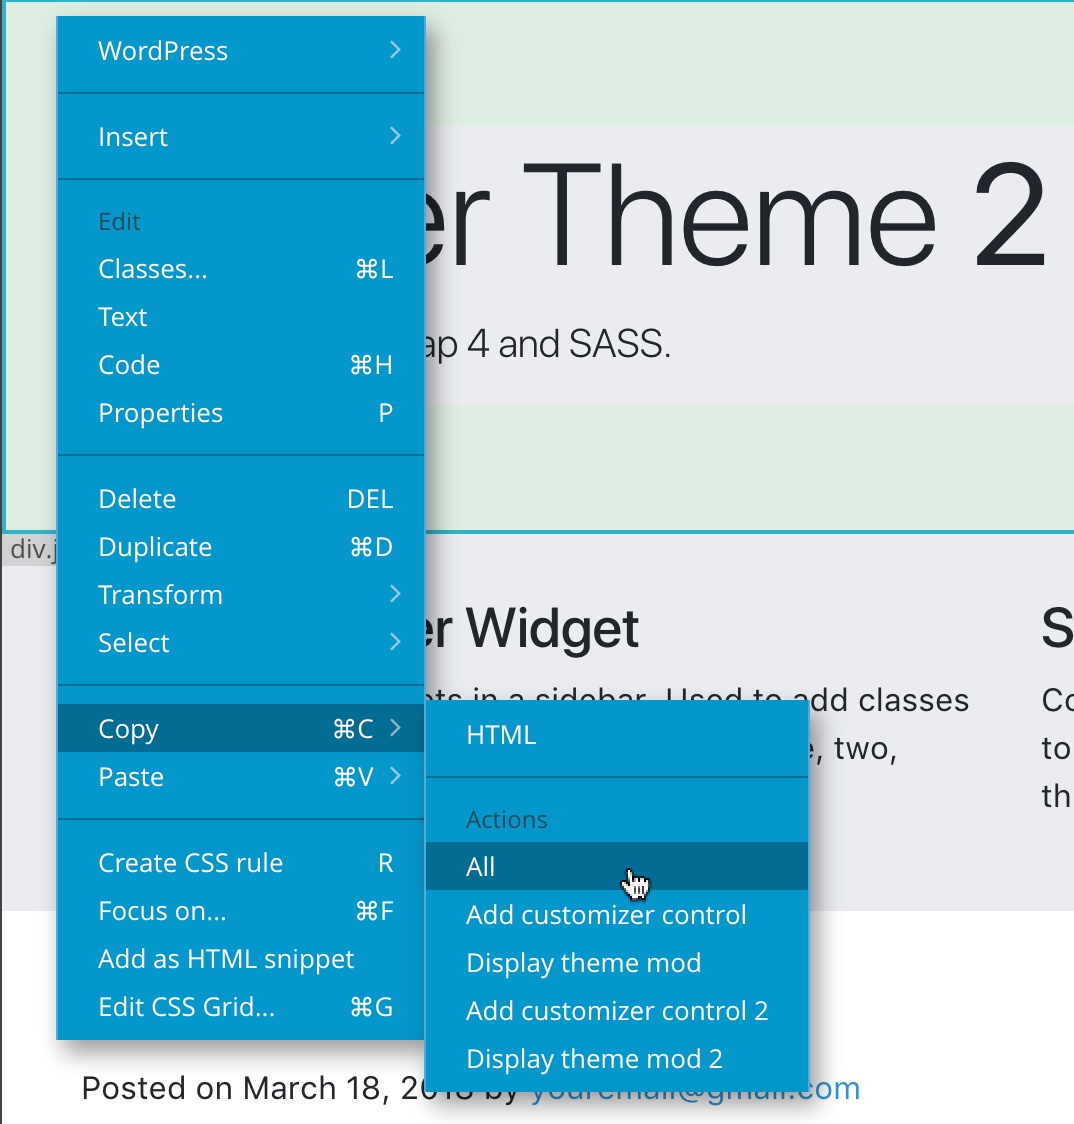
Copy & Paste actions
Copy and paste actions from one element to another. Use the Copy submenu to copy all or one of the assigned actions:
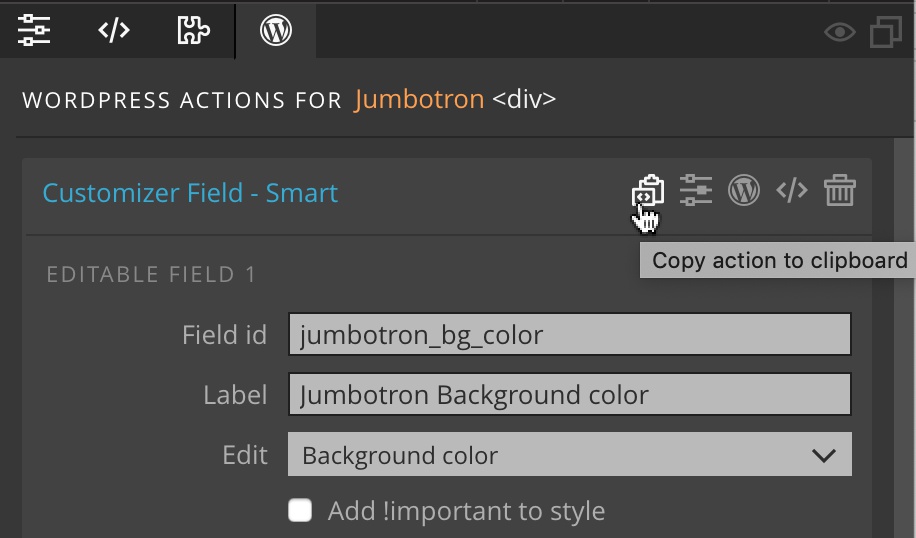
Or, click on the Copy icon next to the assigned action in the Action and WordPress panel:
To copy all assigned actions on the element click on the Copy icon next to the element name:

Use Paste to add copied actions to another element.
SASS stylesheets compiler
Pinegrow now correctly handles projects with complex SASS structures that contain multiple imported files with the same name, for example variables/_buttons, mixins/_buttons…
WordPress Theme Builder
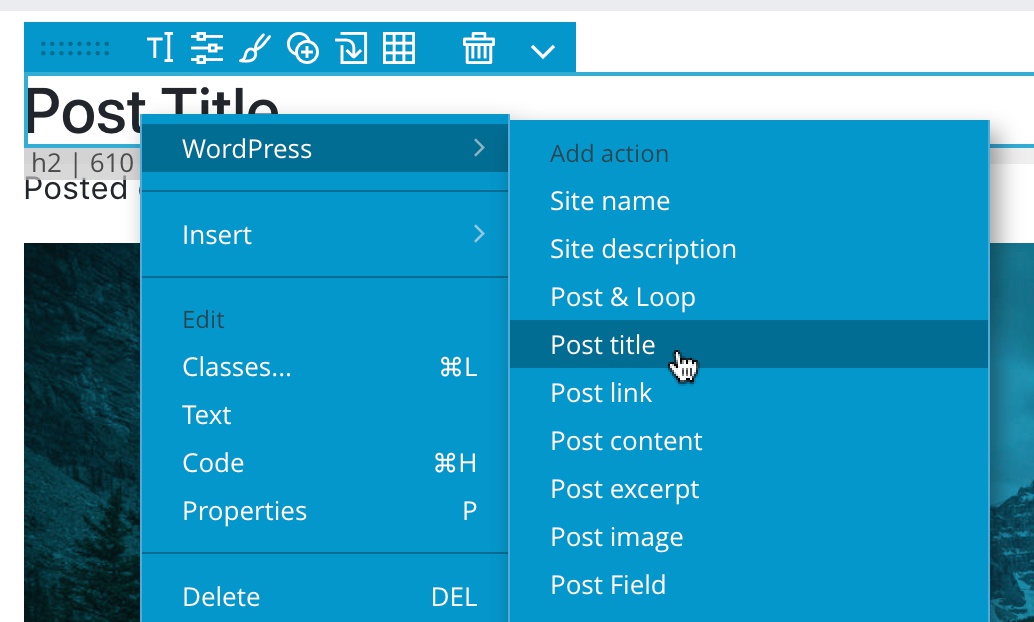
Add actions using the context menu
WordPress actions can now be added to the element using its context menu. Right-click on an element on the page or in the tree and choose an action from the WordPress submenu:
And, as mentioned above, WordPress actions can also be copy pasted between elements.
Enhanced display of WordPress actions in the Tree panel
In the Tree panel view, actions are now displayed before the text snippet in order to make them more visible.
Actions like Customizer Field, Customizer Section and Post Field show their most important arguments right in the Tree display:
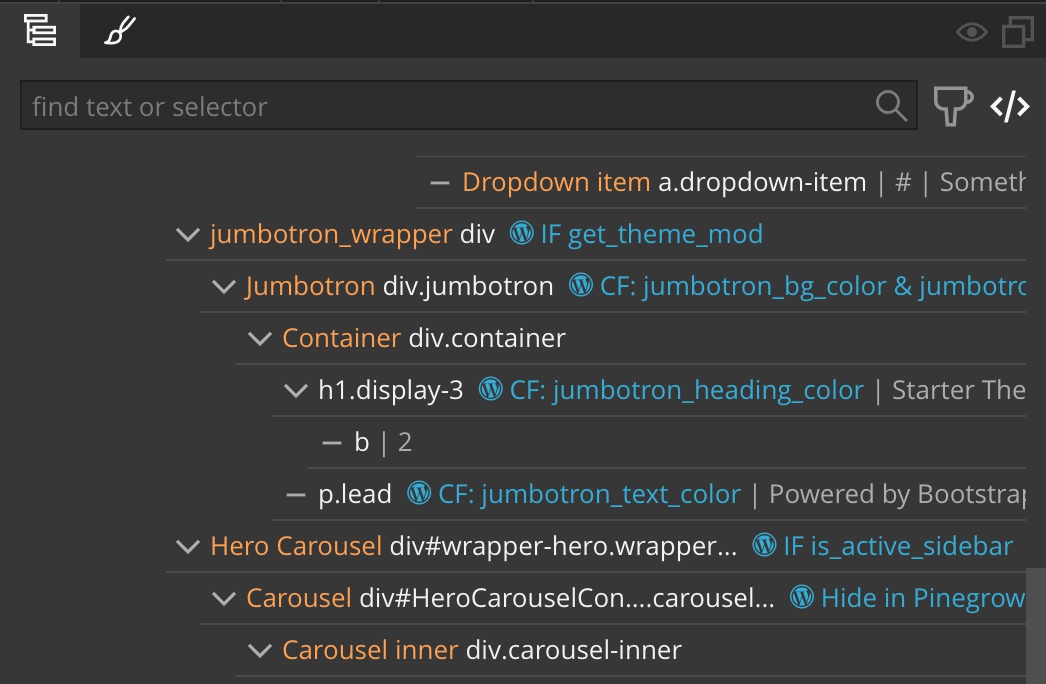
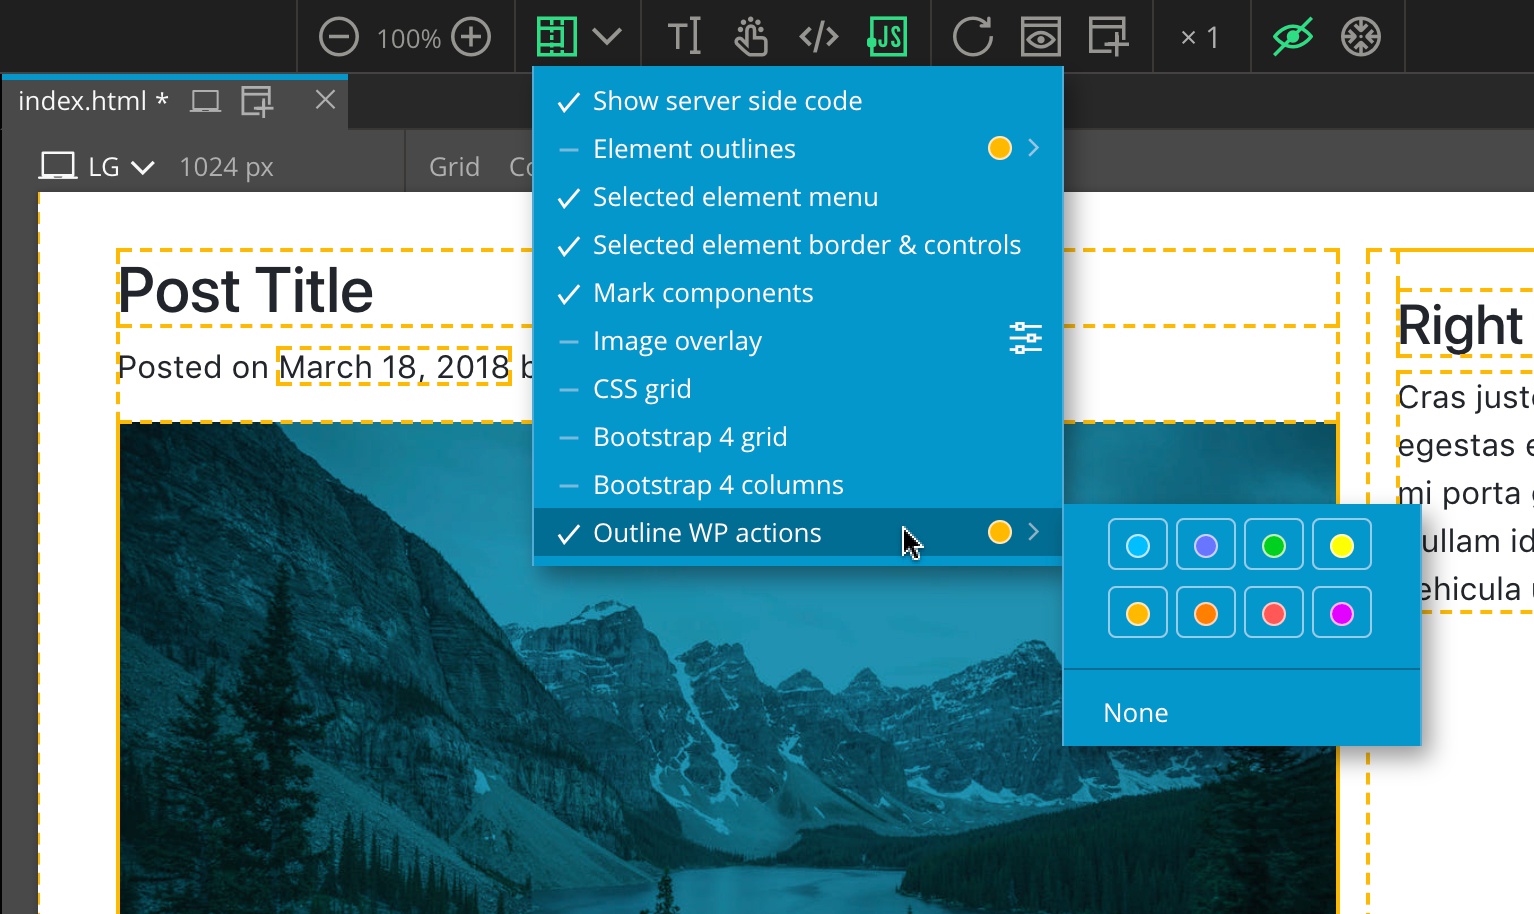
Outline all elements with WordPress actions
Use the new visual helper to outline all elements with WordPress actions:
Post & Loop
Using the original id on the post element
The “Post & Loop” Smart action automatically sets the id attribute of the post element to the id value provided by WordPress. This can interfere with styling or Javascript code that targets that element by its id.
The action now offers the choice to opt-out of modifying the id attribute, in case the id attribute of the post element is set:
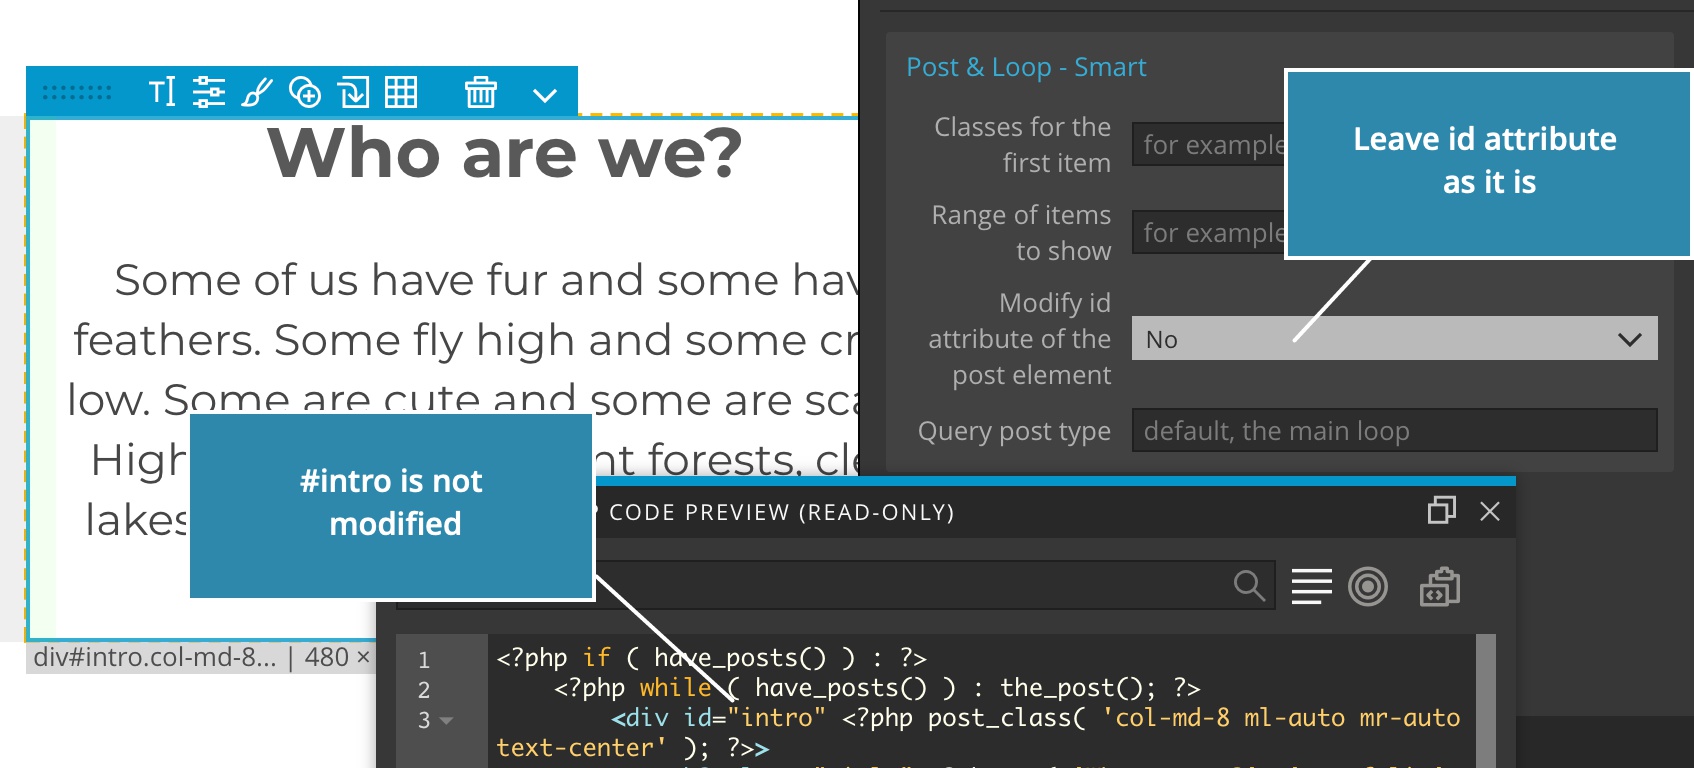
Note that having a fixed element id on the post element only makes sense if only one post item is shown. Otherwise there would be multiple elements with the same id.
Displaying a range of elements
Sometimes we just want to display a subset of posts contained in the WordPress loop (or custom query). For example, we might want to display the first post in one way and the rest of posts in another way. Or, we might have predefined positions for individual posts and we can’t just display all of them with the same loop.
The new “Range of items to show” lets us specify which of the items returned by the loop query we want to display:
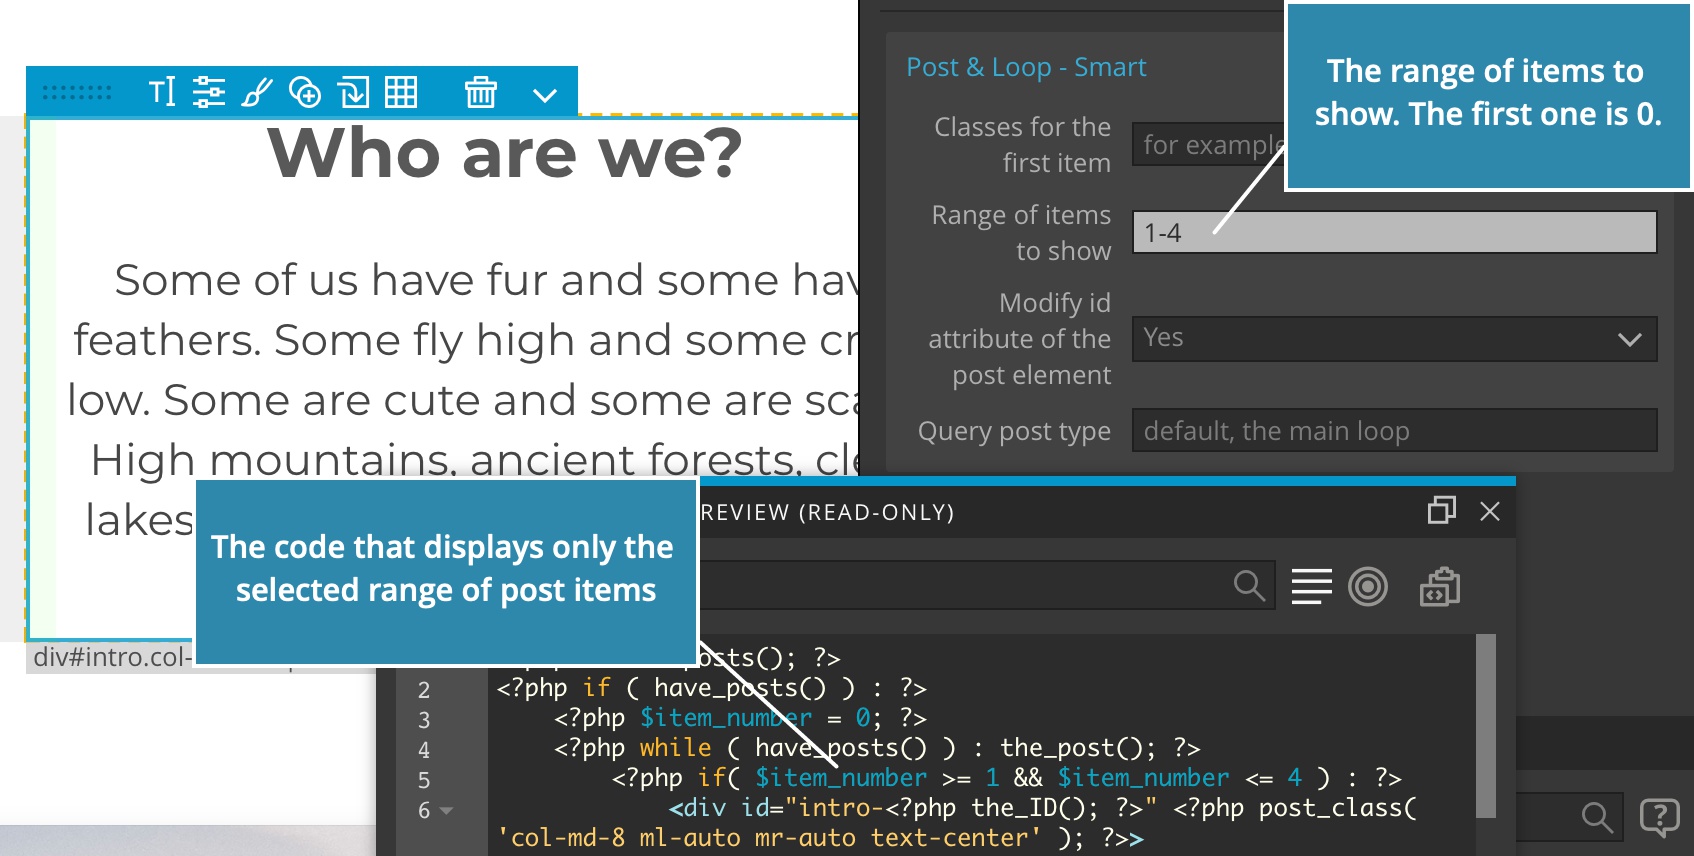
We can either specify a single post, for example 0 for the first one, or a range, for example 1-3 to display second, third and fourth posts.
Note: the post count starts at 0.
Note: this parameter doesn’t affect what posts are retrieved from the WordPress database – it is used to specify which of the posts returned by the WordPress query should be displayed.
The same argument is also available directly on “The Loop” action.
Menu – Smart
The behavior of the action is changed. It now uses Smart menu walker by default on pages that don’t use Bootstrap (Bootstrap menus are used there). The Smart menu walker replicates the exact HTML layout of menu items, instead of using the default WordPress markup.
The action is also now smarter in figuring out which class is used to denote the active menu item.
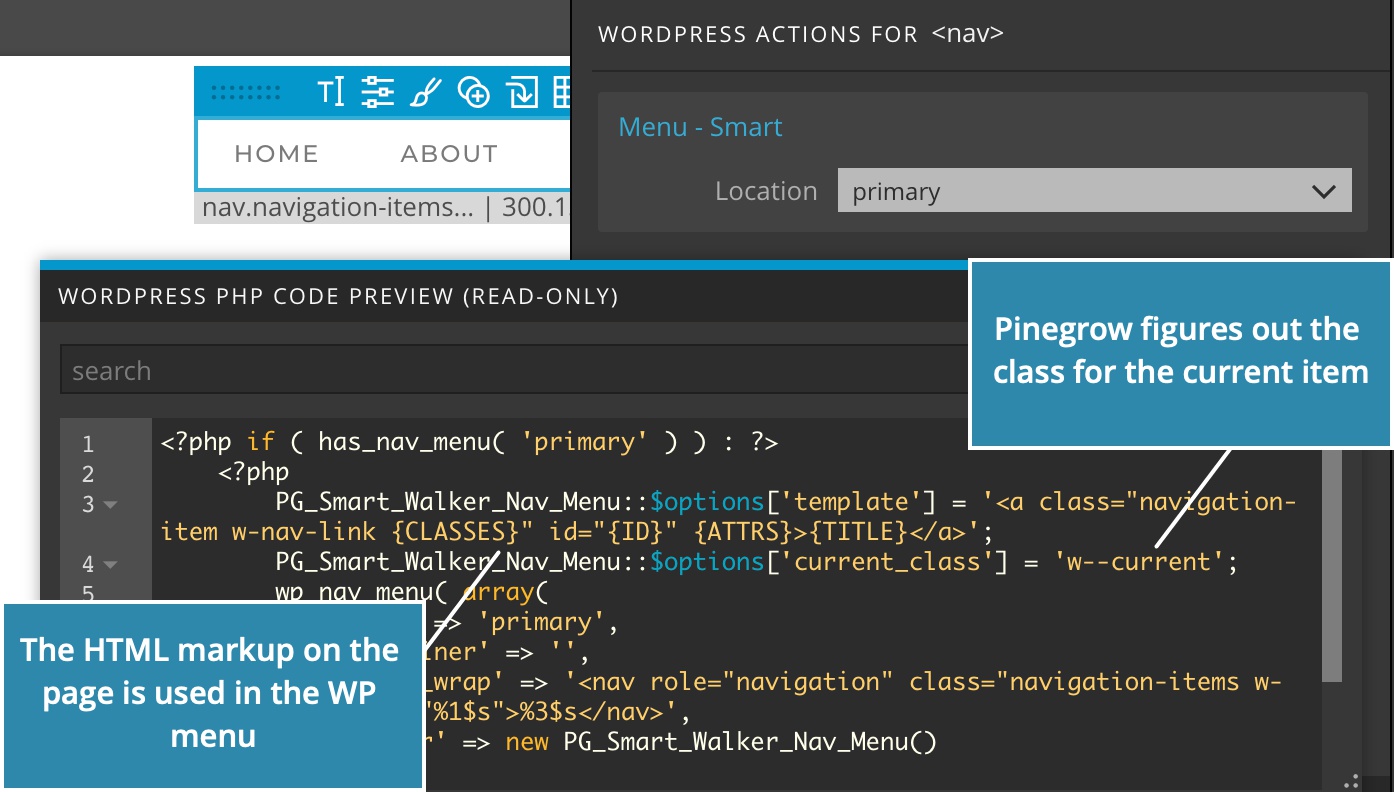
As always with smart actions, if you need more control over these actions change them to regular WordPress actions.
Reusable Customizer Sections and Fields
Customizer Sections (both Smart and regular actions) got the checkbox “Use section id as prefix for enclosed fields”. When checked, the id of the section is used as a prefix for all enclosed customizer fields.

This is very useful in many cases. Let’s take a look at an example.
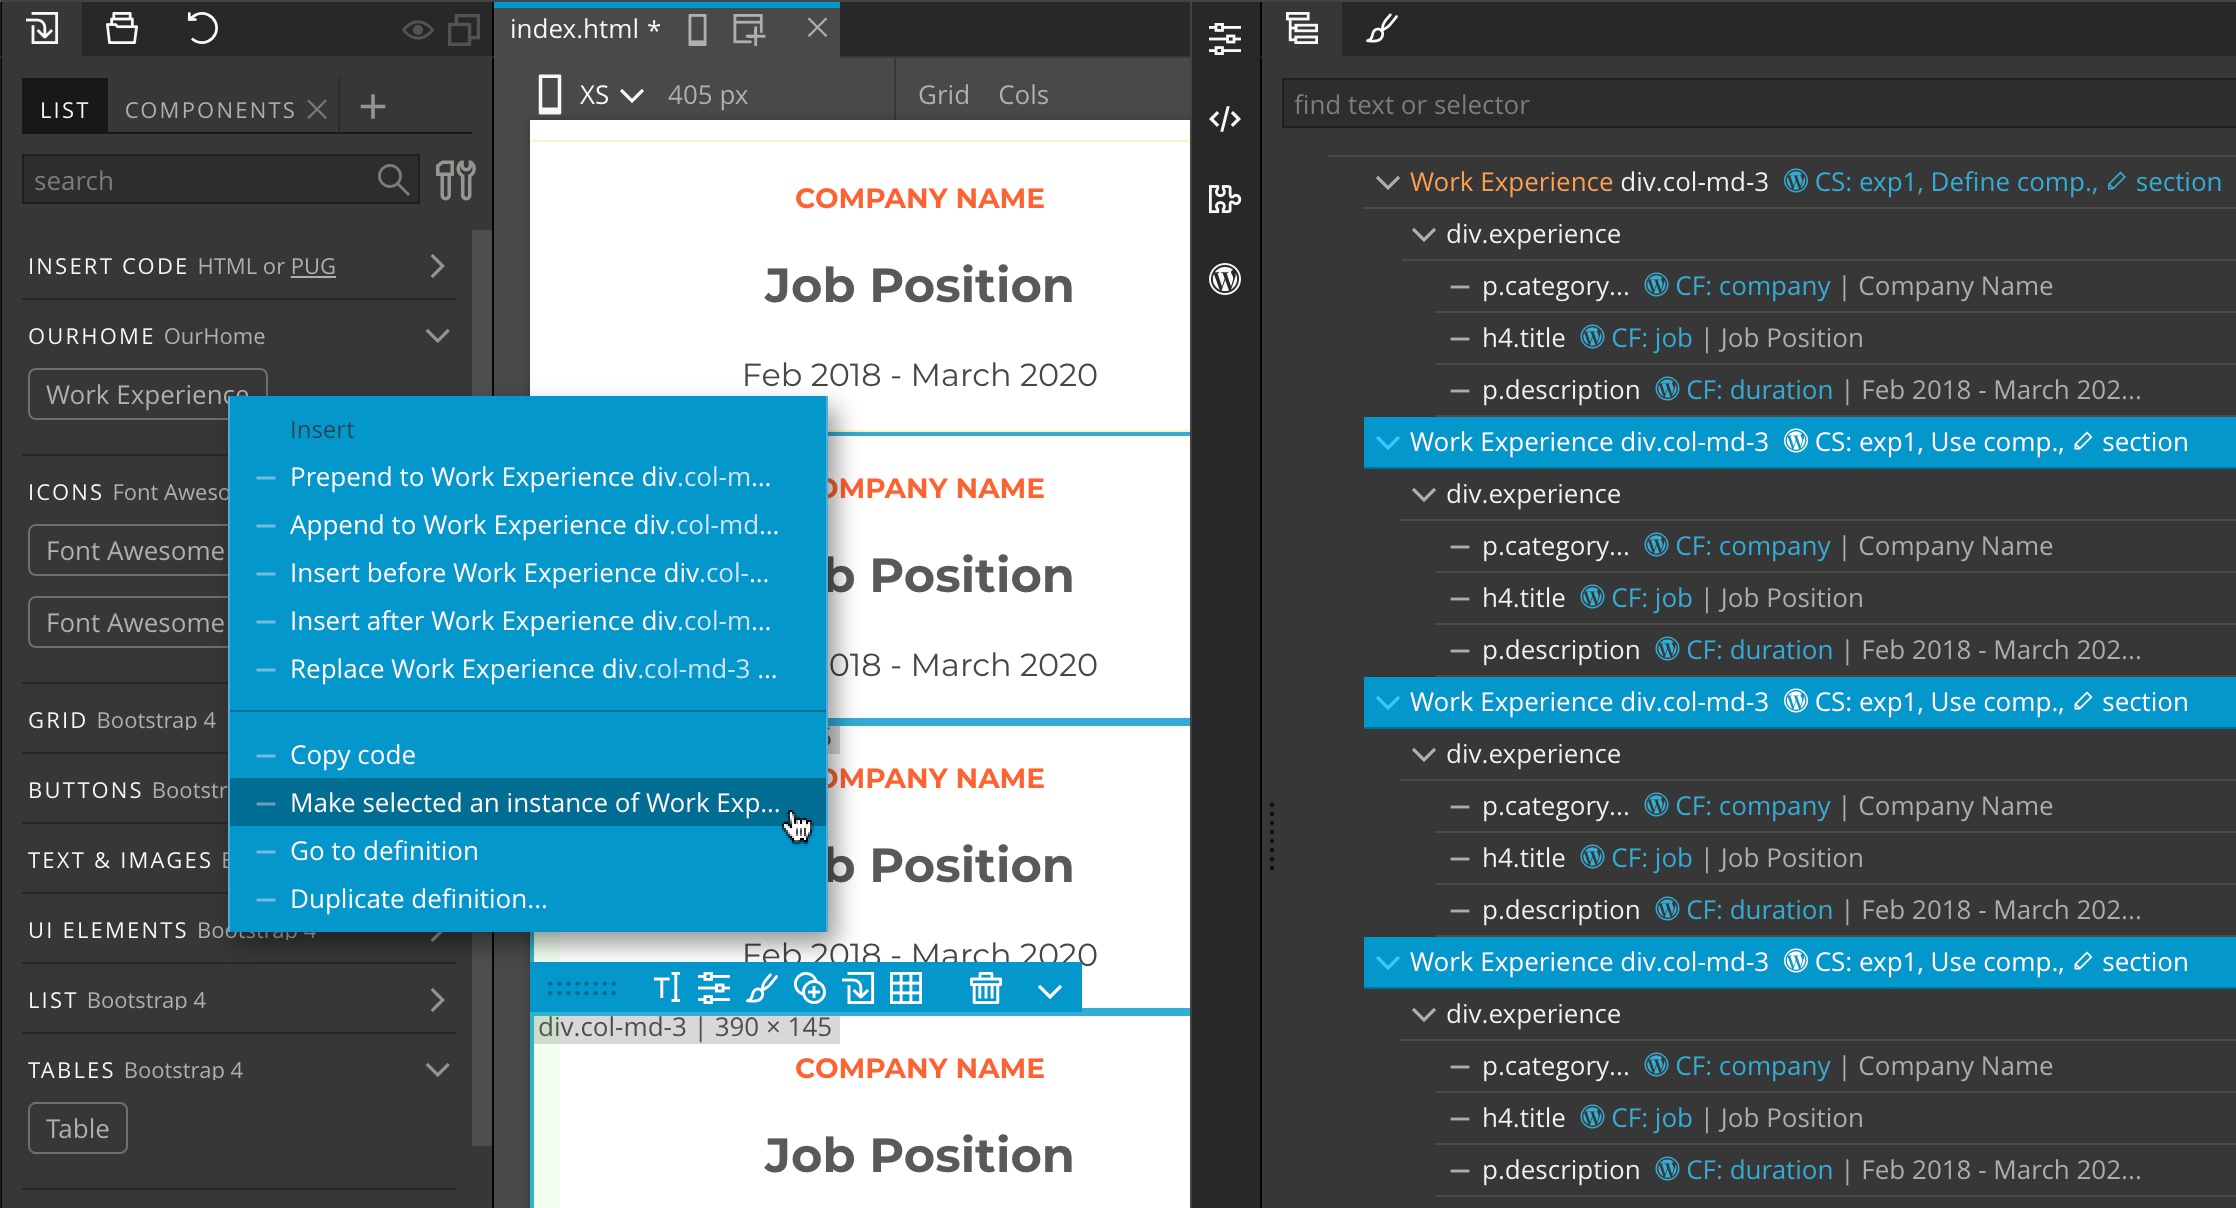
Imagine that we have four sections for showcasing our past experience on our portfolio website. Each section contains fields for a company name, our job position and duration of the engagement. We want to use the Customizer to control the content of these values.
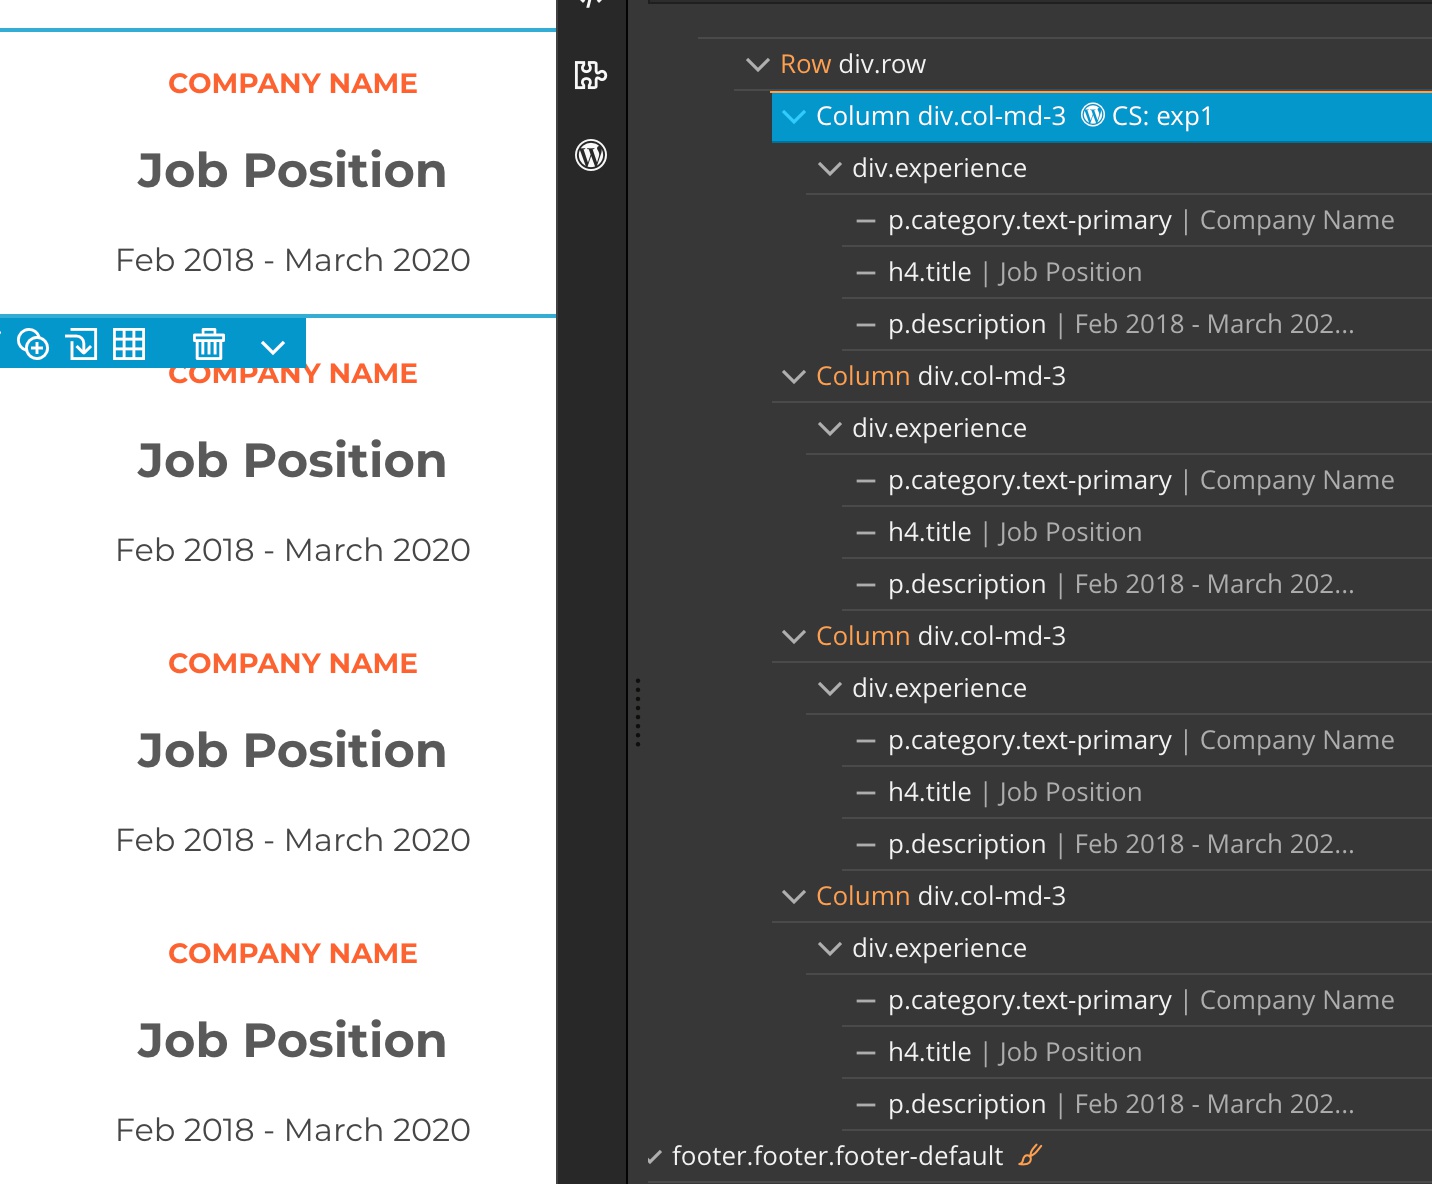
Normally, we would have to setup four unique fields for company names, four for position and four for the duration – each with unique field id. That makes it impossible to simply copy paste actions from one item to another, or to define these blocks as reusable components.
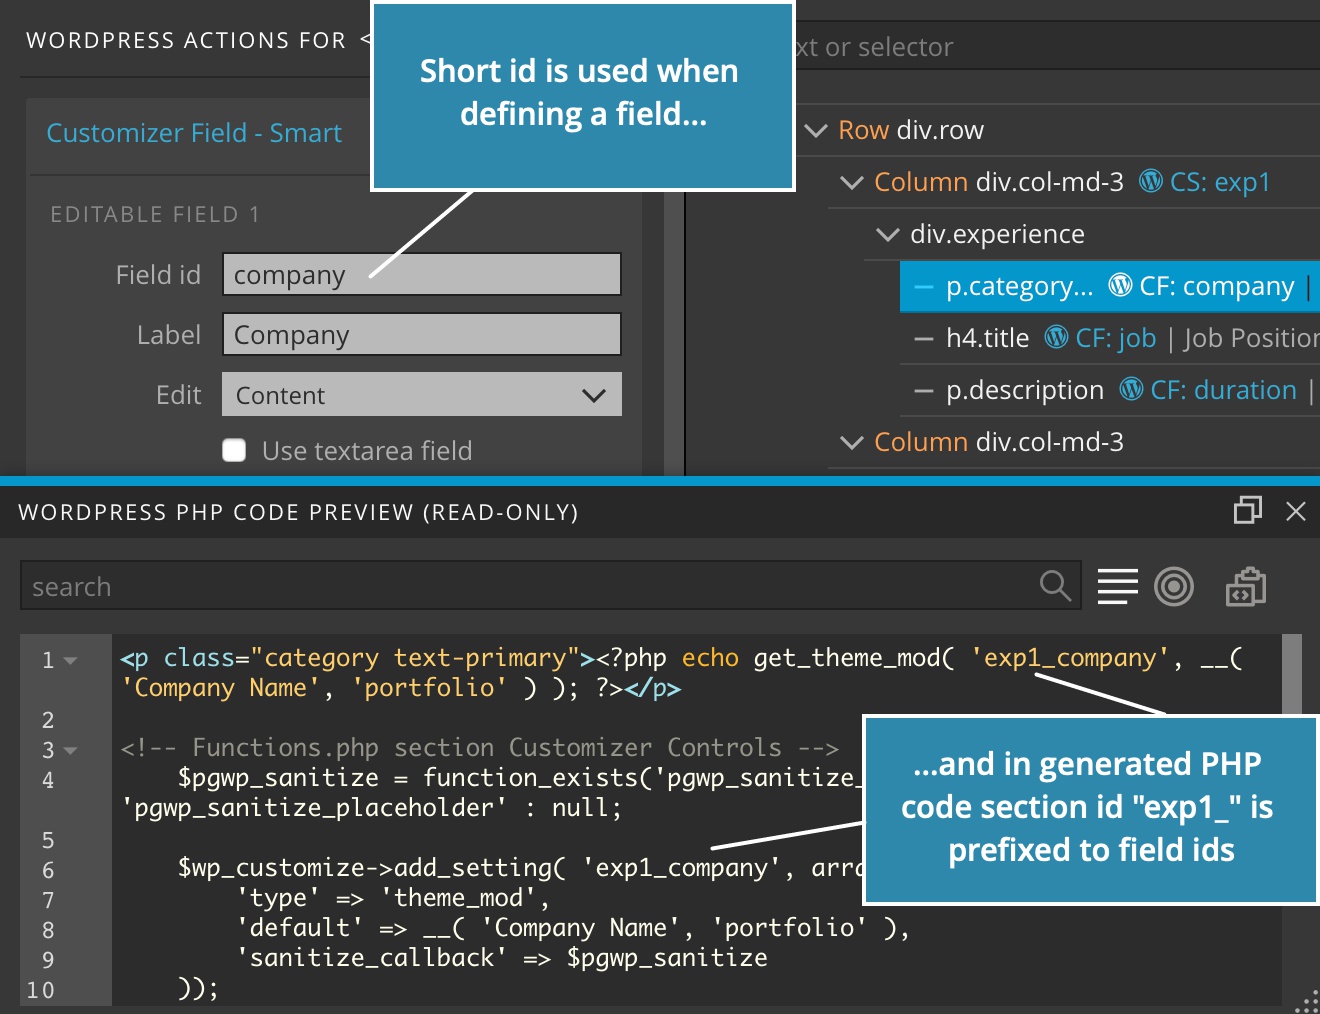
Now we can check “Use section id as prefix…” on the first section with id exp1 and assign simple ids – company, job, duration – to enclosed fields. When Pinegrow exports the theme it will append the session id “exp1_” to fields ids, thus creating unique fields ids “exp1_company”, “exp1_job” and “exp1_duration”.
If we copy paste these actions on related elements in other experience sections we’ll get fields experience2\_company and so on, provided that “Use section id as prefix…” is checked on their Customizer section actions.
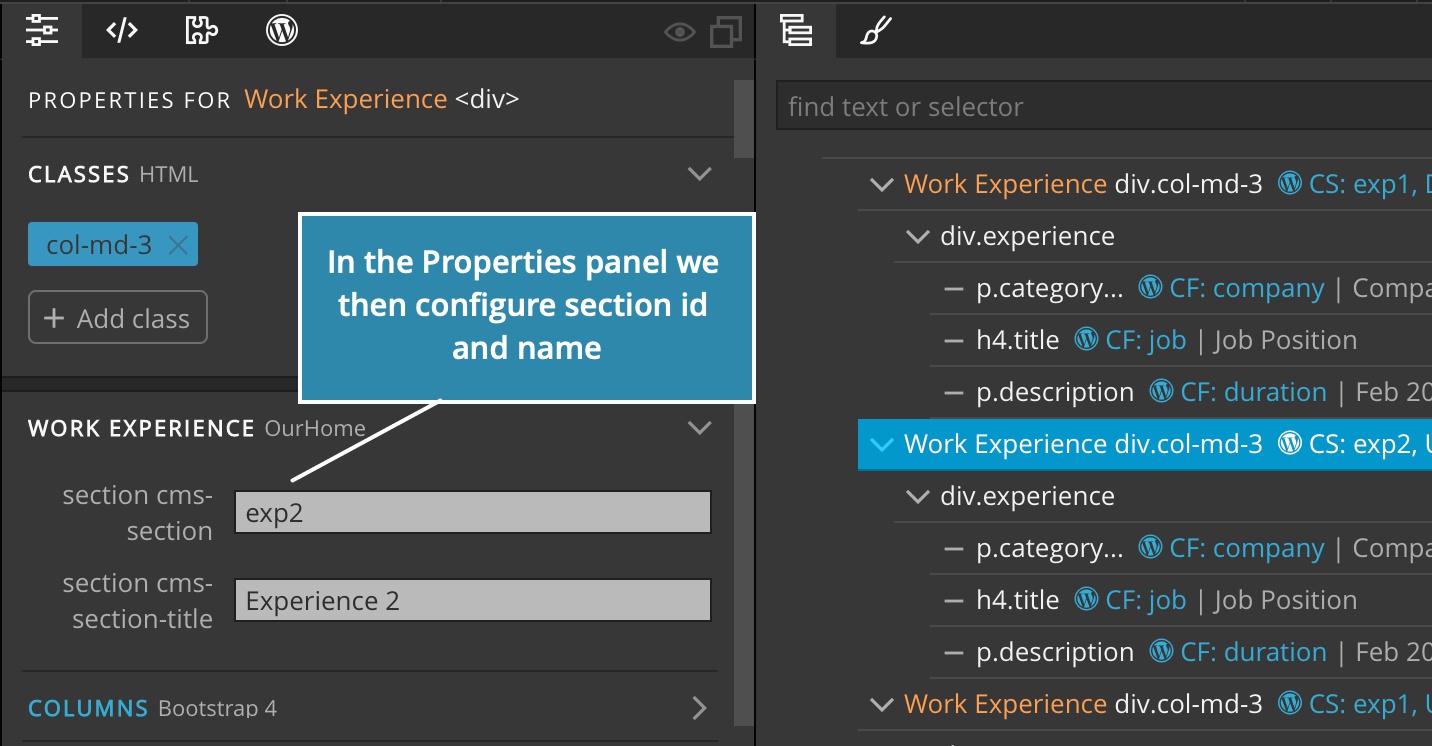
We can go a step further and create a reusable component in the Actions panel with editable attributes that control section id and name.
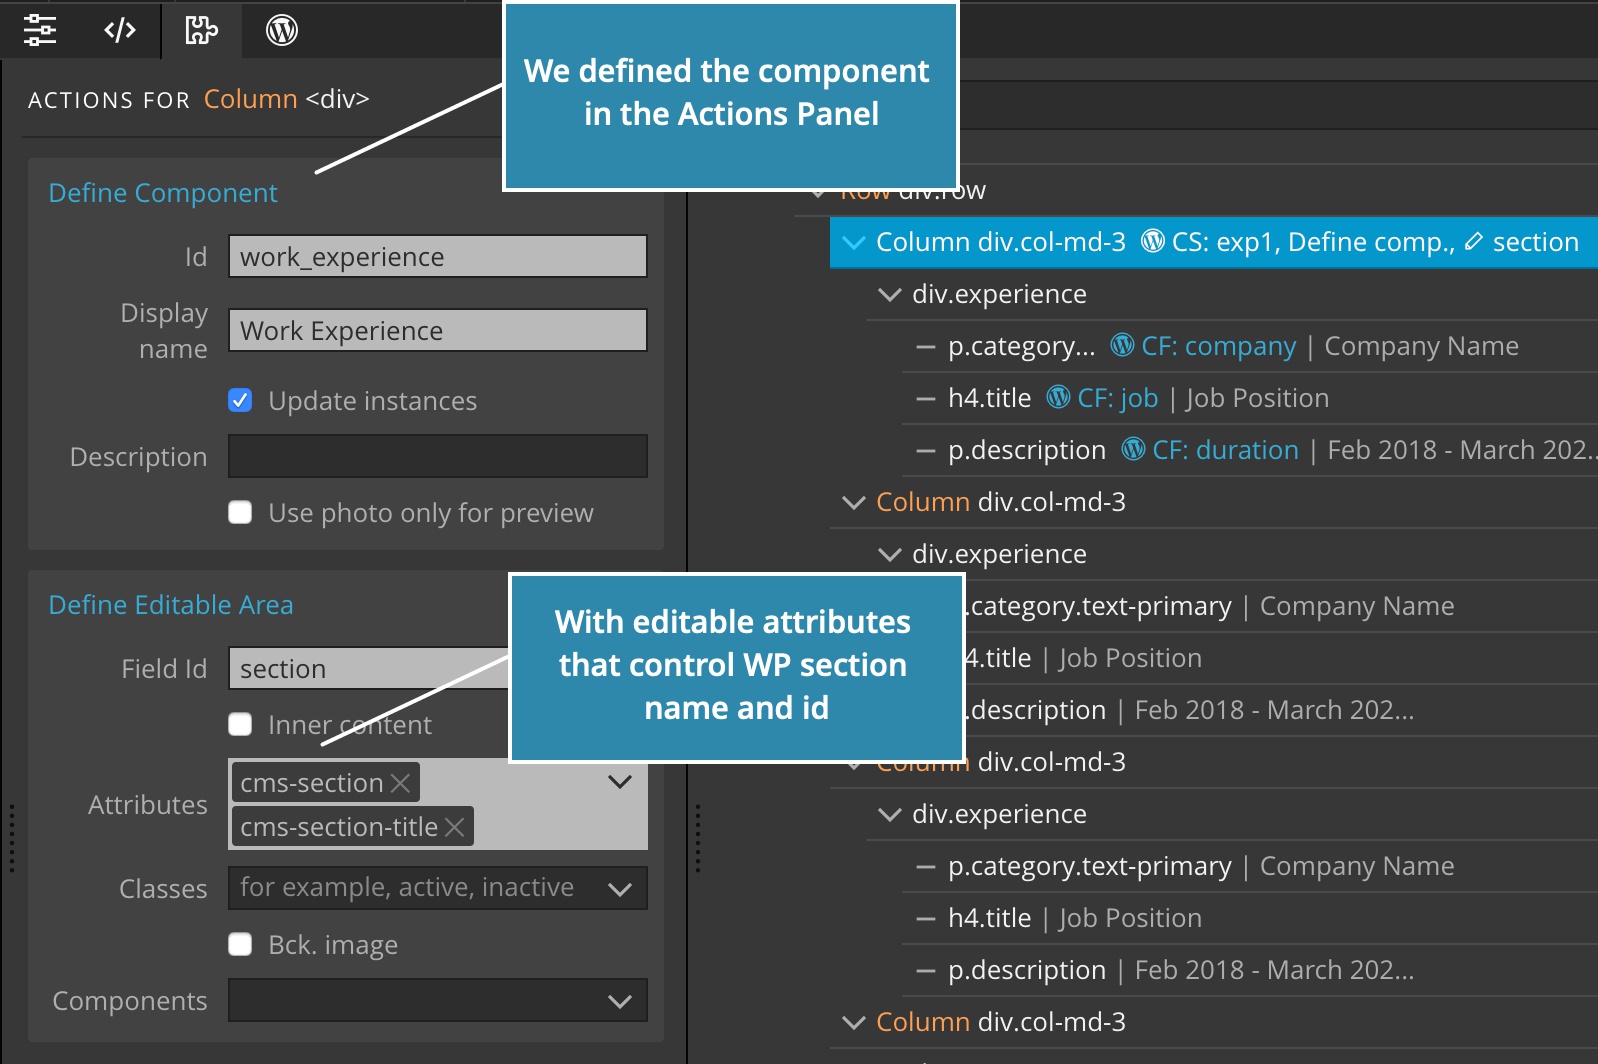
Then we make the other three items instances of this component:
Then we use the Properties panel to configure section id and name of Work Experience instances:
Using global customizer fields inside a section
When “Use section id as prefix…” is on the section id will be prepended to all field ids – regardless is fields are registered or just used.
If we want to simply use a value of customizer field from another section – for example, a color value defined in Colors section – we can use Display theme mod action and check its “Don’t use enclosing section id as field prefix” setting.