Build WordPress themes, plugins and blocks while using real data and previews from your WordPress site.
Watch Adam Lowe explain the new feature, then read the rest of this guide:
The live preview brings two major benefits to building WordPress projects in Pinegrow:
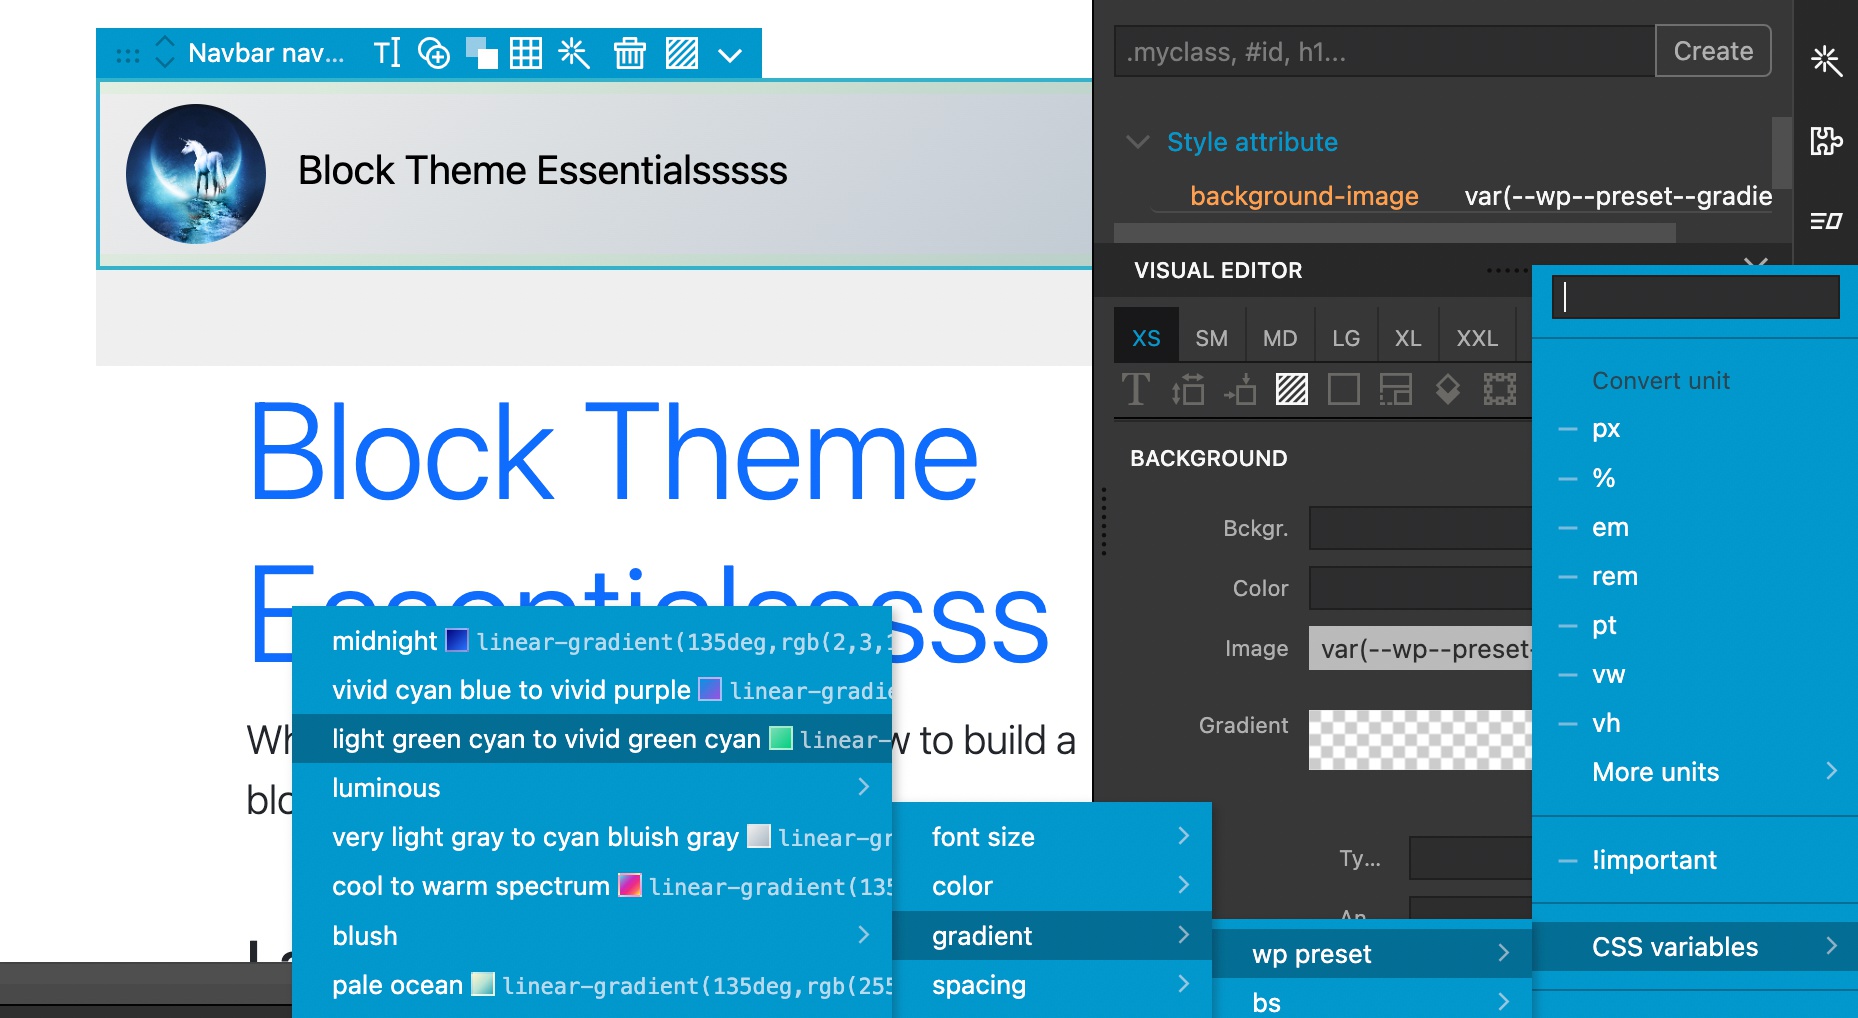
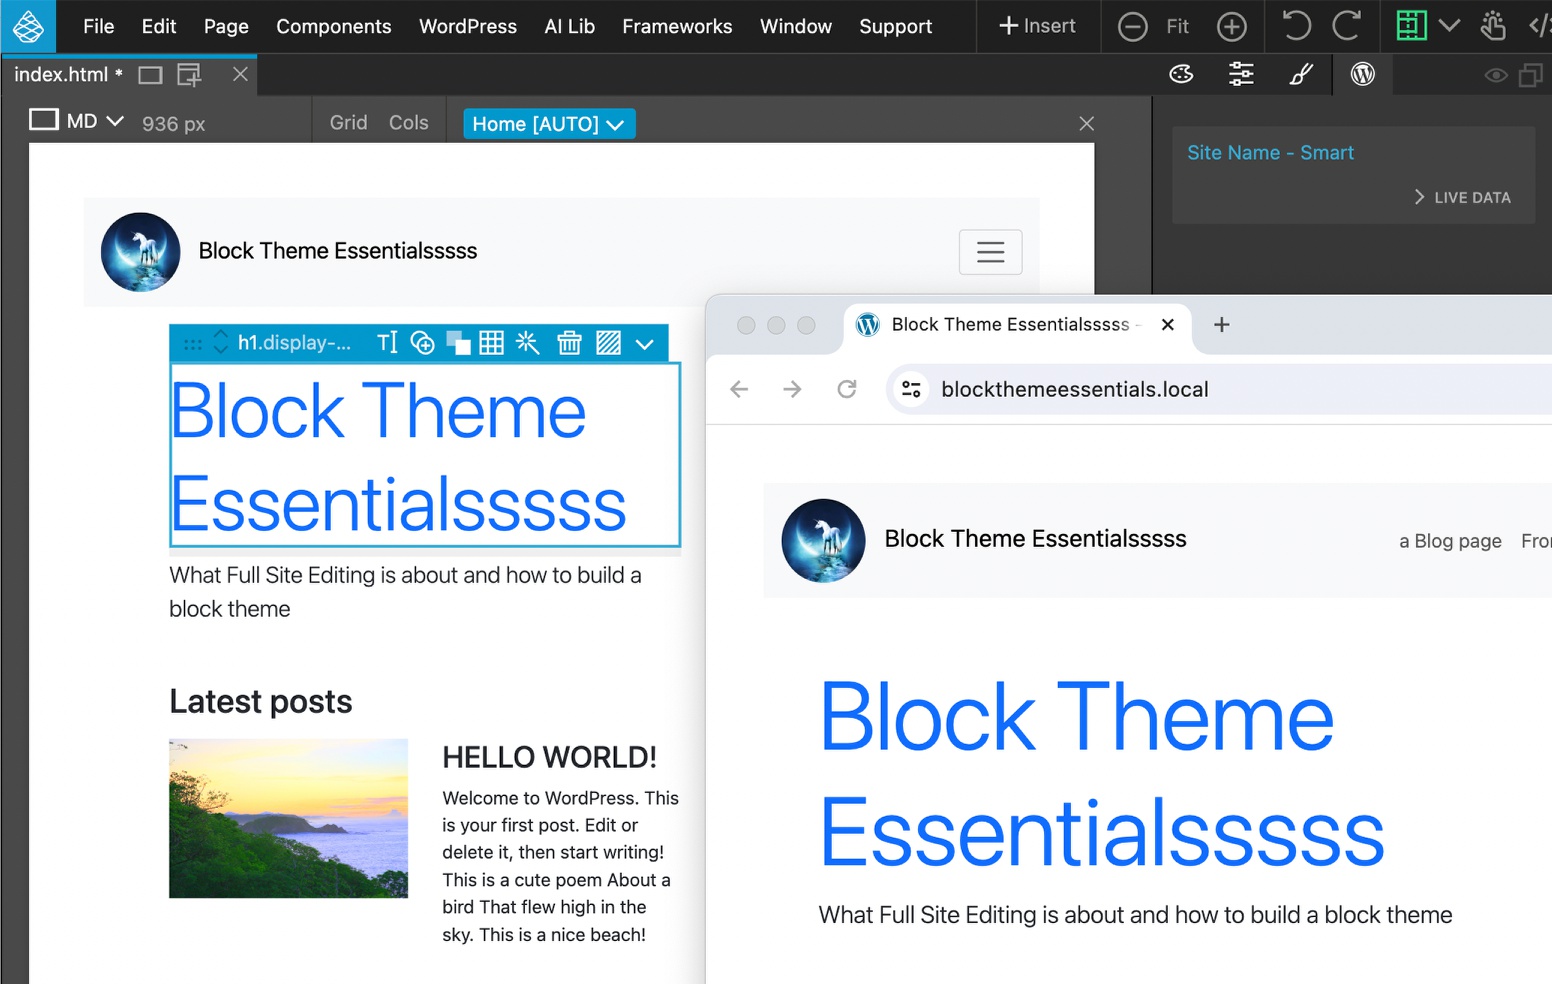
See your project as it will appear on the WordPress site and use site styling, including CSS variables:
Display real content during editing:
Preview with live data works in Pinegrow Web Editor, Theme Converter and in Pinegrow WordPress Plugin.
Setup
Pinegrow uses WordPress REST API to get content and other data from the site.
Pinegrow WordPress Plugin works out of the box, but it can only connect to the site where the plugin is hosted. No setup is required.
For Pinegrow Web Editor and Theme Converter you need to first set up the API access:
Create App password
Open the WordPress dashboard and navigate to the Admin user settings (or any other user with sufficient privileges – Pinegrow only reads data through API) and create a Application password:
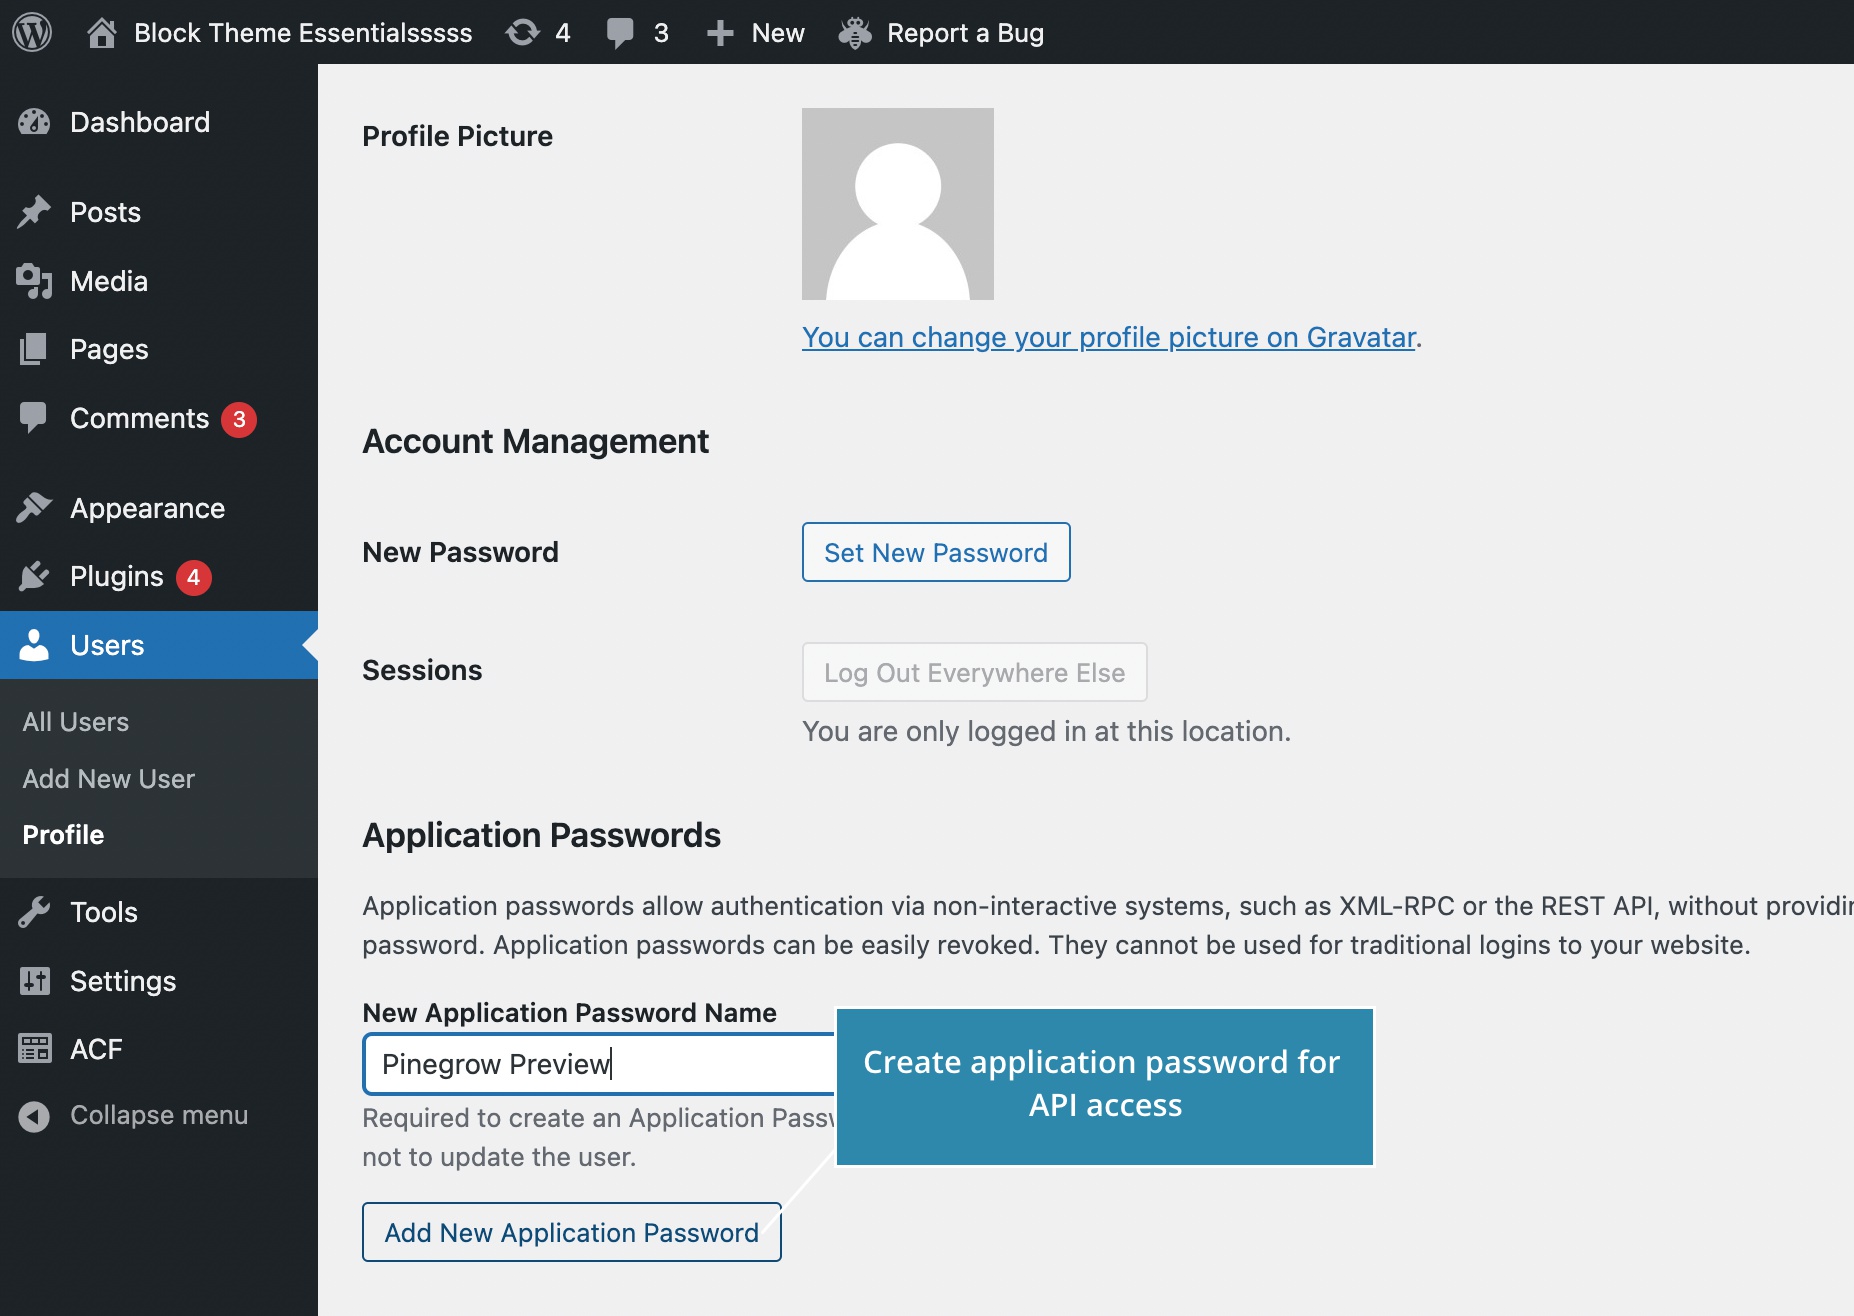
Important: Do not use the regular password of the user. You need to create an Application password for API access.
Enter the information in project settings
In Pinegrow, open Theme / Plugin settings from the WordPress menu and enter the URL address of the WordPress site, the username and the application password:
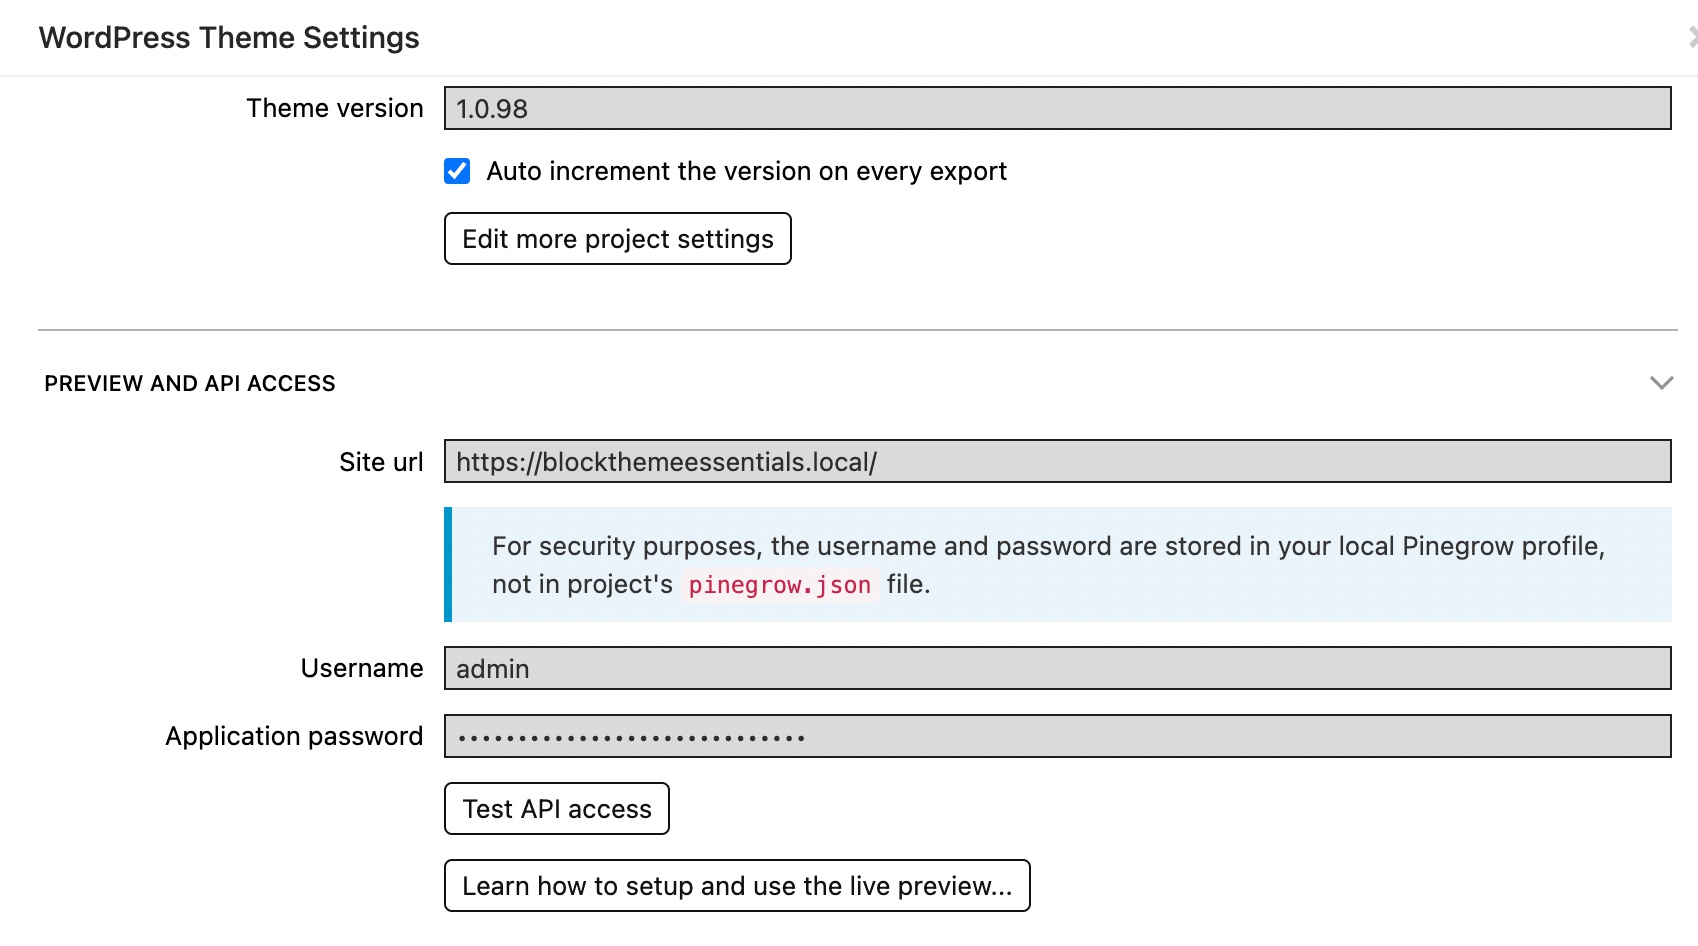
Test API access
Click on the Test API access button to test the API connection.
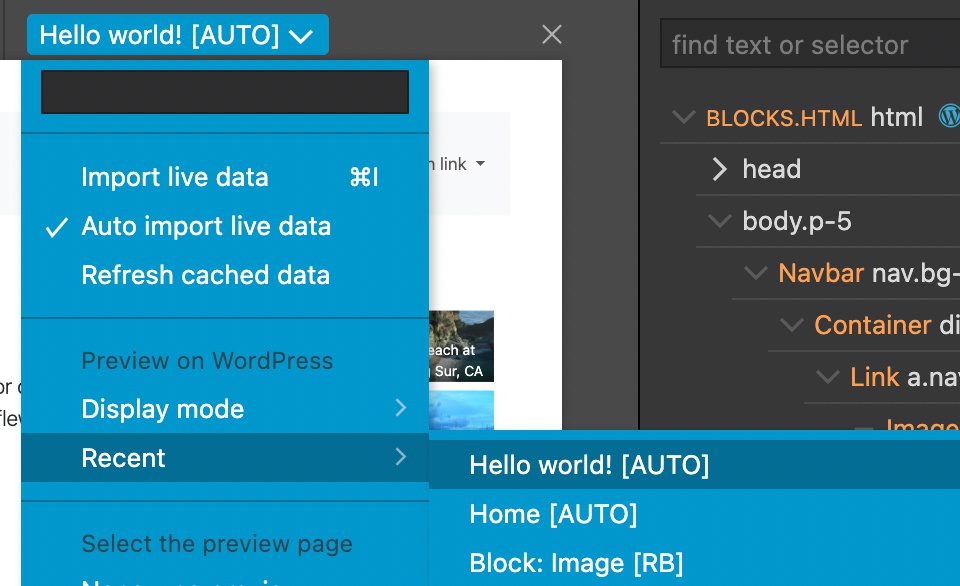
Preview dropdown menu
Every page view has a Preview dropdown menu displayed in its toolbar. The preview menu is the main tool for accessing preview and live data features.

Hint: You can use multiple page views to preview the edited documents on different pages.
The preview dropdown includes two features:
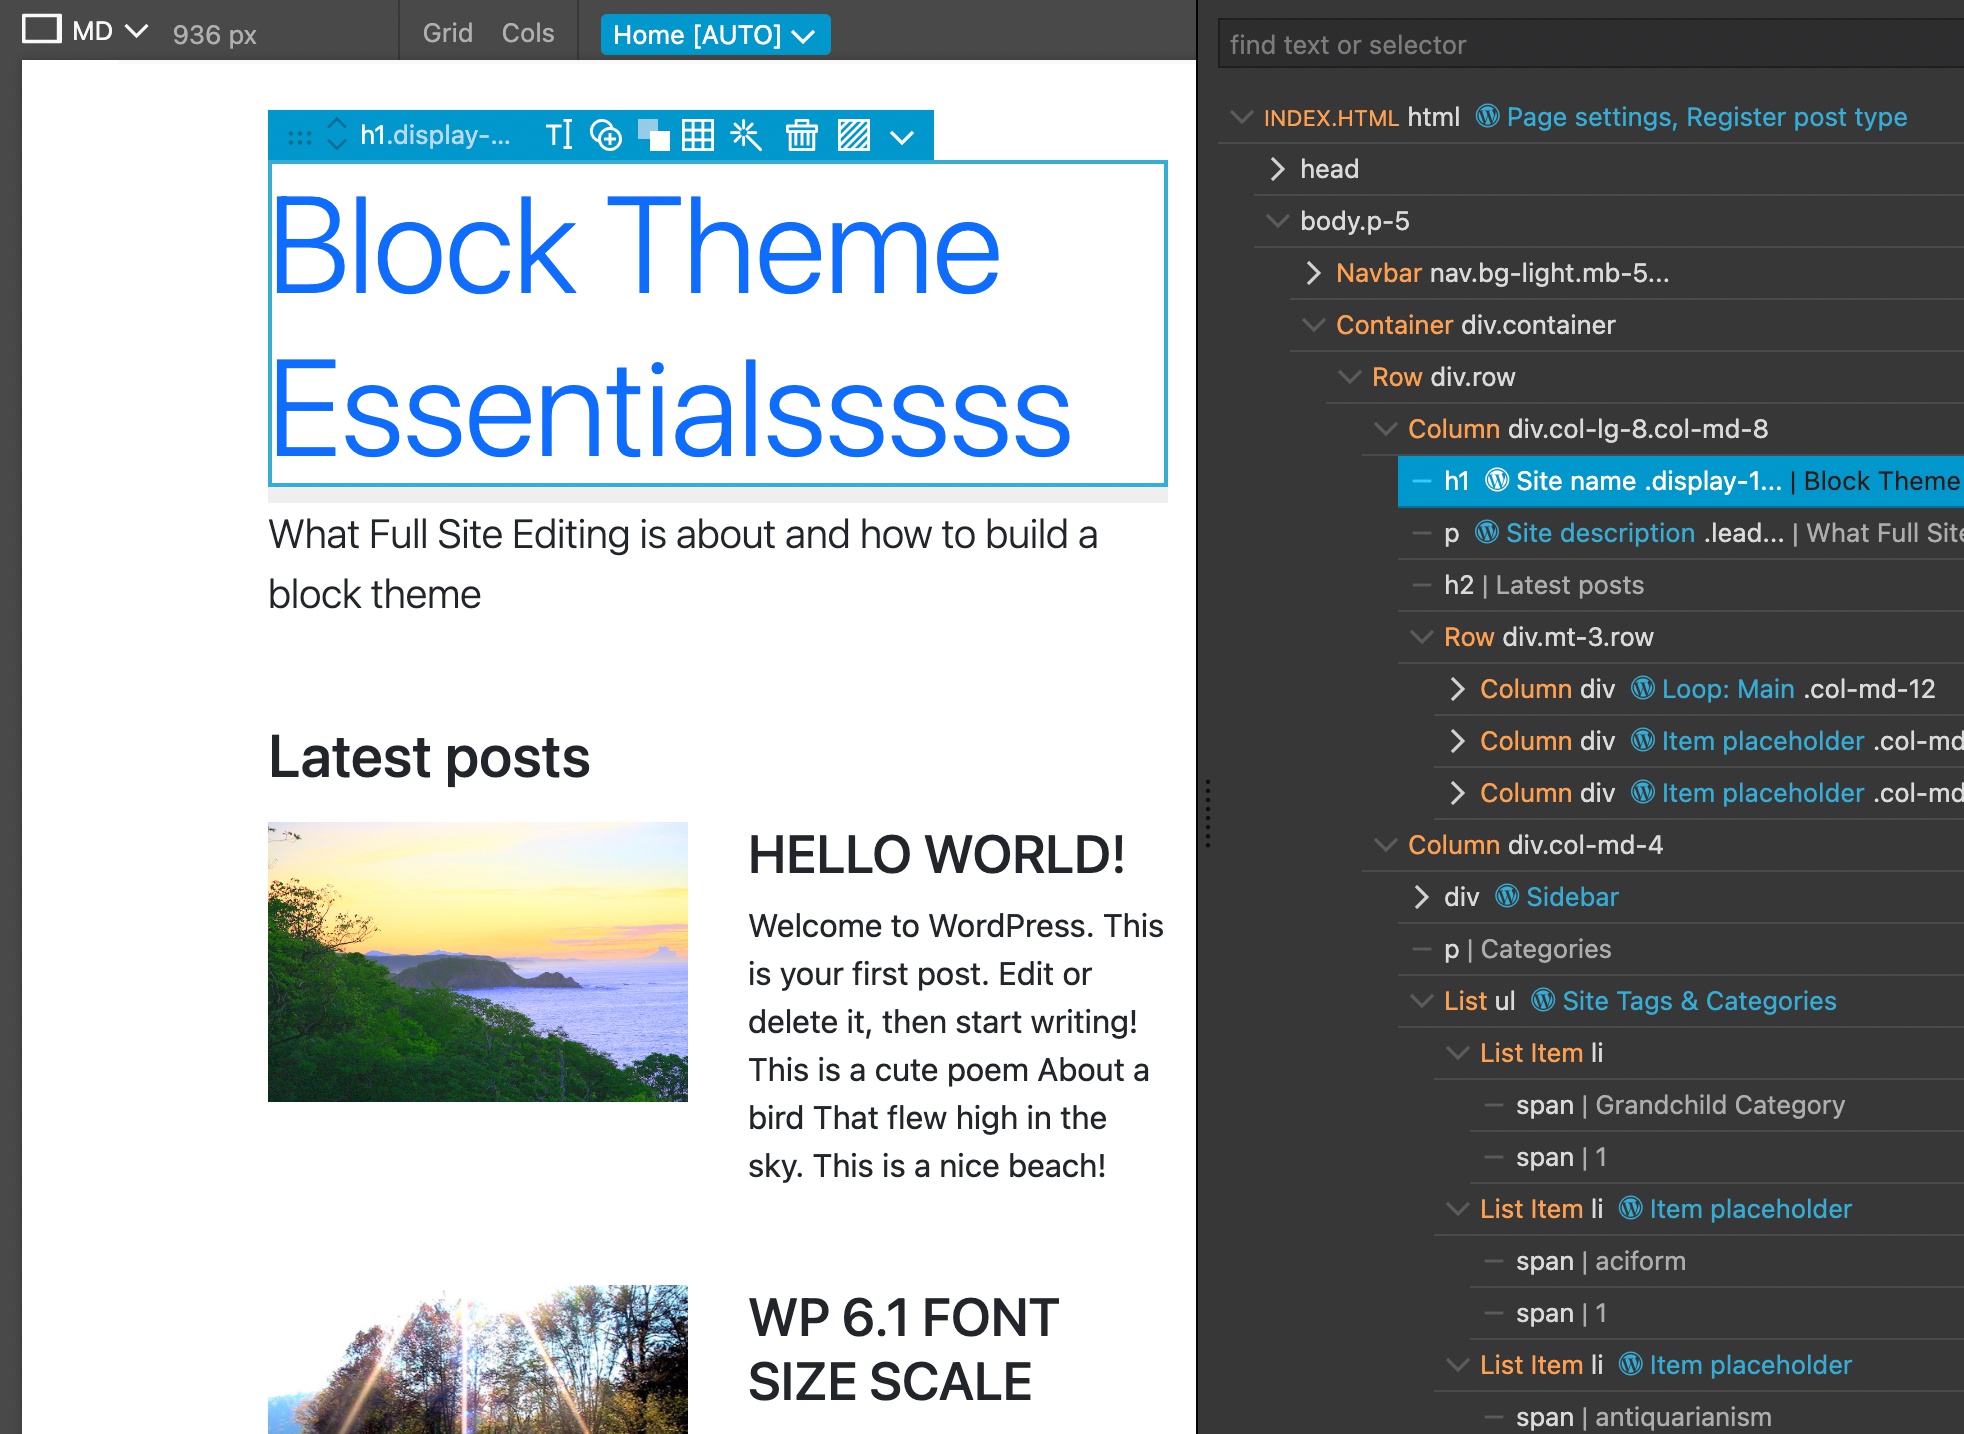
- Importing live data – showing real post titles, content and other data while editing projects in Pinegrow
- Preview on WordPress site – displaying the edited document as it would appear on the WordPress site
Importing live data
Import live data uses WP Rest API to display real data for WordPress actions. For example, Site Name action will display the name of the connected WordPress site.
Not all WordPress actions support displaying live data. At the moment, almost all Post and global smart actions are supported, with the exception of:
- Post Field
- Post Tags & Categories
- Post Author
- Post Pagination
- Post Breadcrumbs
We will cover these functions in the upcoming updates.
Some of the global smart actions can not be supported because their data is not exposed through WordPress API:
- Customizer Field
- Customizer Section
- Reusable Template Part
- Form
You can check if an action supports live data by hovering over its name (live data support is mentioned in action name tooltip), or inspecting its icons.
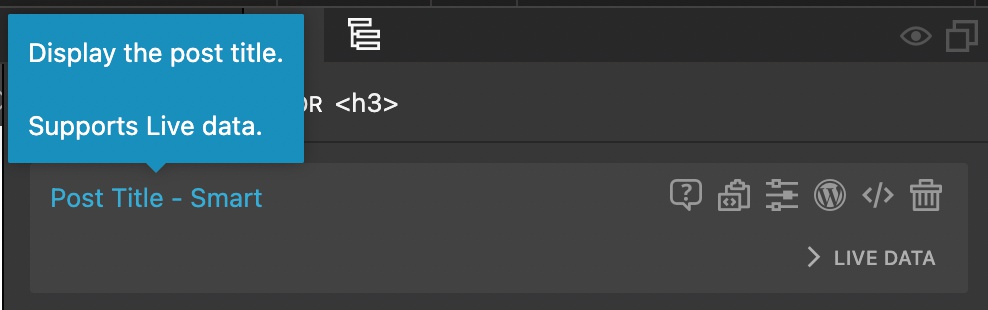
Actions with live data have the “Import from WordPress” icon. Click on this icon to import the data only for this particular action.
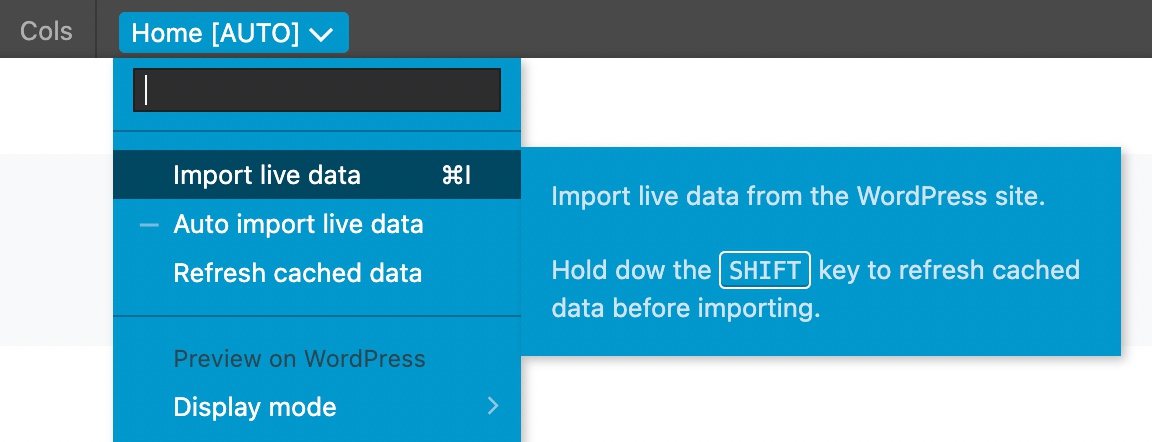
Import live data for the whole page
Use the Import live data or shortcut CMD + I to import the data for the whole page.
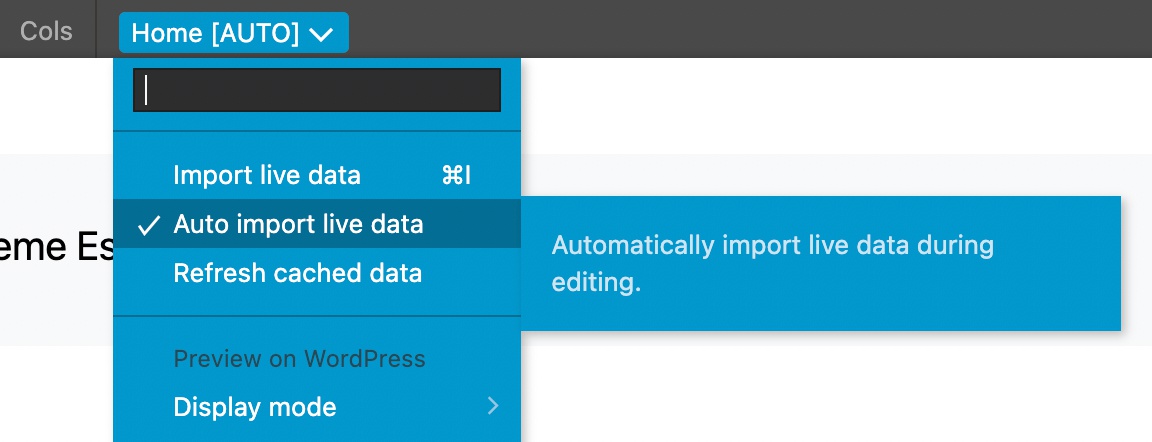
Auto import live data
When this setting is enabled, live data will be updated whenever you edit the page. For example, posts from the site will be updated when you change a Show Posts action parameter.
For most use cases, auto importing works well. But if API access is slow or if updates are distracting, turn auto imports off.
Refresh cached data
To minimize delays Pinegrow caches the data it receives through the WordPress API. But, as a side effect, any changes done on the WordPress site will not be shown in Pinegrow. For example, if you update a post title and then run Import live data, the old title will be displayed.
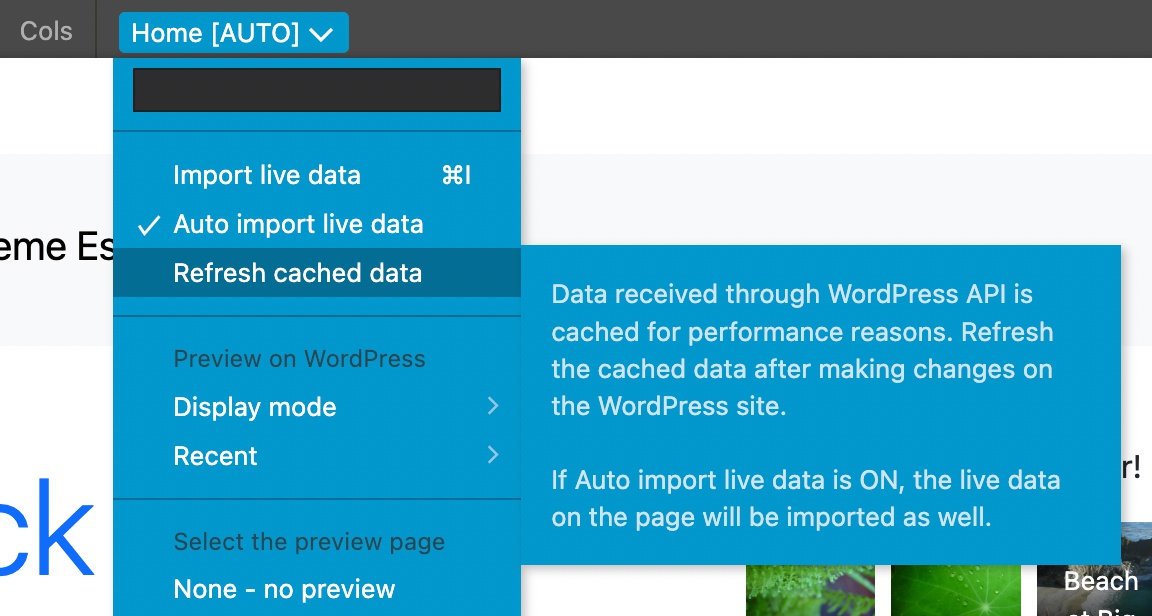
Use the Refresh cached data command to clear the cache and fetch fresh data from the site. If Auto import is on, refreshing the data will also re-import live data for the whole page. If Auto import is turned off, you need to manually import live data after refreshing the cache.
Hint: use SHIFT + CMD + I to refresh the cache and import live data.
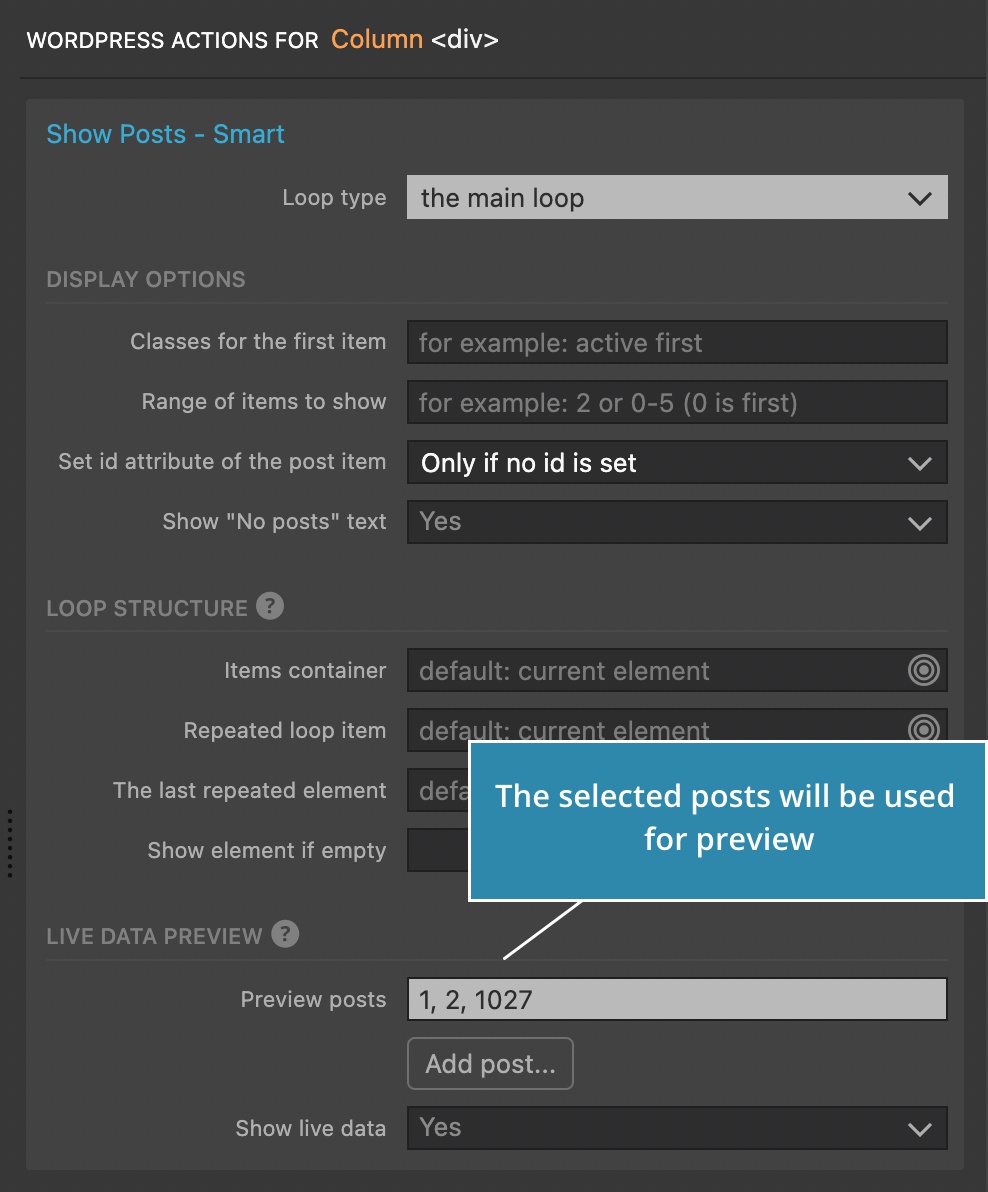
Previewing queries with Show Posts
Show Posts action is able to display live data for the main loop and for custom queries.
Note that all query parameters are not supported and that queries with dynamic PHP function parameters will not display correct results.
In such cases, you can use the Live data section of the Show Posts action to manually pick posts that should be displayed by the action.
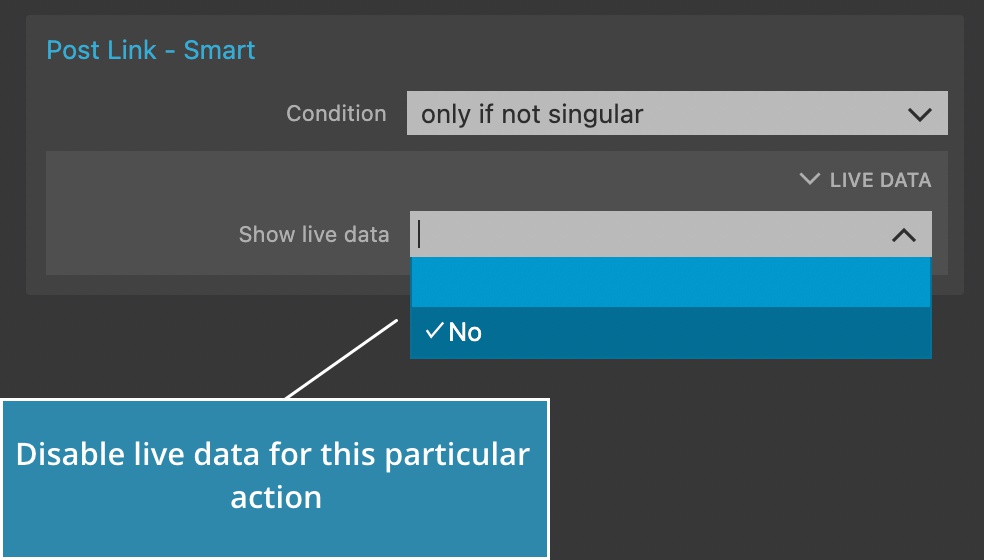
Turning off live data for individual actions
Use the Live data section on individual actions to disable importing its live data. This is useful if live data conflicts or distracts from editing.
Preview edited documents on WordPress site
Preview lets you display the edited document on the selected WordPress page (when we say page we mean any URL of the site, not just posts with page post type).
Setting up the preview has two parts:
- selecting the WordPress page (URL) where the document will be previewed
- choosing where on the selected WordPress page the edited document will be displayed
Display mode
The submenu lets us select where on the preview page is the edited document displayed.
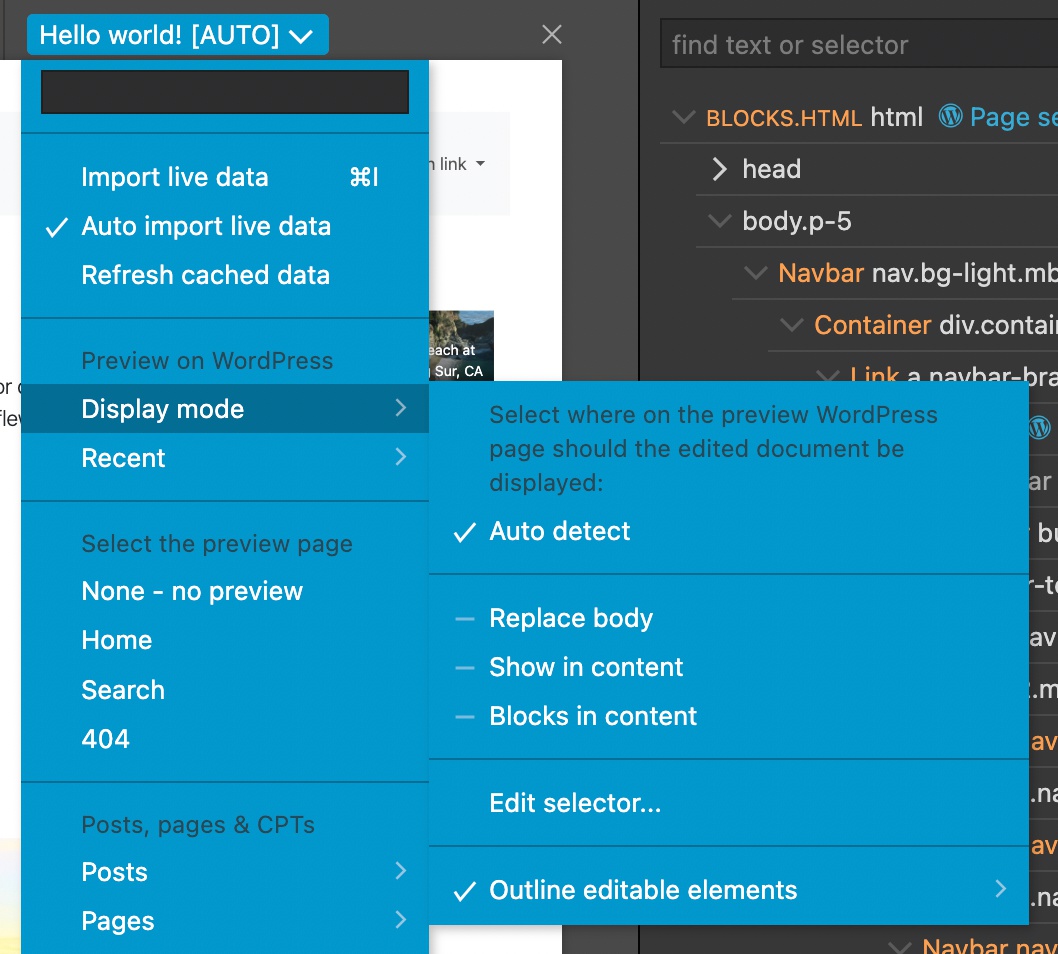
We have three main options:
Replace body – the body of the edited document will replace the body of the preview page. The effect is that only the styling and scripts of the preview page will be used, while the content is completely replaced by the edited document.
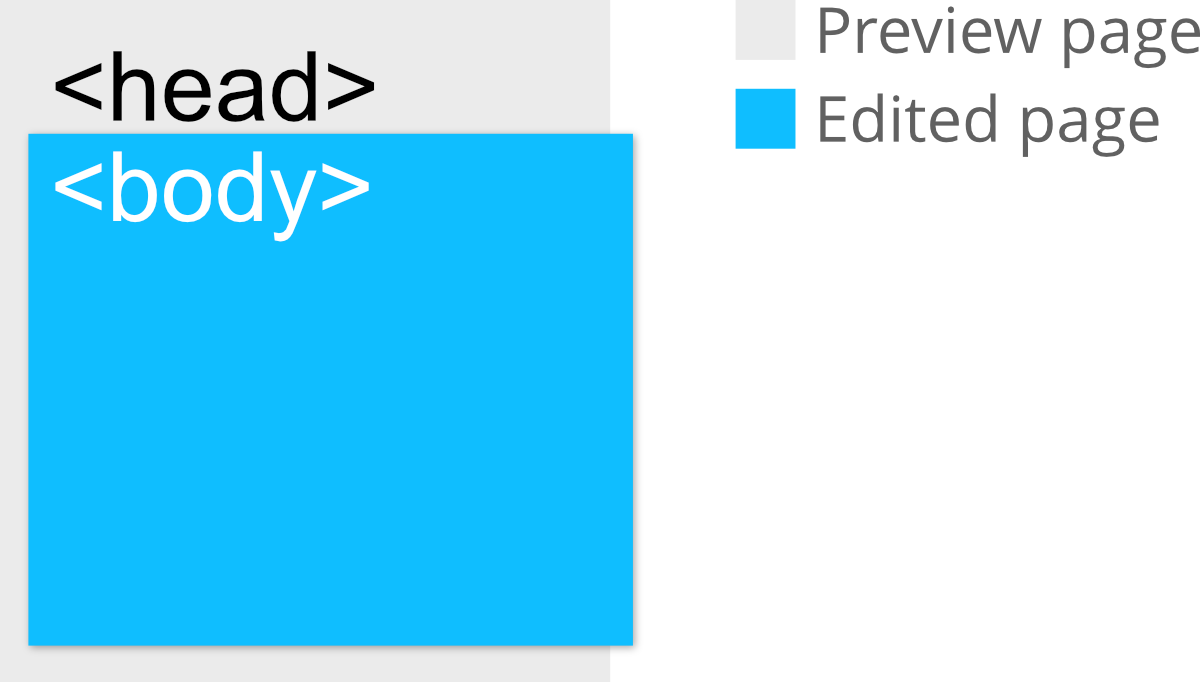
Replacing the body is best suited for whole page templates (such as index.php, single.php…). In combination with importing live data we can get a very high fidelity editable view of the edited WordPress template.
Show in content – the body content of the edited document is prepended to the content area of the preview page. How is the content area selected? The first element on the preview page that matches the selector “” is used as the content element.
All content of the body of the edited document is prepended to this content element.
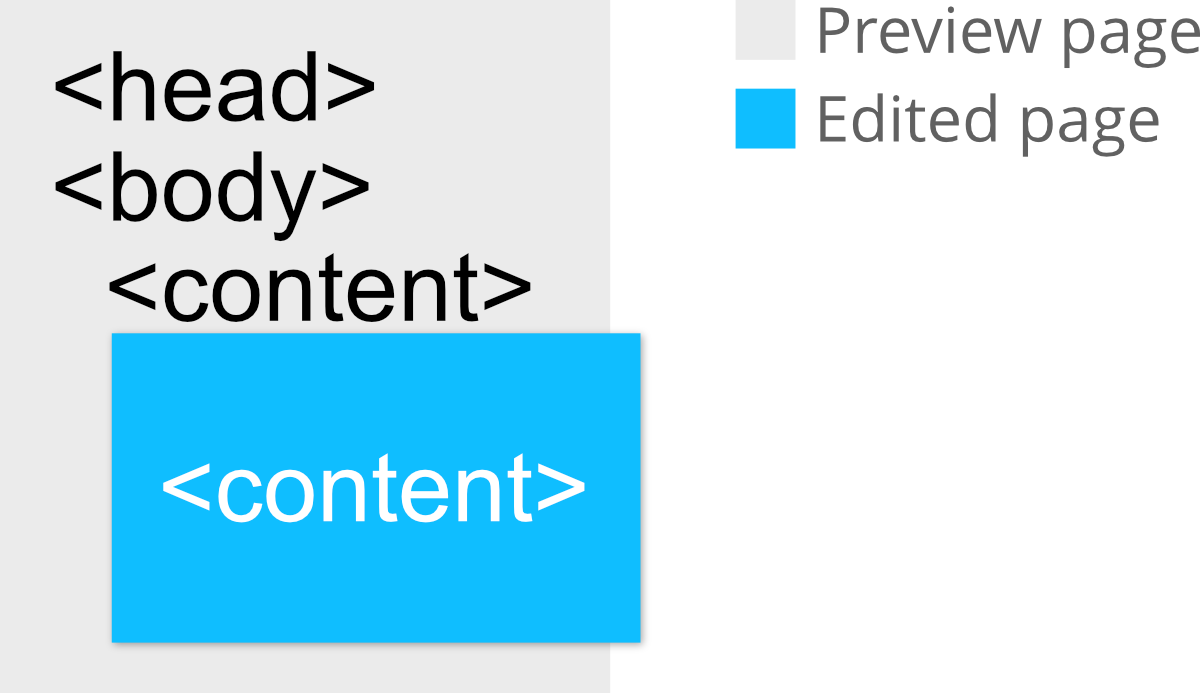
What is the page content doesn’t match the above selector? If you control the theme, add the entry-content or content class to the element in which the post content is displayed. Otherwise, use Edit selector… option (described below) to enter a custom selector.
Show in content is best suited for editing standalone elements such as widgets, template parts and forms.
Blocks in content – only blocks from the edited document are prepended to the content area of the preview page. The selector for detecting the content area is the same as above with Show in content.
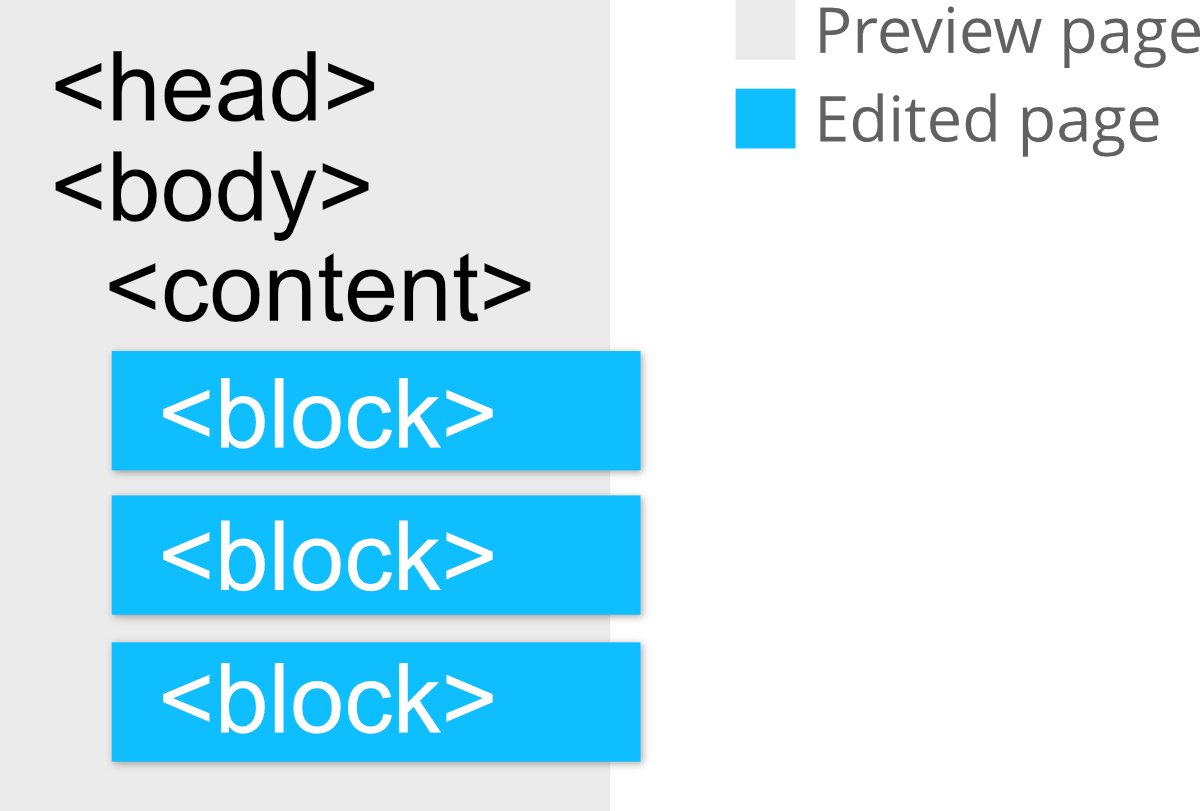
Blocks in content is best suited for editing blocks.
Auto detect – auto detect uses Blocks in content for documents that are not exported as templates and that contain Block actions (both criteria must be true). This is the default choice.
Replace body is used in all other cases.
Enter a custom selector – if none of the predefined options works for you, enter a custom selector of the element on the preview page where the body content of the edited document should be displayed.
Outline editable elements outlines elements that can be edited. Choose a color of the outline in the submenu. This option is hidden when Replace body is used because there, all visual elements are editable.
Recent preview choices
The recent submenu provides a quick way to select previous combinations of the preview page and the display mode.
Selecting a WordPress page for preview
From here down, the dropdown menu lets us select a WordPress page that is used for preview.
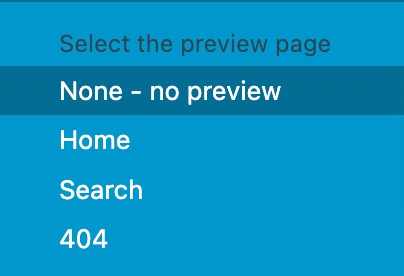
- None – display the document as it is, without using a preview page.
- Home – use the site home as the preview page
- Search – display the document on the search results page
- 404 – display the document on the not found page
Posts, pages & Custom post types
Next, select posts of various post types as preview page. Custom post types are displayed as well.
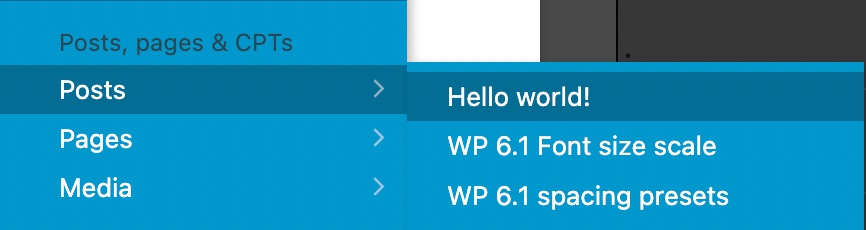
Open submenus to select a post. Only ten posts are displayed in each category. If your target post is not displayed, use the search box at the top of the menu to look for it.
Displaying live data from the selected post
When selecting a preview page with the post selector, importing live data will use the data of the selected post. For example, Show Posts will return the selected post, and Post Title will display the title of the post.
Taxonomies
Taxonomies section displays links to archives of tags, categories and any custom taxonomies.
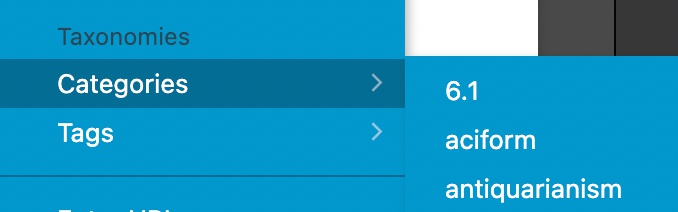
Again, if the term is not displayed, use the search box to look for it.
Enter URL…
If the target page or URL is not available in any of the above options, enter the URL directly.
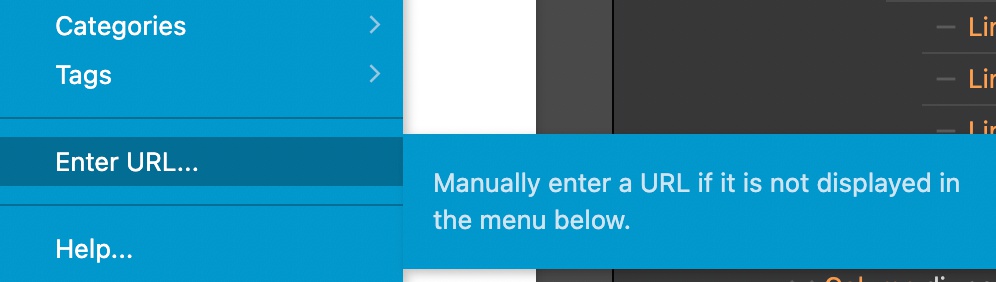
Note, when entering URLs manually, live data from the selected page is not available. You have to chose a post directly from the Posts, pages & CTPs section to display its live data.