Tailwind Visual Editor comes with a powerful feature that makes working with Tailwind styles even easier – Class Styles.
Class Styles lets us group classes into named styles that we can then assign to multiple elements in the project.
Creating new styles
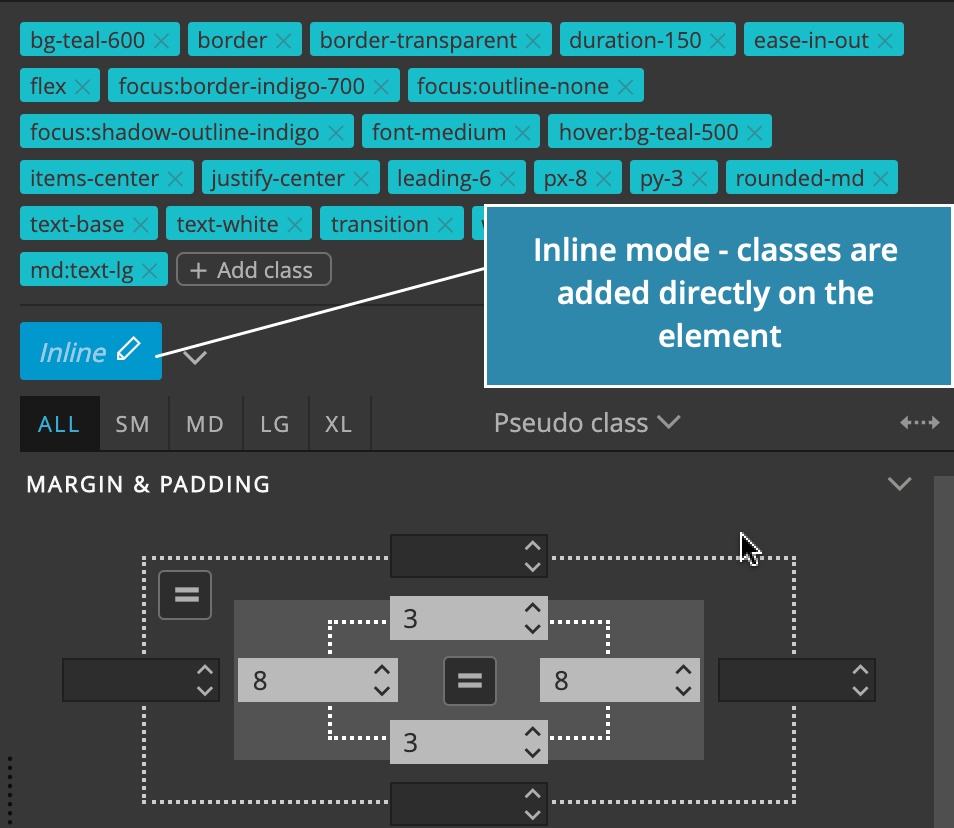
The default mode for styling elements is called Inline. That means that all classes are set directly on the element.
To create a new style, click on the Pen icon, give the style a name and click Ok or press Enter.
The new style is then created and assigned to the element.
Assigning styles
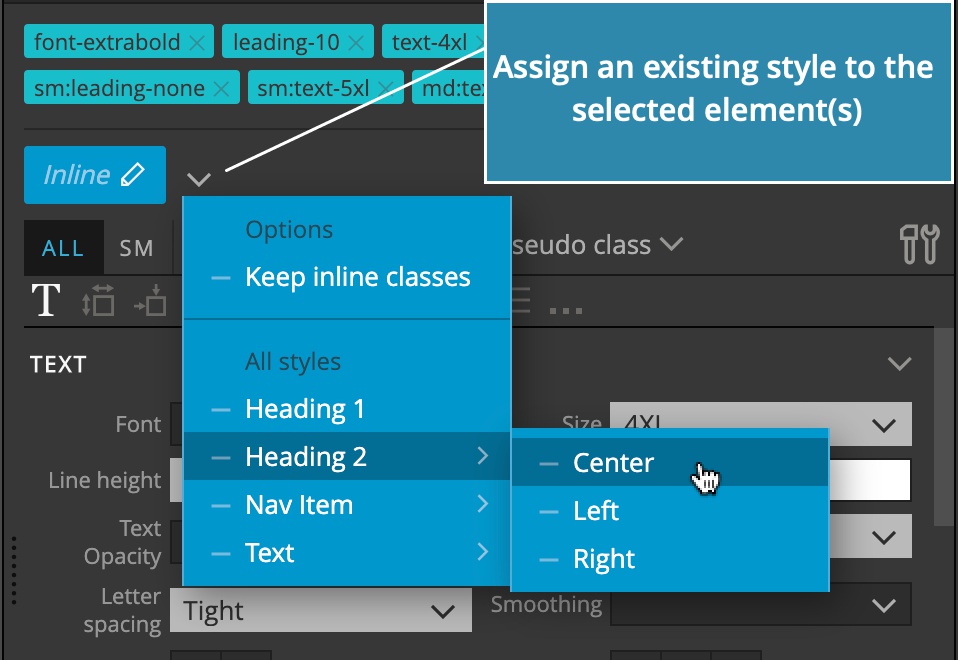
To assign any style to an element, select that element and select the style from the dropdown:
Assign style and keep its inline classes
What to do if you want to assign a style and keep any extra inline classes (inline classes that are currently on the element but are not a part of the newly assigned style) on the element?
Starting from Pinegrow 5.973 you can activate the Keep inline classes option and then assign a style.
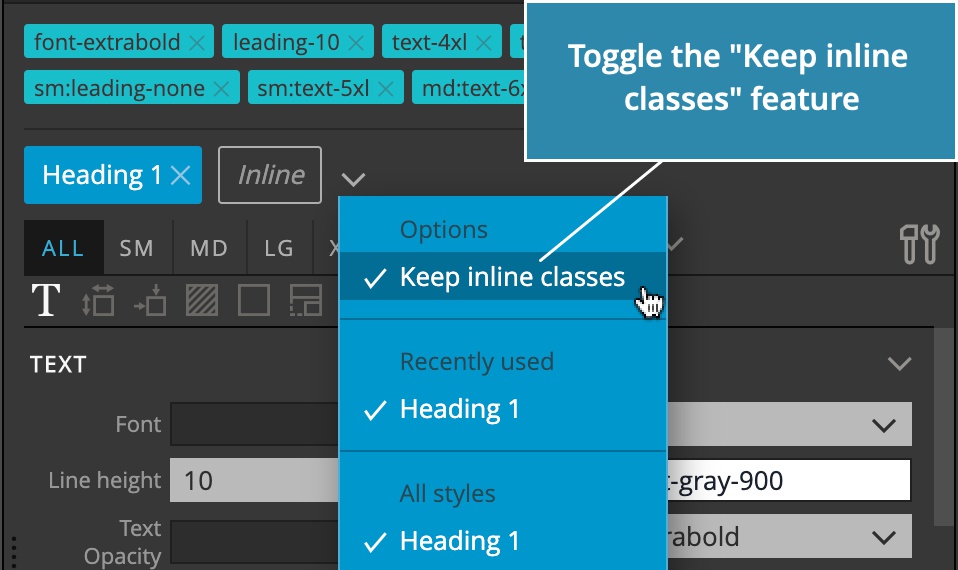
To deactivate this feature, click on “Keep inline classes” again.
Keeping inline styles is very convenient in situations where you want to assign a style to the element but keep any classes that are not covered by that style as inline classes (and potentially for defining a sub-style variant).
Updating styles
The selected style is marked with the blue color. Any edits through visual controls modify the selected style.
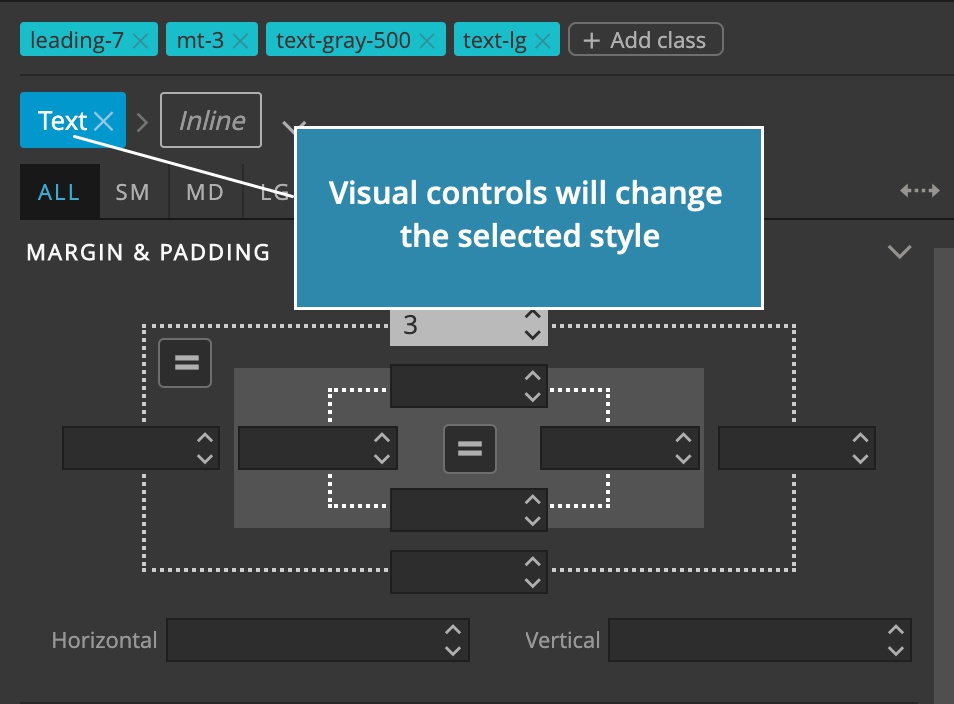
Such changes are immediately updated on all elements that use this style – on all pages that are open in Pinegrow at that time (there is also a feature to update all files in the project).
One style per element – but…
Every element can only have one style assigned (we can’t assign two or more styles to a single element).
This limitations helps prevent turning styles into an unorganized mess, that is similar to the situation we often encounter with CSS.
At the same time, having to define a style for every single button variant is also not good, and leads to having too many similar styles.
There is a middle-way solution. It has two parts:
Inline classes
Instead of modifying the selected style of the element, we can select the Inline style option. When Inline is selected any edits in visual controls affect only that elements and don’t change the style.
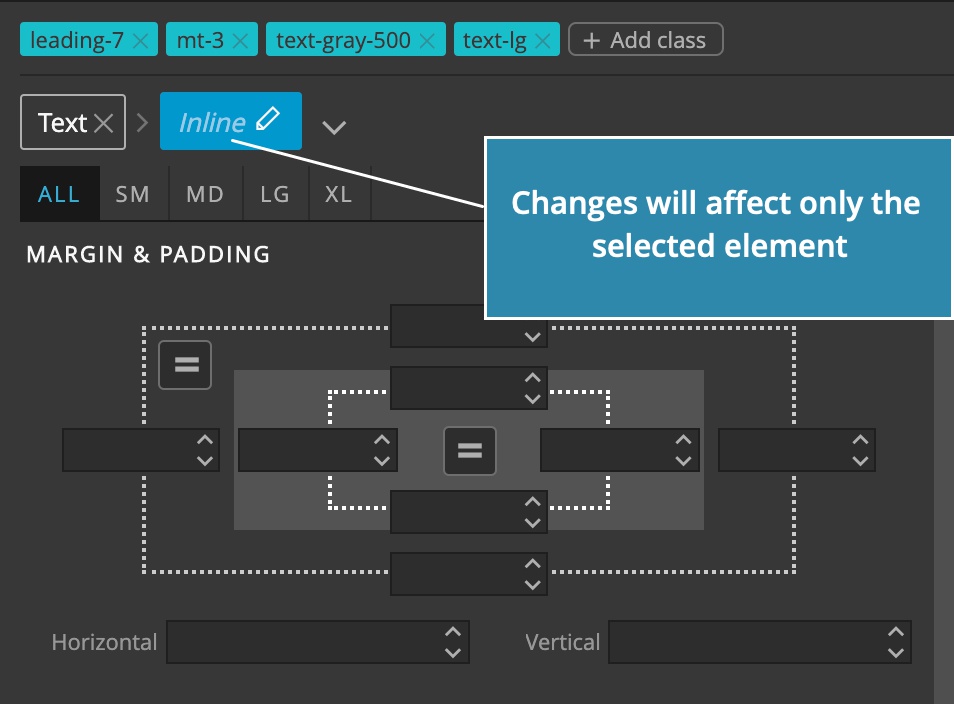
With that we can override style properties – for example, change the color to red – instead of having to define a new style.
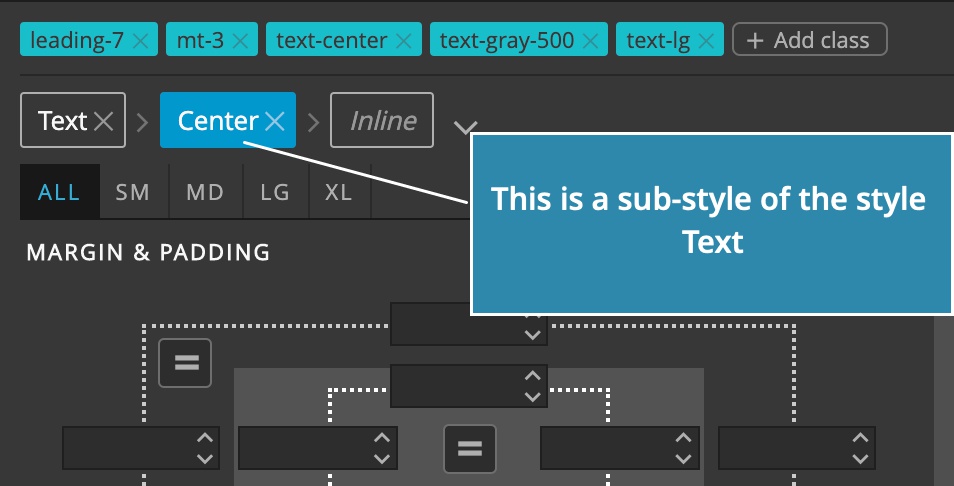
Sub-styles
Did you notice that Inline button has the Pen icon displayed even when a style is already assigned to the element?
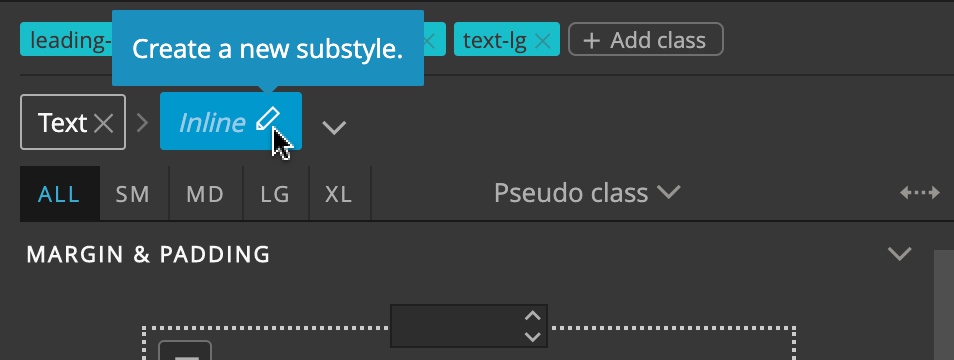
We can use it to create a sub-style of the assigned style, for example a red variant of the alert box.
The process of creating a sub-style is simple:
- Select the Inline mode.
- Use visual controls to style the variant.
- Click on the Pen icon to create a named sub-style. Don’t repeat the full name, like “Button – Red”; instead just give the variant name “Red”.
Inline classes and Sub-styles give us the right amount of flexibility.
Managing styles
Class Styles can be managed in a dedicated Class Styles panel:
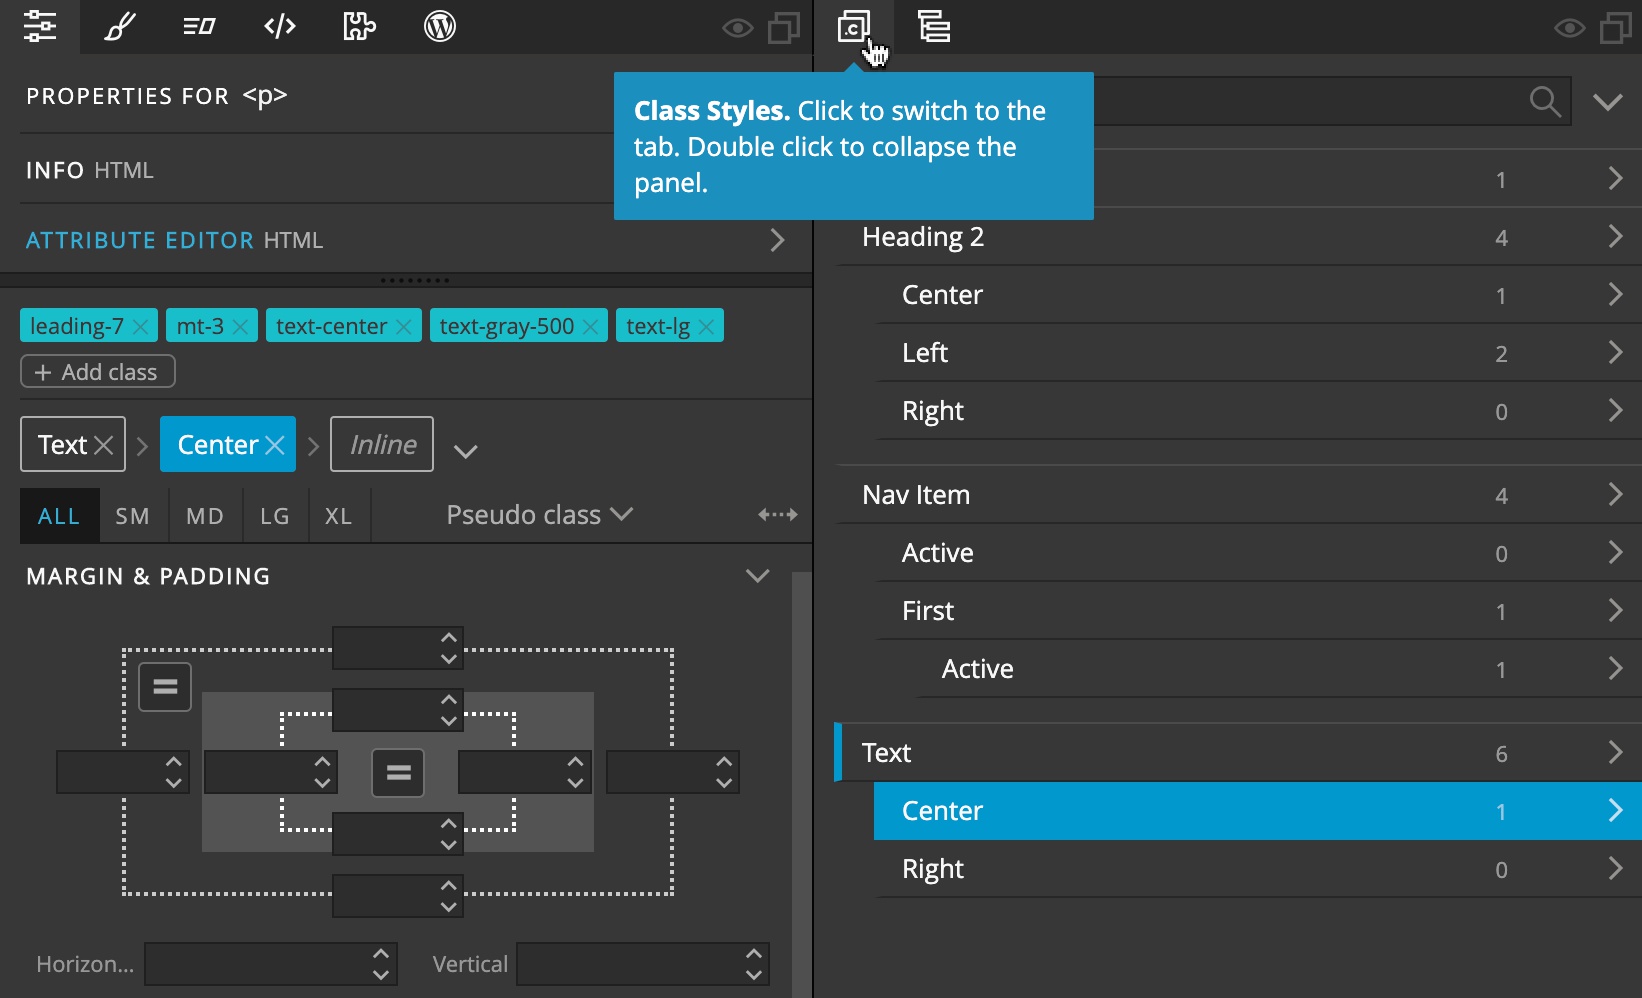
At the top of the panel we can search for a style, or use the dropdown to:
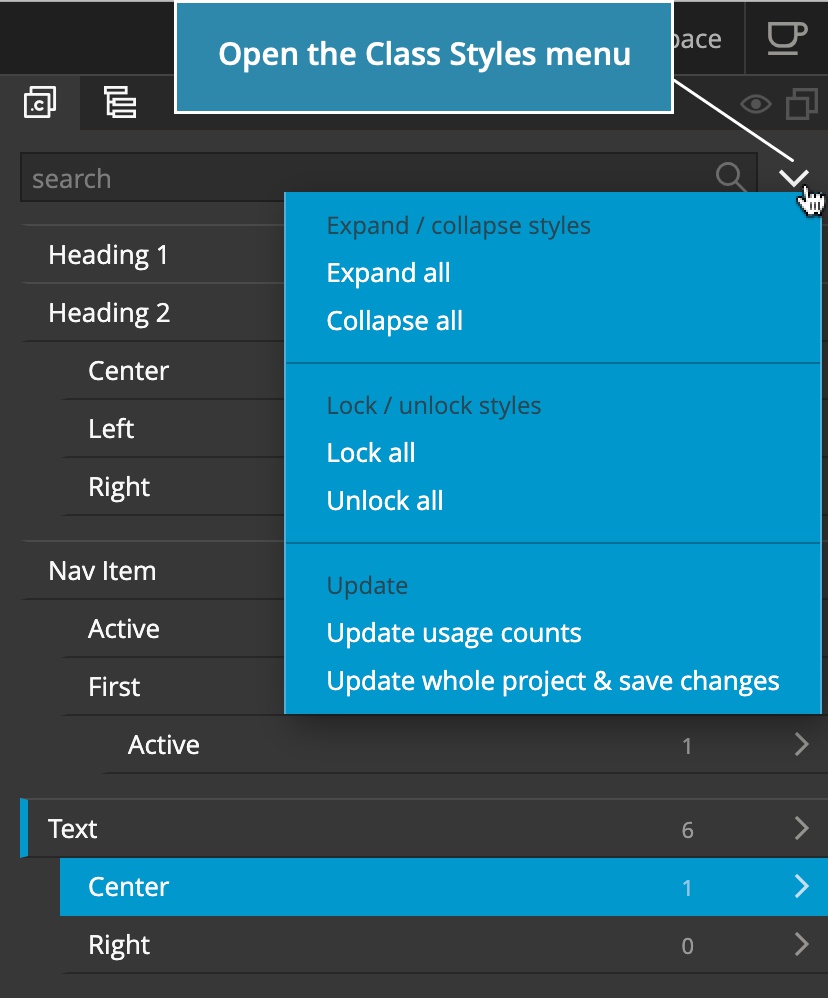
- Collapse and expand display of styles. Click on any class to jump to its visual control.
- Lock and unlock styles. This is useful for making sure that we don’t modify a style by mistake.
- Update usage counts scans the project and count how often styles are used.
- Update the whole project to apply any changes to all files in the project – not only to pages that are open in Pinegrow at the time a style is changed.
Assign styles
Click on the style name to assign it to the selected elements.
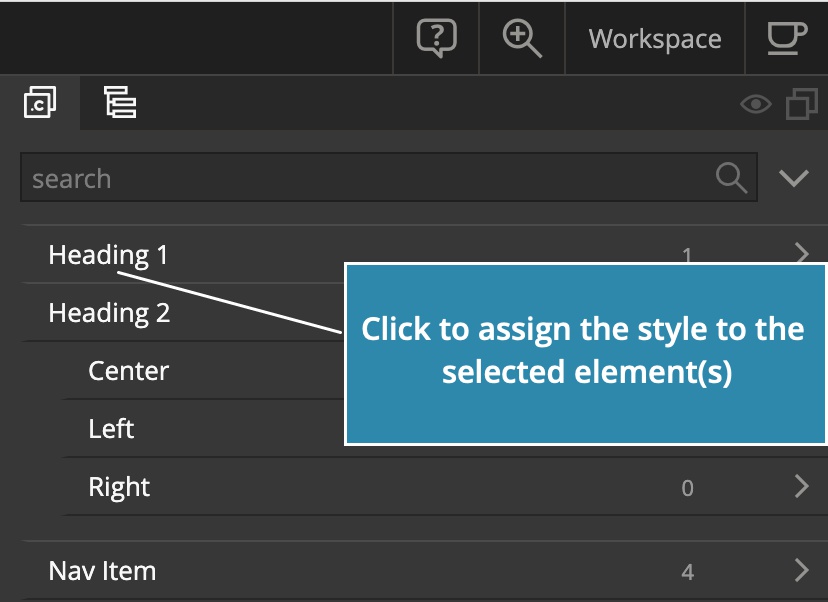
Don’t worry if you make a mistake – just use undo.
Additional commands
Right-click on the style in Class Styles panel to open the style menu:
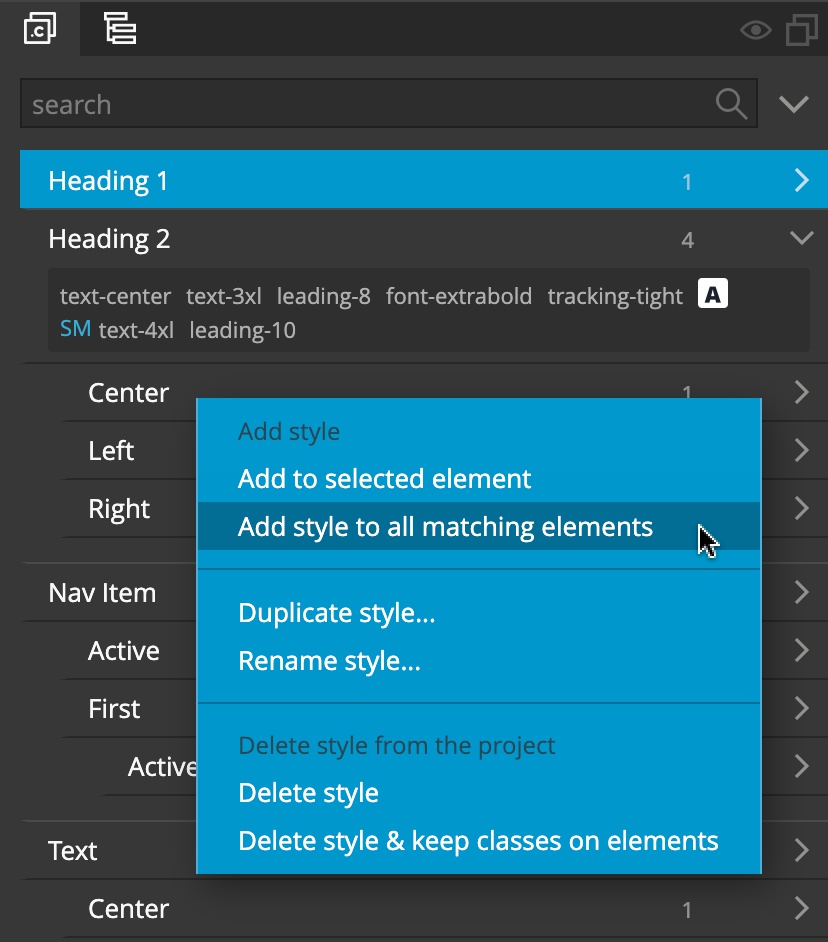
The same menu is available from Properties panel as well:
- Add style to all matching elements will scan the page and add the style to all elements that have a matching set of classes. This is useful for quickly assigning a new style to all matching elements on the page.
- Duplicate style will clone a style.
- Rename style will rename it and update the whole project.
- Delete style will delete the style and remove all its classes from affected elements.
- Delete style & leave classes will delete the style but leave all the classes on affected elements.
Please note that Update of the whole project is needed to apply deletions throughout the project.
Technical details
Tailwind Visual Editor stores class style information in data-pg-class-style and data-pg-class-style-inline HTML element attributes. You can safely remove these attributes when deploying the page, just don’t remove them in the source project because the information about assigned styles and inline classes would be lost. The style definitions are kept in projectdb.pgml file. It’s recommended to keep this file under source control.