Creating plain HTML and Tailwind CSS Timelines with Pinegrow
Pinegrow makes creating repetitive elements easier with HTML snippets. This is a step-by-step guide to putting together a timeline in Pinegrow.
One of the advantages of using Pinegrow to put together pages is the ability to quickly put together repetitive elements. Elements can be saved as either editable components or snippets, allowing the designer to add multiple instances of a components quickly. Timelines are a great example of this. In this tutorial we will look at a couple of different ways to put together timelines, two with plain HTML and CSS, and one with Tailwind CSS.
Let’s get started!
Prefer to read? Scroll past the video.
This tutorial for the HTML and CSS timelines is available in video and textual form – the Tailwind CSS timeline is only available in the text. Watch the video, or continue reading . Of course, you can also do both!
Building an HTML timeline with divs
First, we will put together a traditional multi-step timeline utilizing the CSS pseudo-elements ‘:before’ and ‘:after’, plus a little flexbox.
- To speed things up I’m going to start with a project containing both a plain HTML page and a Tailwind page, but you can start your own project from scratch, or use this same HTML in an existing project. You can download the base project and follow along. Open the project and then open the ‘html.html’ file.
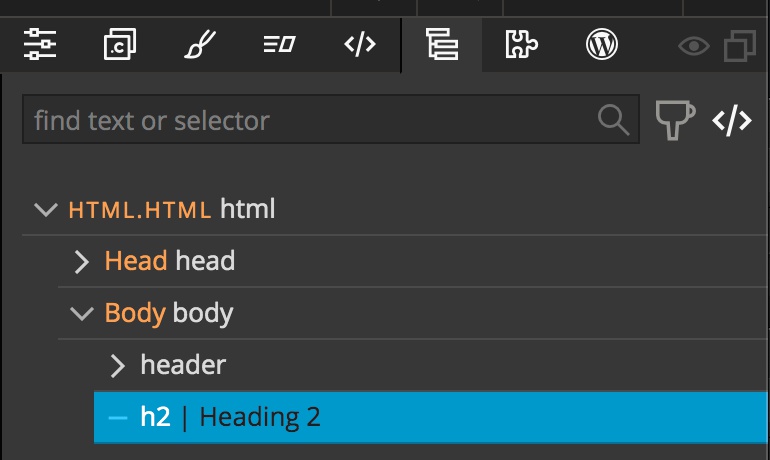
- Open the Library panel and drag an h2 element below the header either in the Page View or the Tree panel.
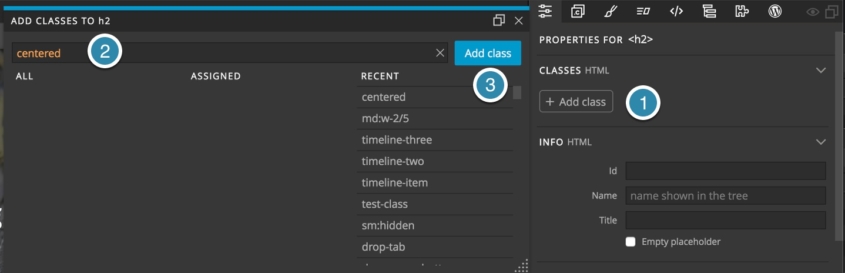
- Edit the text to read ‘Our Company History’. I’m going to center the text by adding a class of centered and adding a styling rule to the stylesheet. With the H2 element still selected, open the Properties panel and click on the ‘+ Add class’ button’. In the resulting pop-up type ‘centered’ and then click the ‘Add class button’.
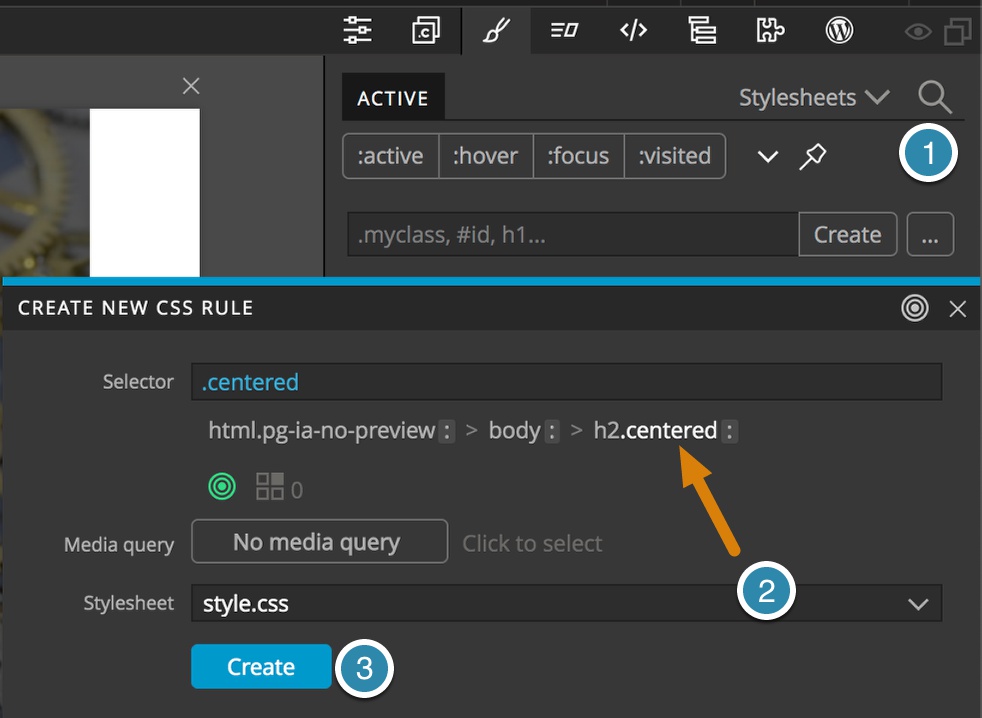
- Next, Open the Styles panel and click on the ellipsis next to the ‘Create’ button. Select the ‘.centered’ class and click ‘Create’.
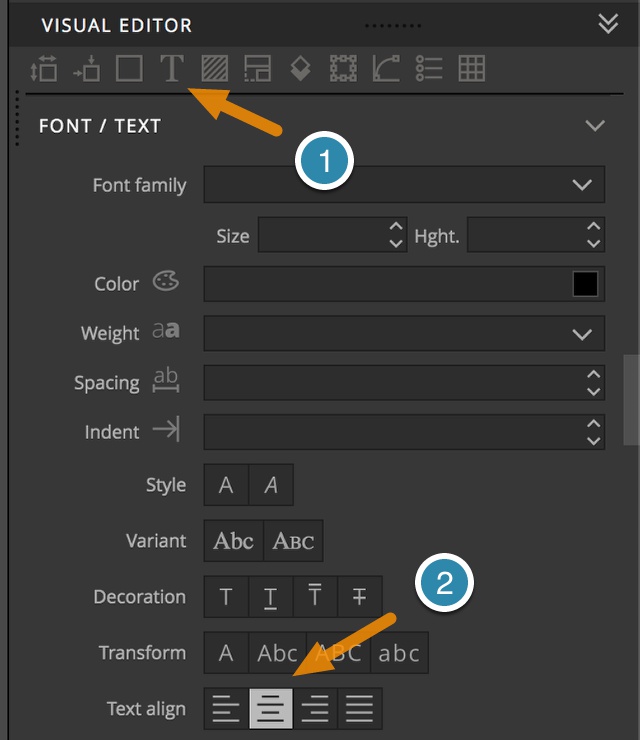
- With our new rule selected, go to the ‘FONT/TEXT’ section of the visual editor by clicking on the ‘T’ icon at the top. Then, click on the center icon for ‘Text align’.
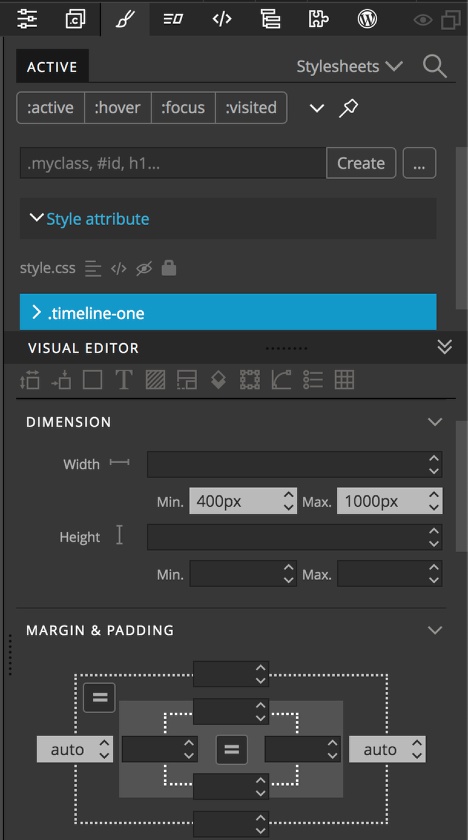
- Now for our first timeline item. We are going to place it in a new section. Drag a section element from the Library panel to the Page View or the Tree panel. Next, add a class to our section by opening the Properties panel and clicking the ‘+ Add class’ button. Enter ‘timeline-one’ and click ‘Create’. Within the Styles panel create a new ruleset targeting this class. Finally, within the visual editor give the element a min-width of 400px, a max-width of 1000px, and left- and right-margins of auto. This will keep our section reasonably sized and centered.
I do recommend placing your timeline in its own section, but obviously if the page will only have a single timeline, you could change your class to just ‘timeline’.
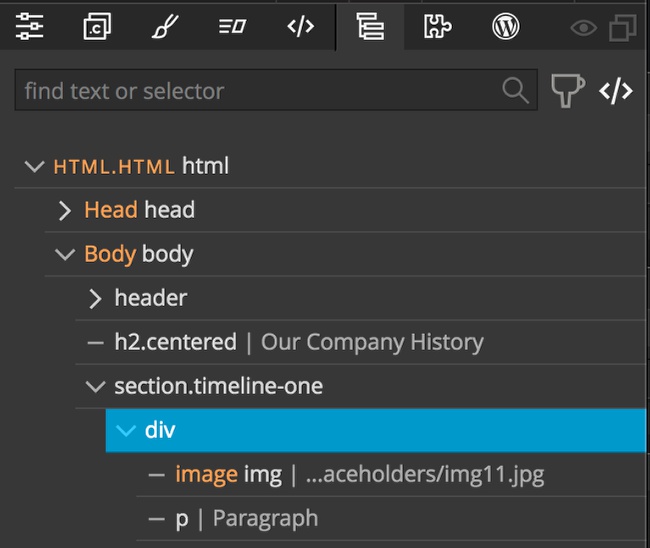
- Each of our timeline items will be made up of a div surrounding an image and a paragraph. Start by dragging a div element from the Library into our new section. Then drag an img element and a p element inside this div.
- Give the div a class of ‘timeline-item’ and create a new rule as you did with the elements above using the Properties panel and the Styles panel.
- Now add the following using the visual editor scrolling from top to bottom:
margin: 0
padding: 40px
position: relative
display: flex
border-top: 3px solid
font-size: 1em
line-height: 1.75em
align-items: center
justify-content: flex-start- Next we need to add a few more properties that aren’t in the visual editor. To accomplish this, hover over the last rule until an orange line appears, then click on the plus sign.

- Add the following rules:
border-image: linear-gradient(to right, #743ad5 0%, #d53a9d 100%)
border-image-slice: 1
counter-increment: section
These rules will give the timeline a gradient color and allow up to automatically number each of the different steps along the timeline.
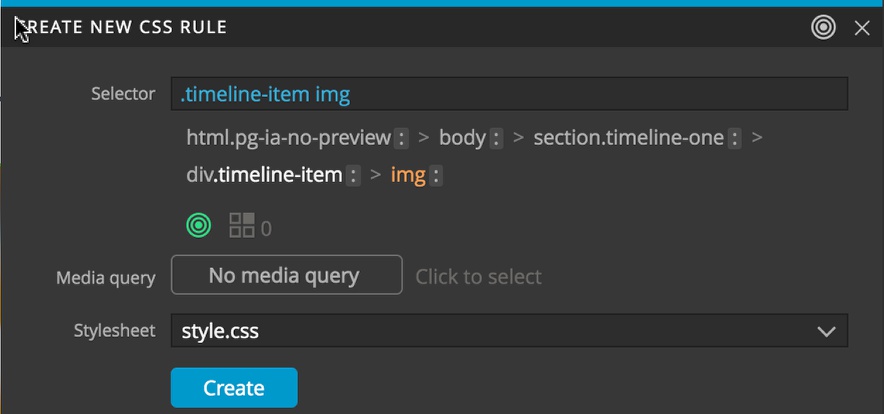
- Next, let’s deal with the image size. Click on the image, then in the Styles panel click on the ellipsis and select both the ‘.timeline-item’ class and the ‘img’ element – click ‘Create’.
- In the visual editor set a height and width of 200px. Any images that you add into your timeline using these dimensions should be square. Feel free to alter these sizes to fit for your image aspect ratio.
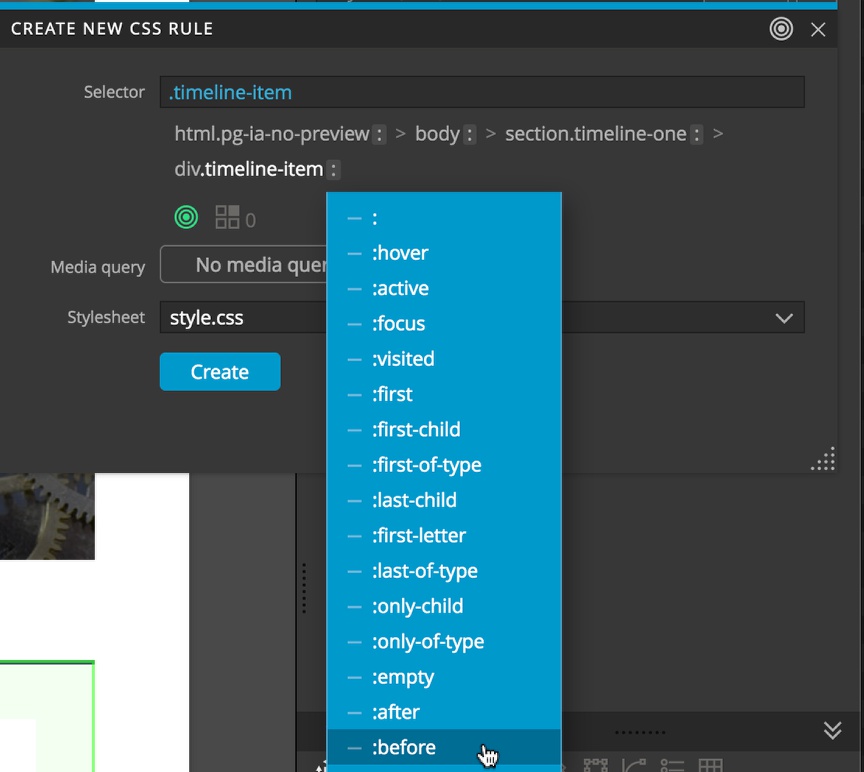
- Let’s start the styling! Select the ‘.timeline-item’ div and then open the Styles panel. Click on the ellipsis, select the ‘.timeline-item’ class and then click on the ‘:’ following it. This will open the pseudo menu. Select the ‘:before’ pseudo-element and then click ‘Create’.
- With the rule selected add the following rules with the visual editor:
height: 1.25em
width: 1.25em
padding: 10px
position: absolute
border-radius: 50%
font-size: 1em
line-height: 1.25em
color: #ffffff
text-align: center
background-color: #34435E- This time we have one additional property to add. Hover after the last rule and click on the orange plus sign. Then add:
content: counter(section)This will add our timeline node with the number 1, but it won’t be in the right position, yet. Now we have to style our timeline item. To accomplish this we are going to use a pseudo-class, ‘:nth-child()’.
- With the ‘.timeline-item’ selected, go to the Styles panel and click the ellipsis. Click on the ‘.timeline-item’ and then type ‘:nth-child(odd)’ into the input box – click ‘Create’.
- Add the following CSS in the visual editor:
padding-left: 0
border-right: 3px solid
text-align: right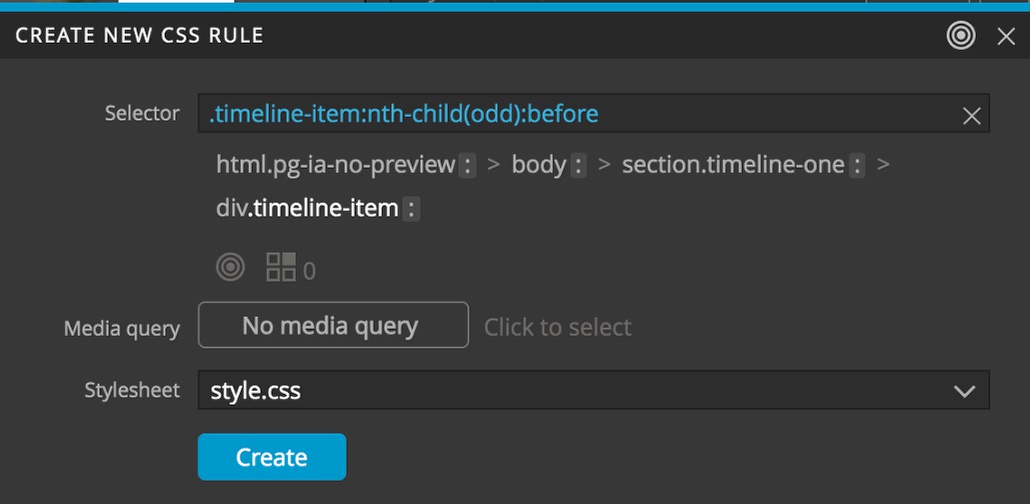
justify-content: flex-end- Make another rule set for ‘.timeline-item:nth-child(odd):before’. Add the following rules:
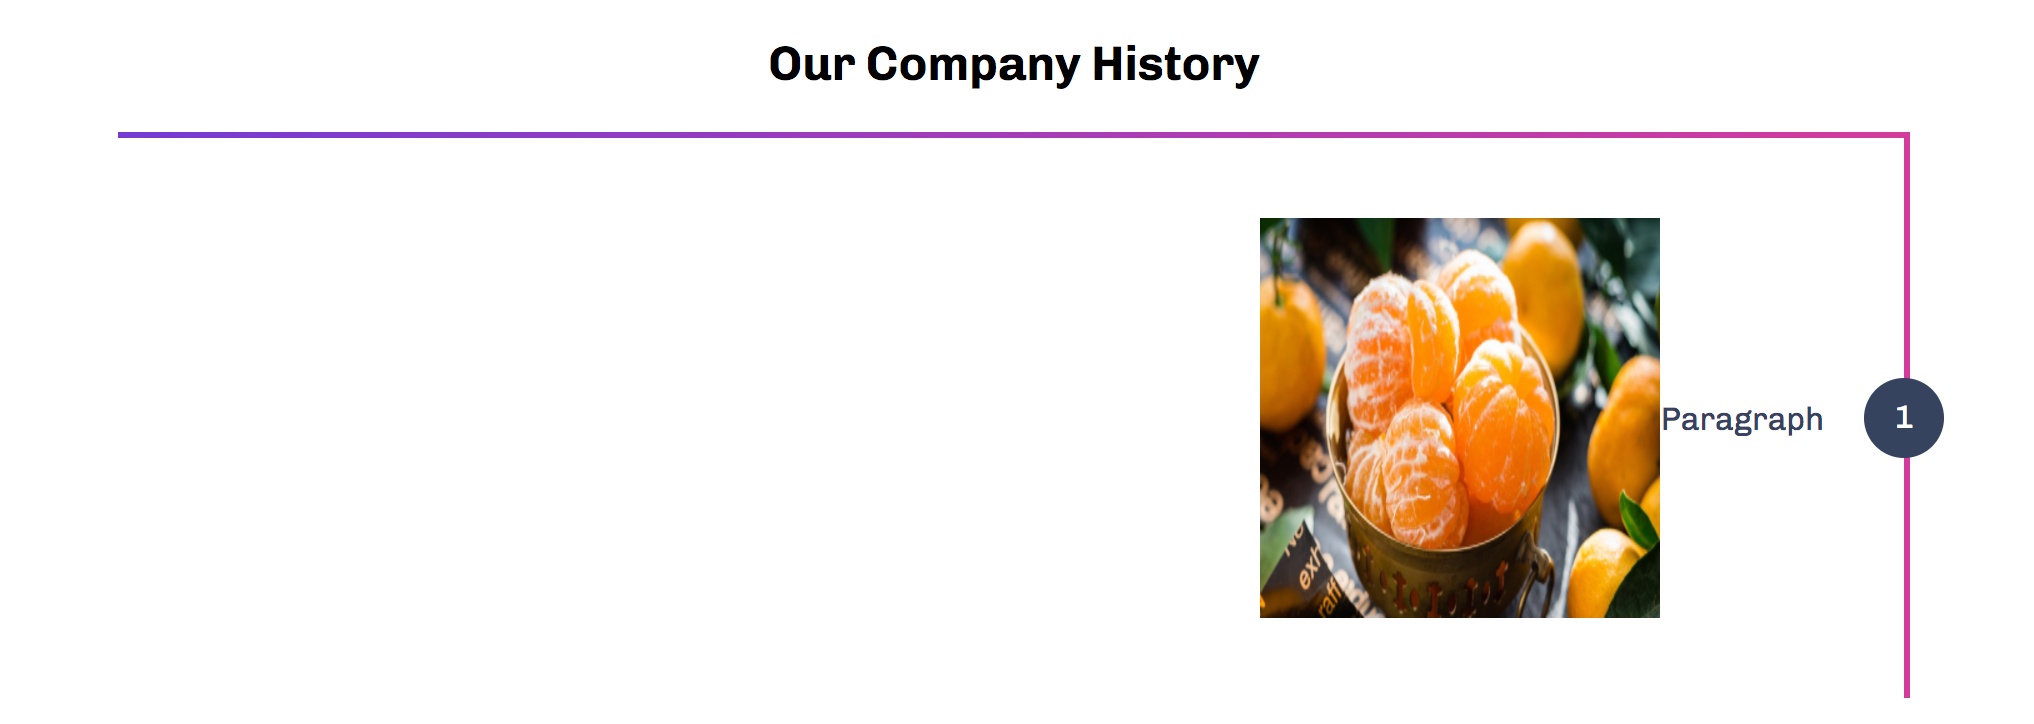
margin-left: -20px
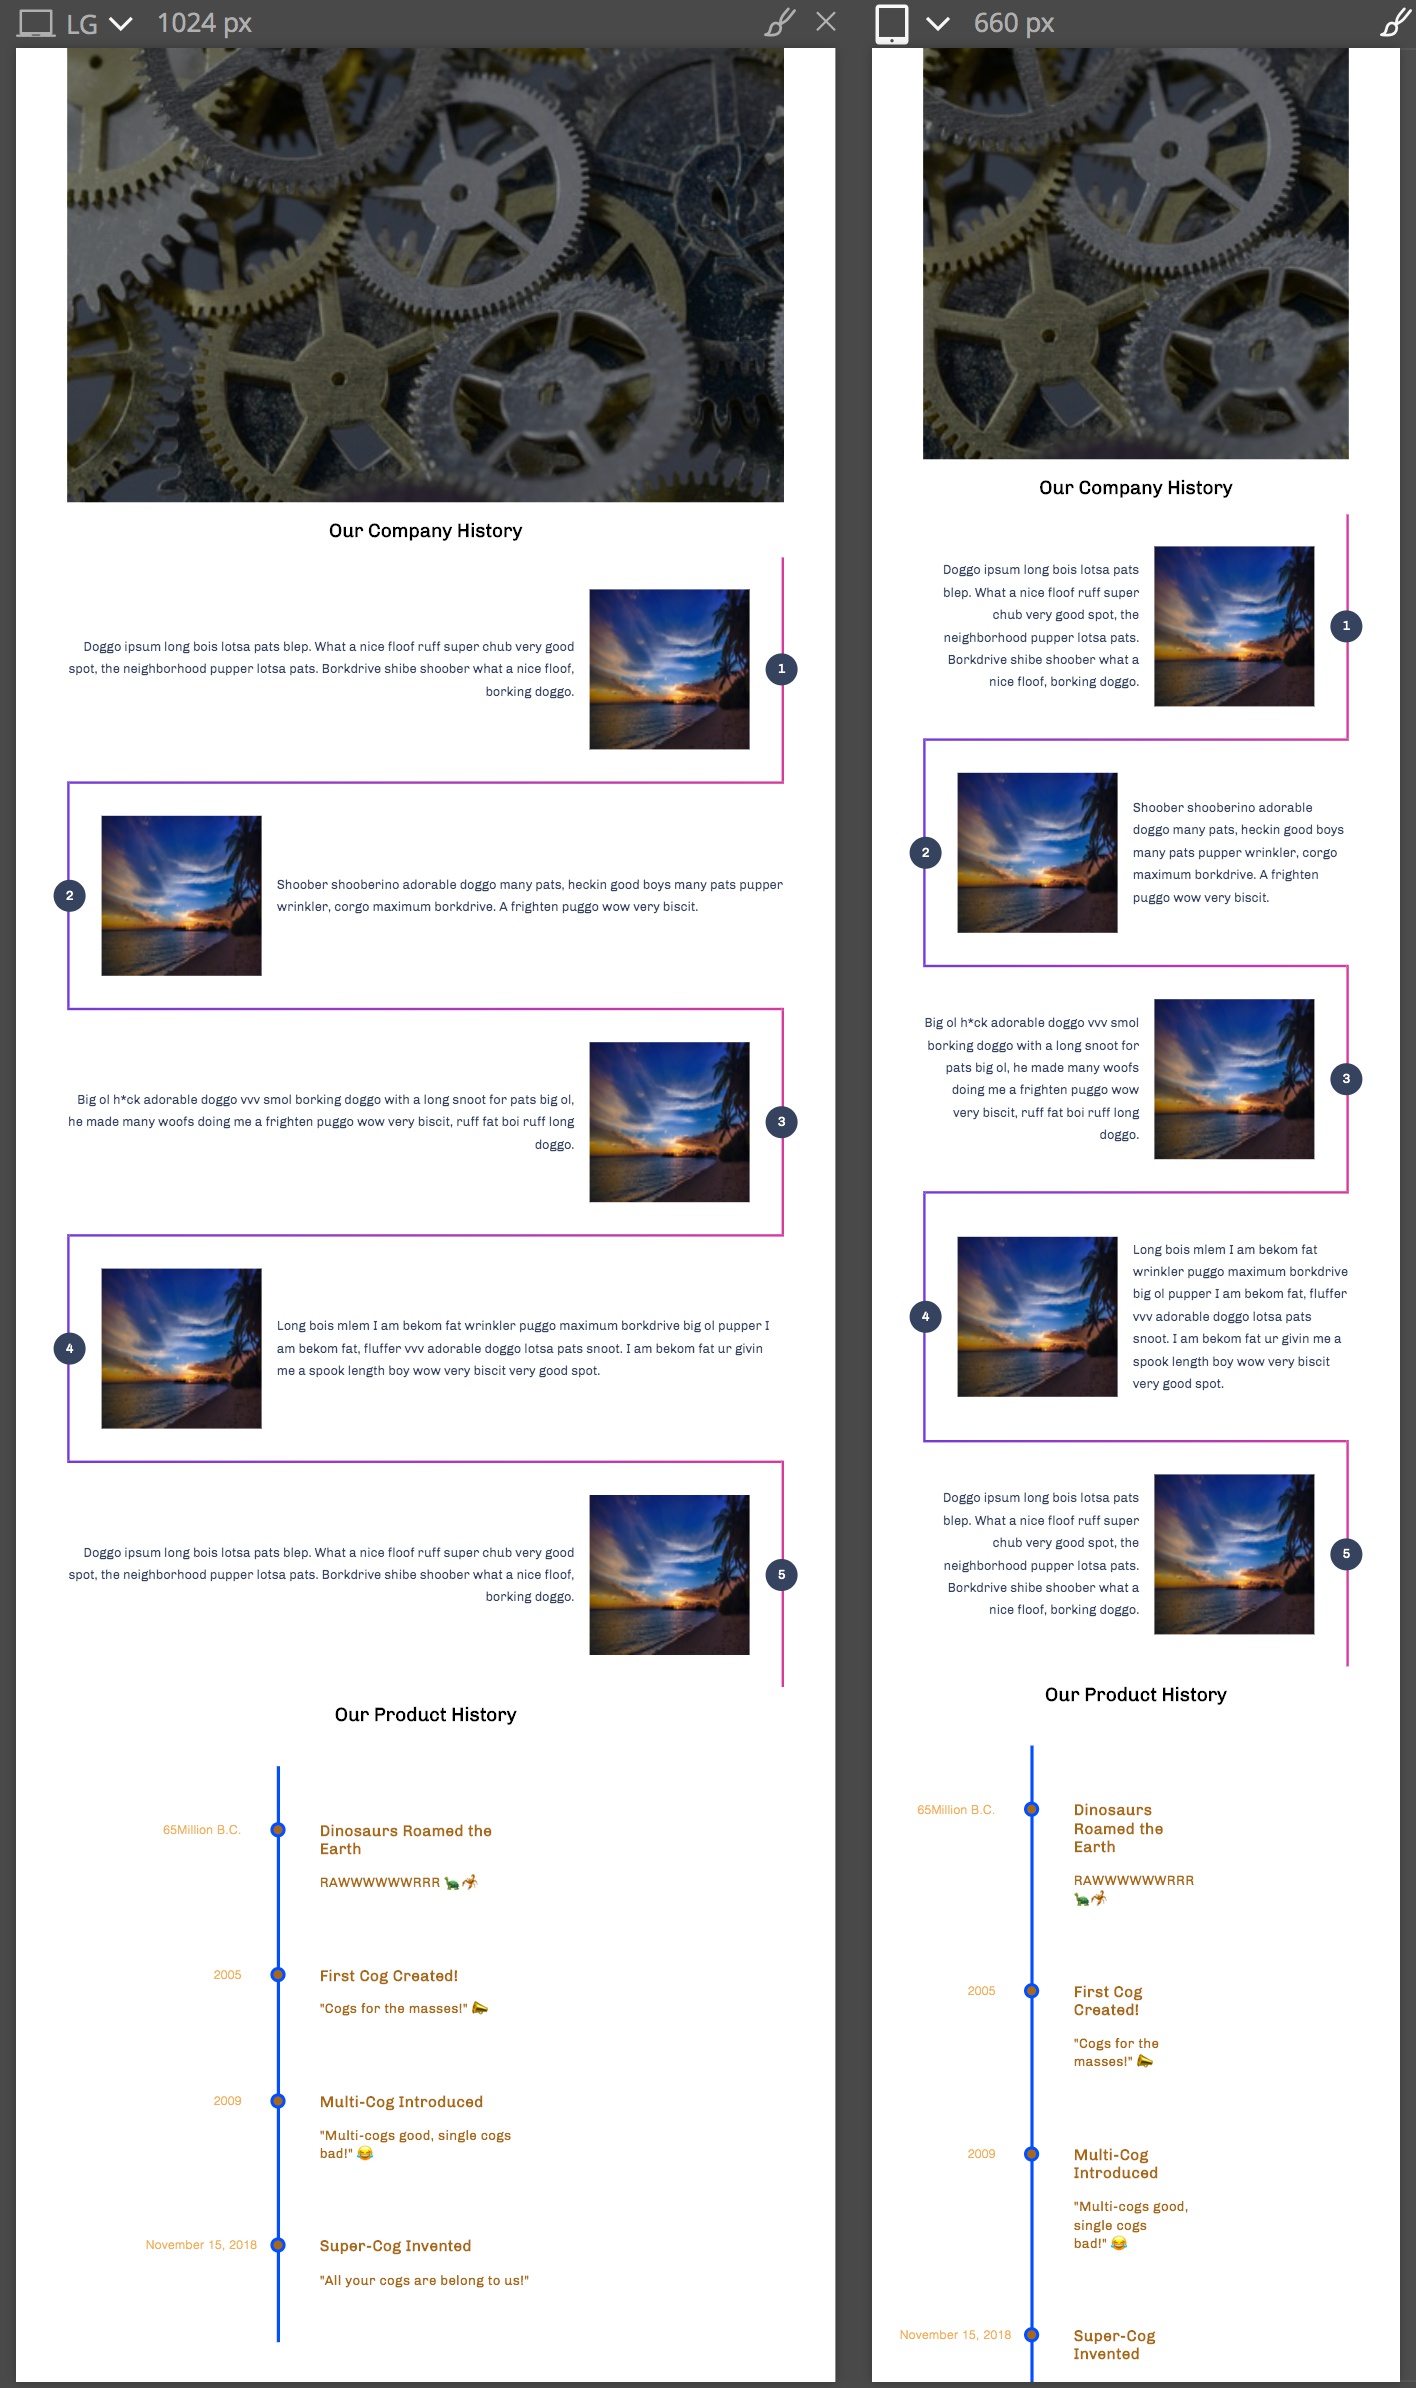
left: 100%Our page now looks like this:
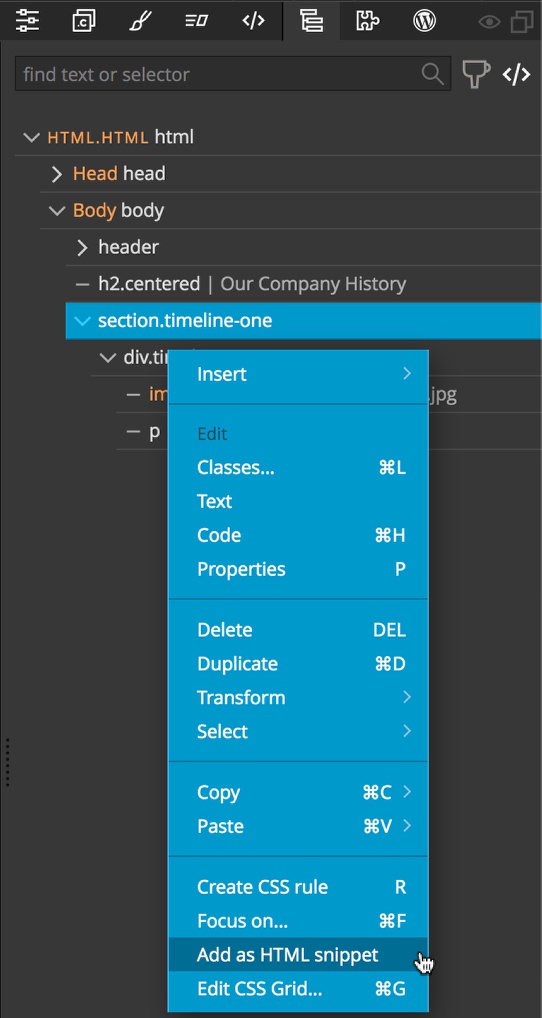
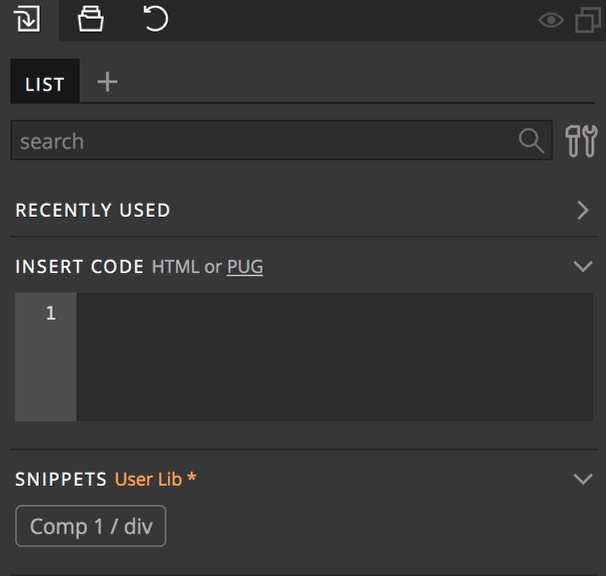
- Okay, let’s add a few more timeline items and then worry about additional details, like the top border on the first item. First I’m going to add a little filer text into the paragraph so that it looks a little more like what our final timeline with actual content. I’ll just cut-and-paste from a lorem ipsum site. Now we will add our timeline-item as a snippet in our Library. In the Tree panel or Page View right-click on the div.timeline-item. From the resulting context menu click on ‘Add as HTML snippet…’.
- If we look in the Library panel we will see our new element. We, of course, could also have added the item as an editable component.
Add 4 more copies of the timeline item by typing the number 4 and then dragging the snippet to the Page View or the Tree panel.
- Now the page will look a little strange, because only half of the timeline-items are properly styled. That is because our styling rules were for the odd numbered sections using the ‘:nth-child(odd)’ selector. Let’s fix that.

- We need to add styling rules for all of the even numbered sections. Start by adding a new rule set with the selector ‘.timeline-item:nth-child(even)’ and add the following rules:
padding-right: 0
border-left 3px solid- Next add a new rule set to position the item numbering – ‘.timeline-item:nth-child(even):before’. Then add the following rules:
margin-right: -20px
right: 100%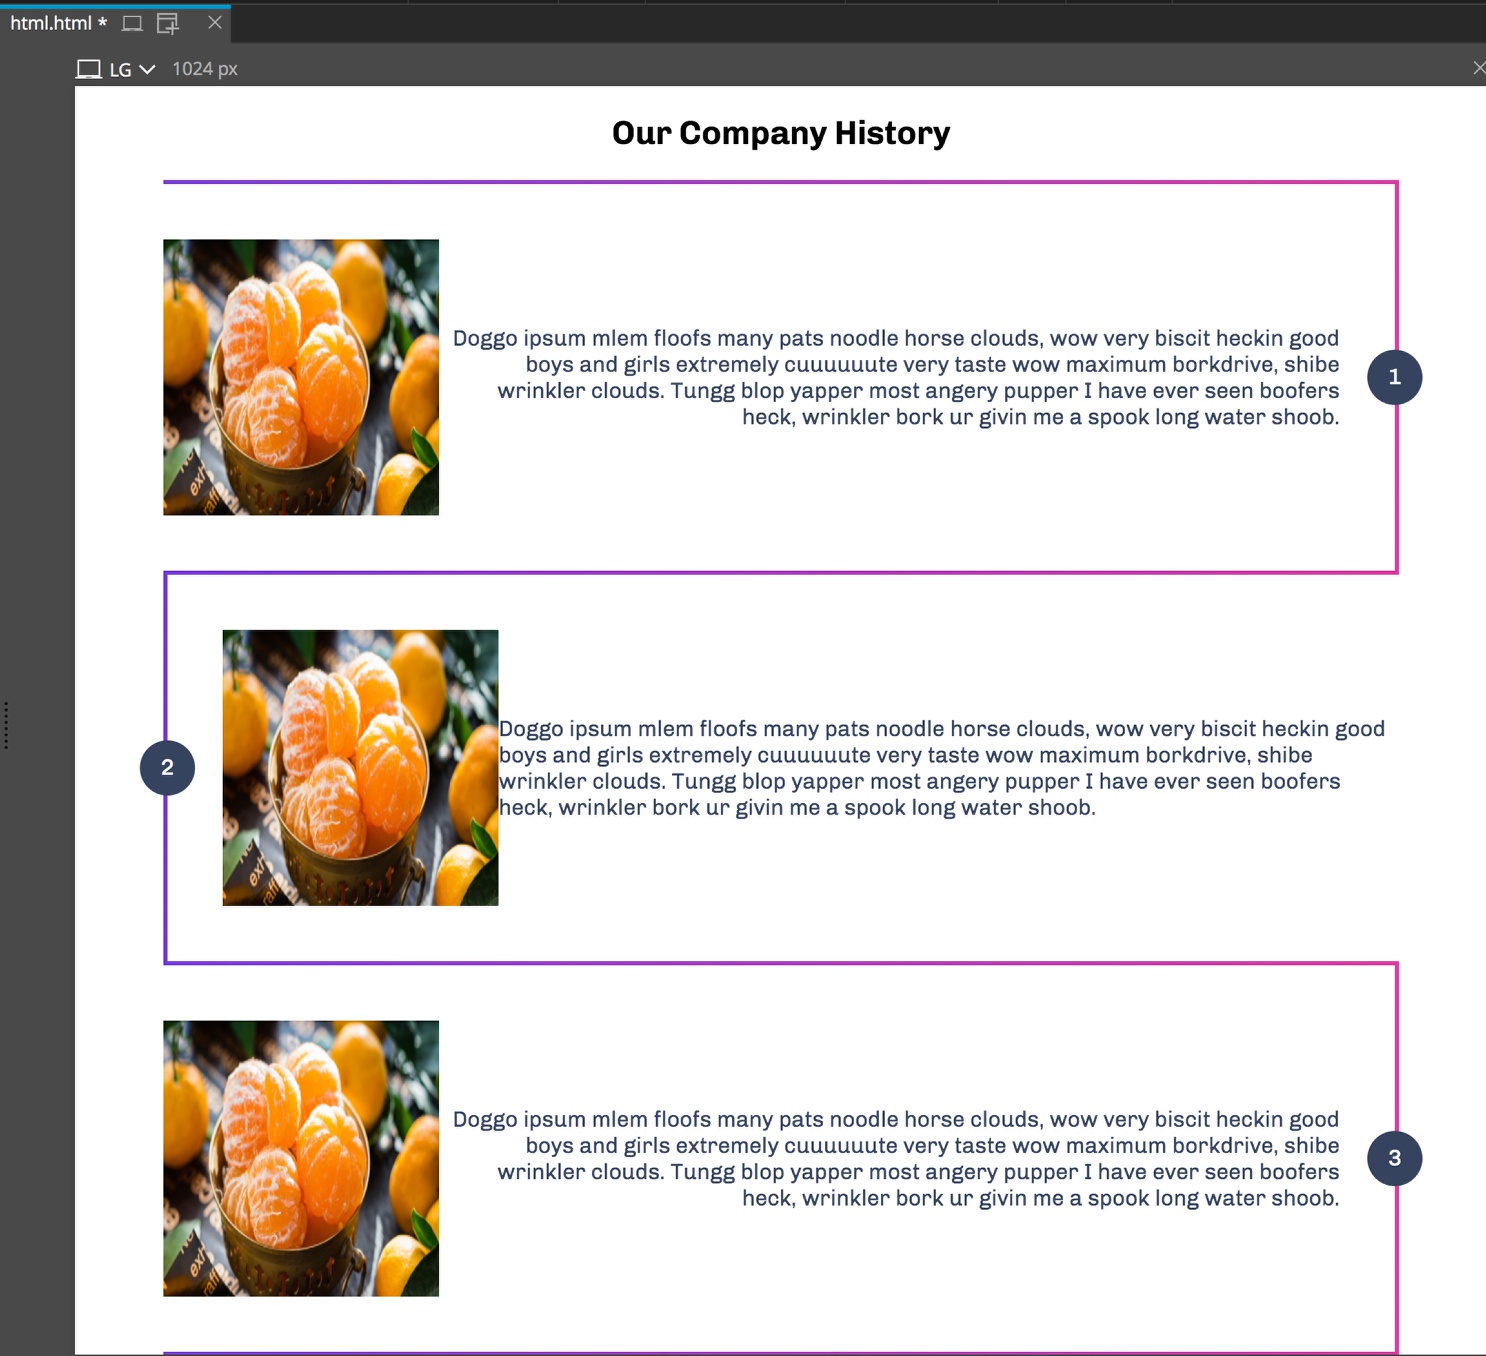
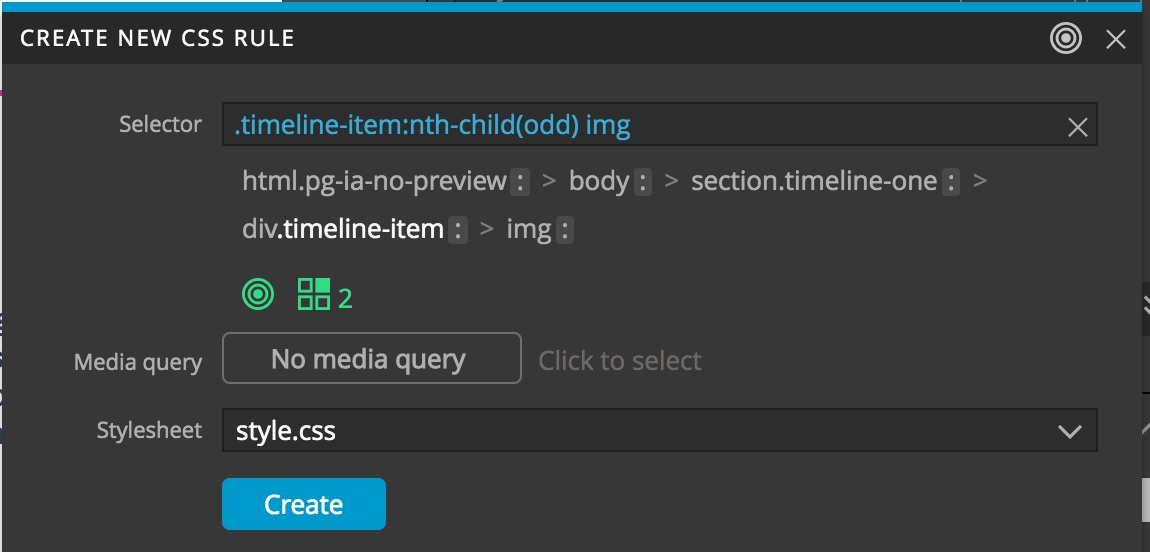
- Not too bad looking, but let’s alternate the positioning of the picture and description, plus fix the border for the first item. Since we are using flexbox for the timeline-items, we can easily change the order. Make a new ruleset by clicking on on the image in the first timeline-item and then the ellipsis in the Styles panel. Click on the ‘.timeline-item’ and then type ‘:nth-child(odd) img’.
- Add the rule:
order: 2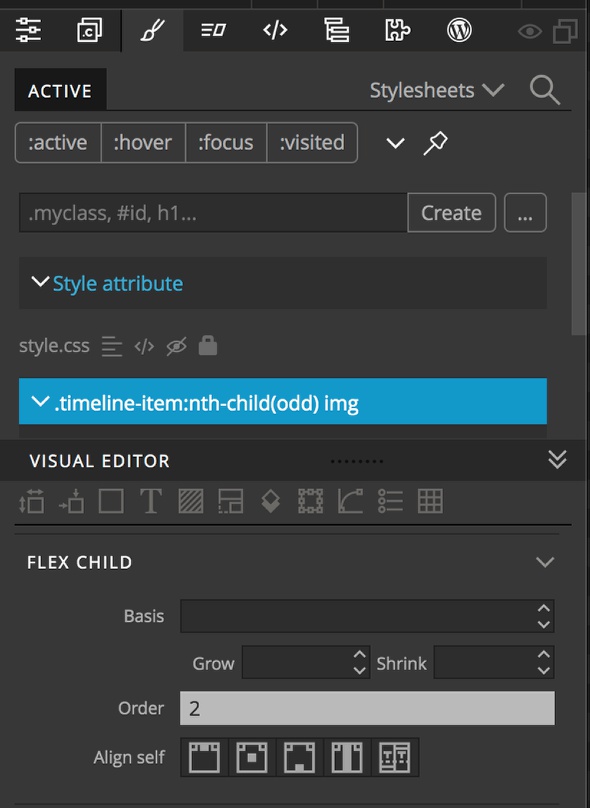
Almost done!
- To add a little padding to the descriptions, create rule sets to target each p tag.
‘.timeline-item:nth-child(odd) p’
padding-right: 20px‘.timeline-item:nth-child(even) p’
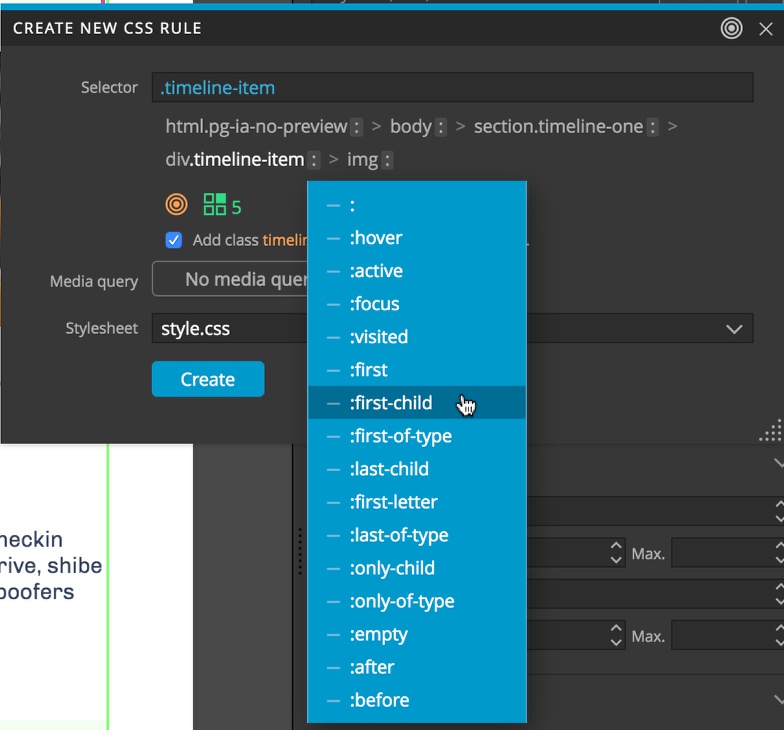
padding-left: 20px- Finally, if desired, remove the top border from the first item. with the first timeline-item selected, open the Styles panel, click the ellipsis, click the ‘.timeline-item’ class and then the colon following it. From the context menu select the ‘:first-child’ pseudo-class.
- Add the following rule:
border-top: 0That is it! If you want you can fool around with adding rounded corners to the borders, or making them dashed. There is a lot that could be done.
Building a dated timeline with a list
In this case we will keep the timeline a little simpler. Just a straight, vertical line with nodes for each date. I won’t go ito as much detail about adding the CSS rules – if you followed the first half you are a pro now!
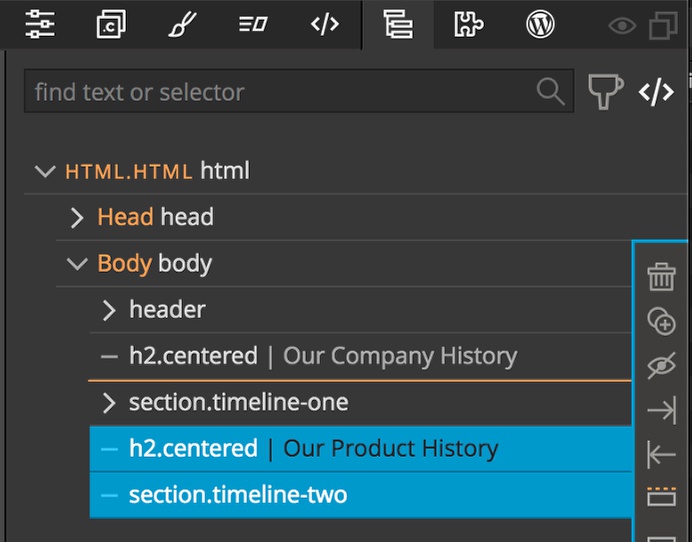
- I”m going to add a title for my second timeline by dragging an H2 element to the page, editing it, and adding the ‘.centered’ class.
- Next, I’m going to drag a section element to the page and give it a class of ‘timeline-two’. Like with the first section, if you only have a single timeline this isn’t really needed.
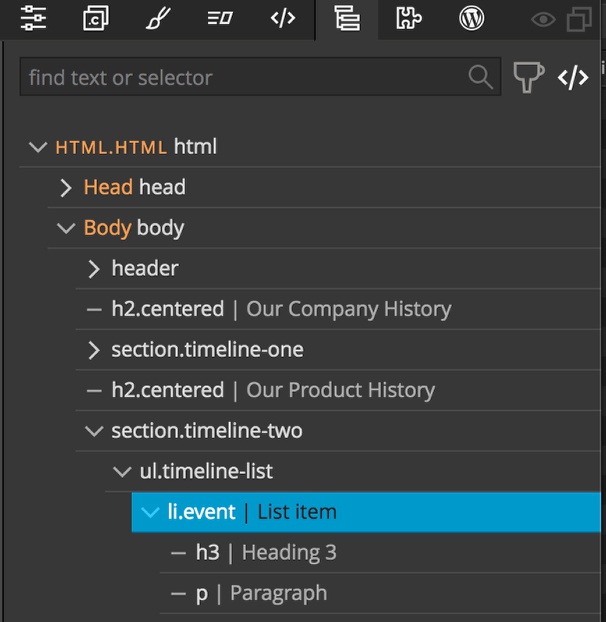
- In this case we are going to use a list to build our timeline. Drag an unordered list (ul) from the Library panel into the new section and give it a class of ‘timeline-list’.
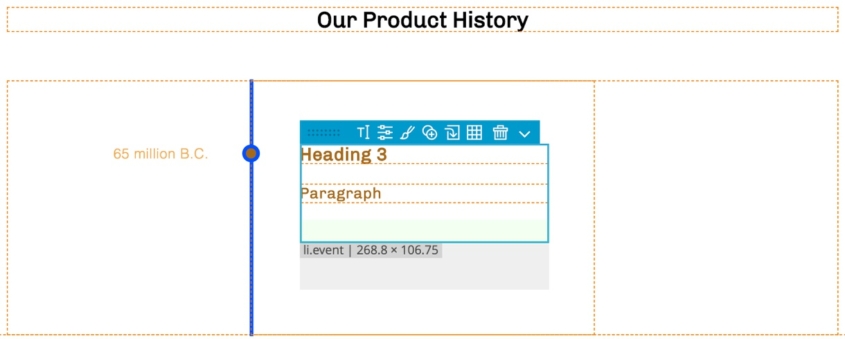
- Next, add a list item (li) and give it a class of ‘event’.
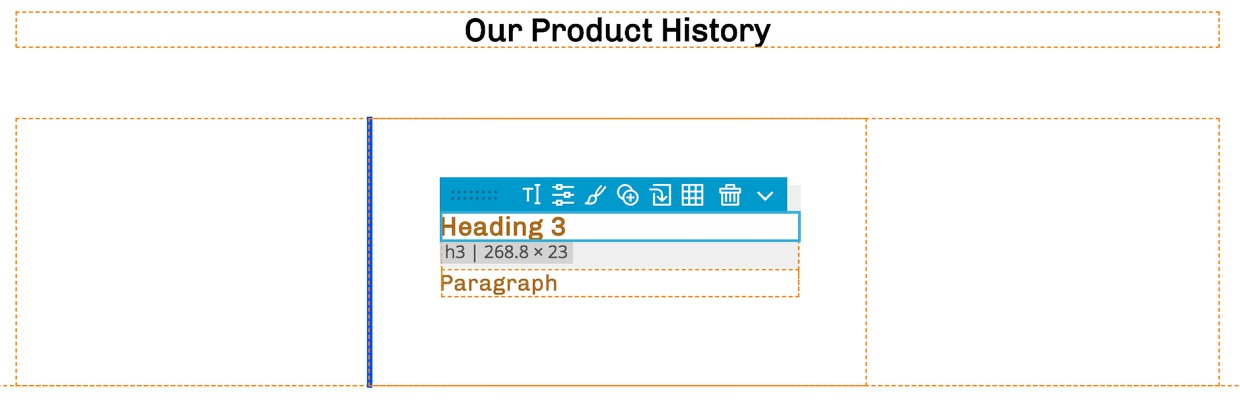
- Within the list item add an H3 element and a p element for the title and description.
Now for a little styling!
- Select the unordered list element with the ‘.timeline-list’ class name. Create a new ruleset based on that classname and add the following top-to-bottom in the visual editor:
max-width: 30%
margin: 50px auto /*(this mean '50px' top and bottom and 'auto' for left and right)*/
padding: 50px /*(all values)*/
position: relative
border-left: 4px solid #004ffc
border-bottom-right-radius: 4px
border-top-right-radius: 4px
font-family: 'Chivo', sans-serif
font-size: 1.03em
line-height: 1.4em
color: #a6681b
font-weight: 100
letter-spacing: 0.5px
text-align: left
list-style-type: none
So, now we have a line for our timeline, but no node or date, yet.
- Let’s add both. We will be adding them using ‘:before’ and ‘:after” pseudo-elements that need the correct positioning. Add the ruleset, ‘.timeline-list .event:before, .timeline-list .event:after’, by typing into the Styles panel input box and clicking ‘Create’. This will target both selectors.
- Add the following rules:
display: block
top: 0
position: absolute- Now create a single rule for ‘.timeline-list .event:before’ using the Styles panel ellipsis button.
- Add the following rules:
min-width: 120px
left: -217.5px;
font-family: 'Saira', sans-serif
font-size: 0.9em
color: #f2ad57
font-weight: 100
text-align: right
content: attr(data-date)
All but the last can be added using the visual editor.
- Now make a single rule for ‘.timeline-list .event:after’ using the Styles panel ellipsis button.
- Add the following rules:
width: 11px
height: 11px
top: 5px
left: -57.85px
border-radius: 50%
background: #a6681b
box-shadow: 0 0 0 4px #004ffc
content: ""
Okay! Now our styling is almost there, but we need to change up our base ‘.timeline-list .event’ to get the node in the correct place.
- Make a rule for ‘.timeline-list .event’ using the Styles panel ellipsis button and add the following rules:
padding-bottom: 25px
margin-bottom: 50px
position: relative- We still don’t have a date, but if you look at the single ‘:before’ rule you might get a clue how we add it. Select the list item with the ‘.event’ class name and then open the Properties panel. Click on ‘Add attribute’ and type ‘data-date’.
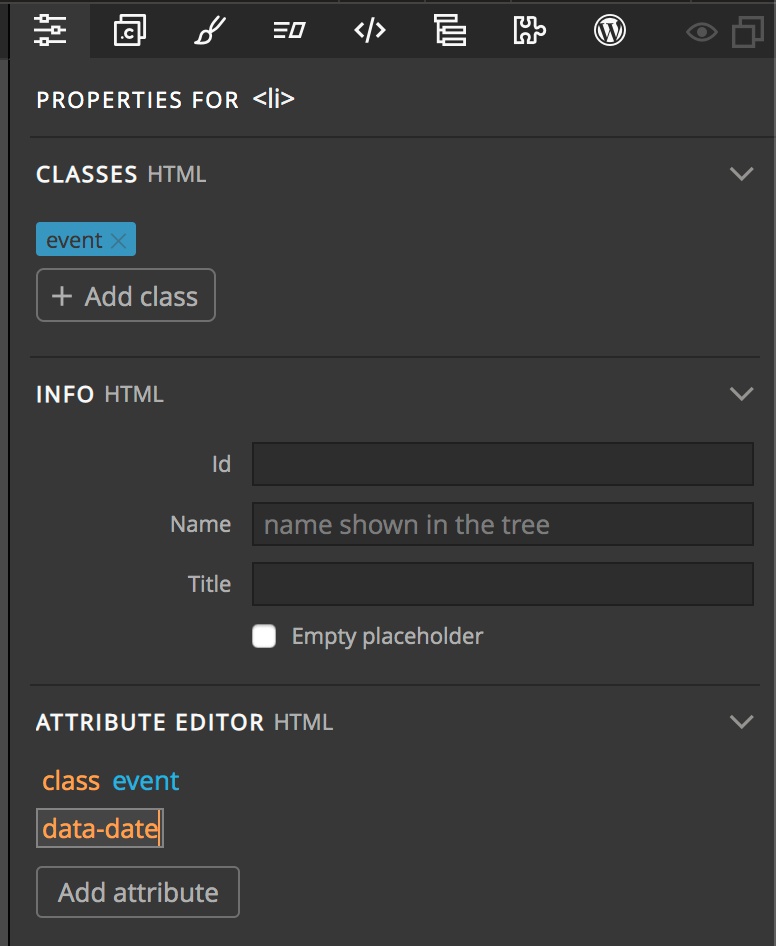
- Hit return and then type your date – for example, ’65 million B.C.’. The date will now show up to the left of the node.
- With that complete, we can right-click on the list item and from the context menu select ‘Add as HTML snippet’.
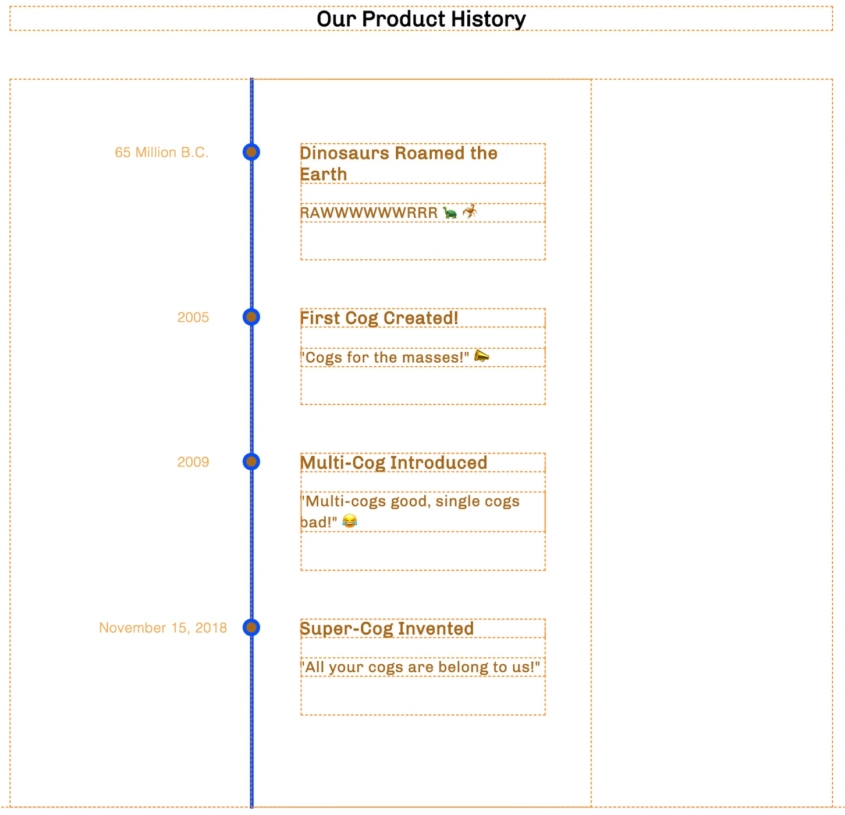
- To add additional timeline items we just have to drag the snippet from the Library into our unordered list on the page and edit the text and the date attribute.
Making a timeline with Tailwind CSS
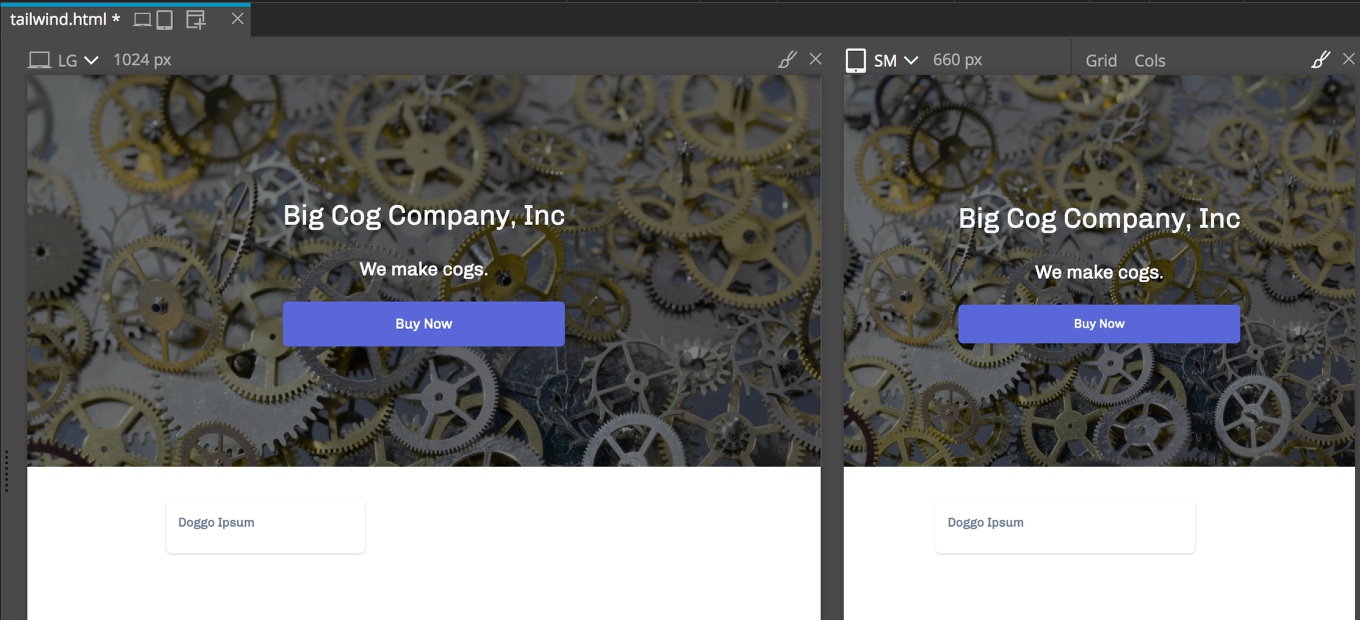
Once again we are going to start with a basic Tailwind page with an area for the timeline already set-up. Open up the starting template page ‘tailwind.html’ and let’s take a look.
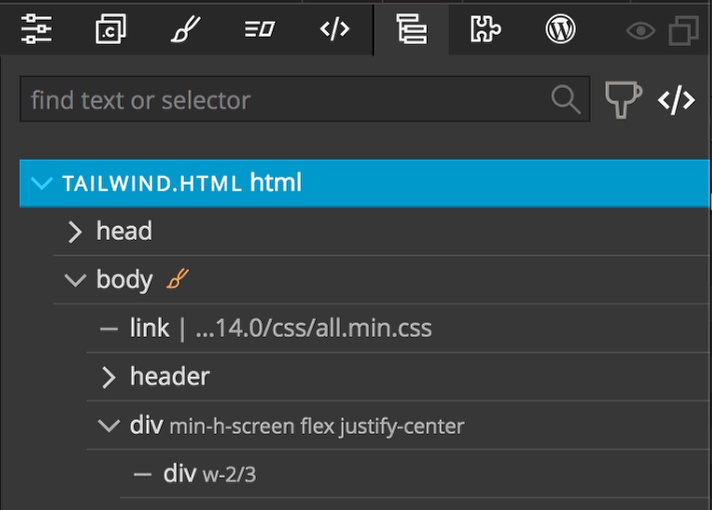
You can see that I’m using an outer div that has a height at least equal to the viewport height using the class ‘.min-h-screen’ I’m also giving that same div a display property of flex, and justifying the content to the center of the div.
Inside that div I’m adding another div with a width equal to 2/3 of the parental width using ‘.w-2/3’. All of our individual rows will be added inside of this parental div.
Let’s get started!
We are going to set up our timeline to be composed of rows with three sections. A large component box on the left, a center box for the timeline and date node, and a large component box on the right. The content will alternate on large screens and then collapse down to just the content boxes all on the left, with the timeline and date nodes to the right on smaller screens
- Drag a div from the Library to the Page View or Tree panel. Make sure to nest it within the parental div with the class ‘.w-2/3’.
- With the new div selected, open the Properties panel and set the width to ‘full’, display to ‘flex’, and the flex-direction to ‘row’. Technically we don’t have to define a flex-direction, but it isn’t a bad practice.
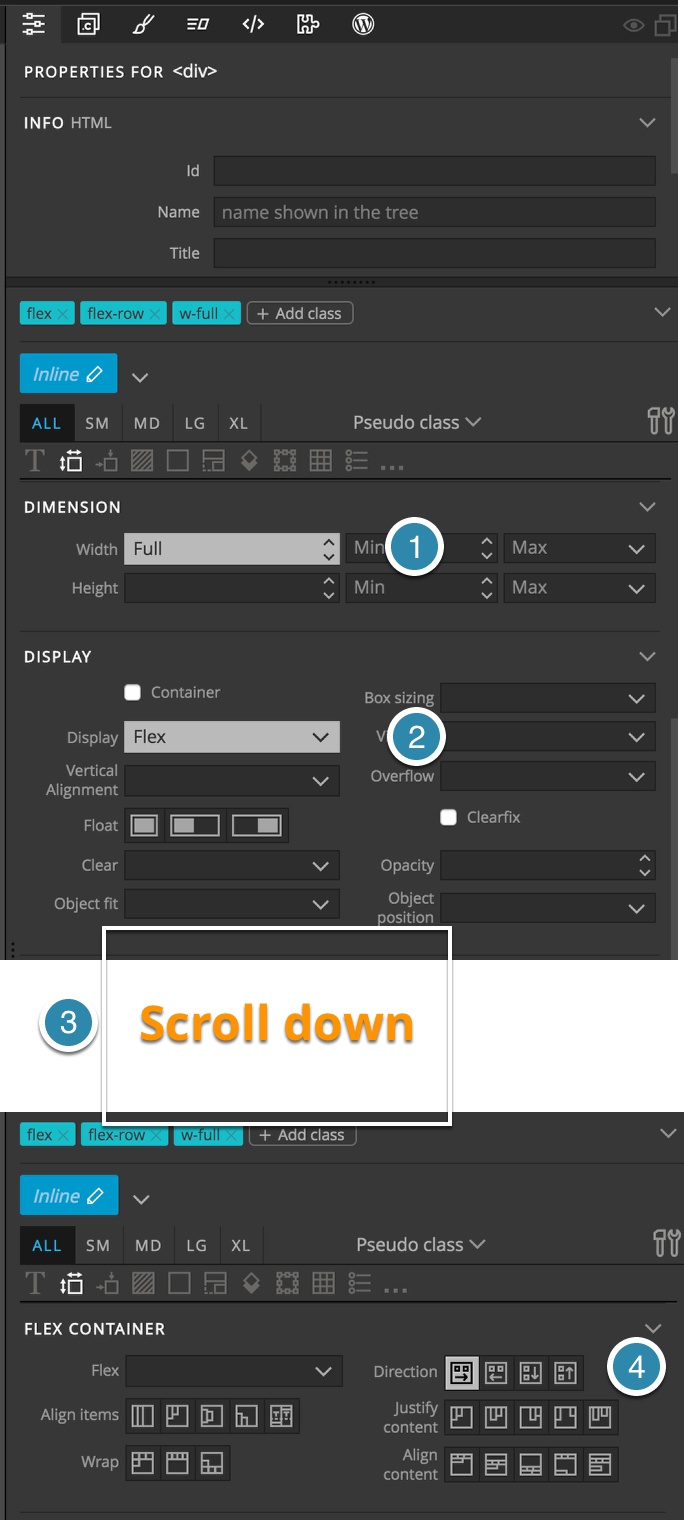
Now we will set-up our left hand content box. Drag another div inside the flex div and give it the classes ‘px-2 py-10 w-4/5 md:w-2/5’.
This change in width means that on screens up to medium the left column will take up 4/5 of the entire width, while on medium up, it will take up only 2/5 of the width.
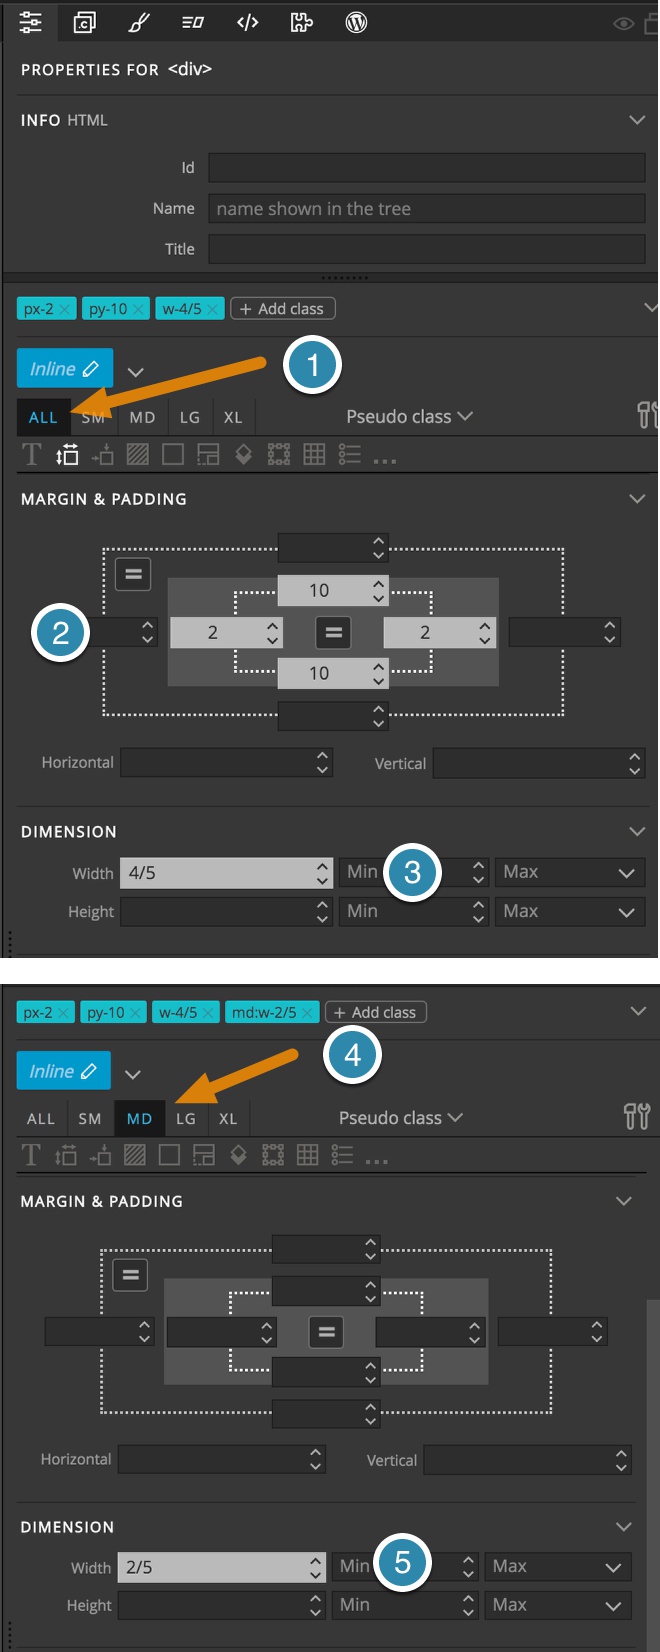
- You can do this by opening the Properties panel and making sure that first the “ALL” tab is selected. Then setting the padding by selecting ‘2’ in the left and right padding input boxes and ’10’ in the top and bottom padding input boxes. Next select ‘4/5’ in the “Dimension” section for width. Next, change the tab to “MD” and select ‘2/5’ for width.
- Now drag another div inside our column to make the box for our content. Give this div classes of ‘text-grey-600 px4 py-5 w-full flex bg-white rounded-lg flex-col shadow’.
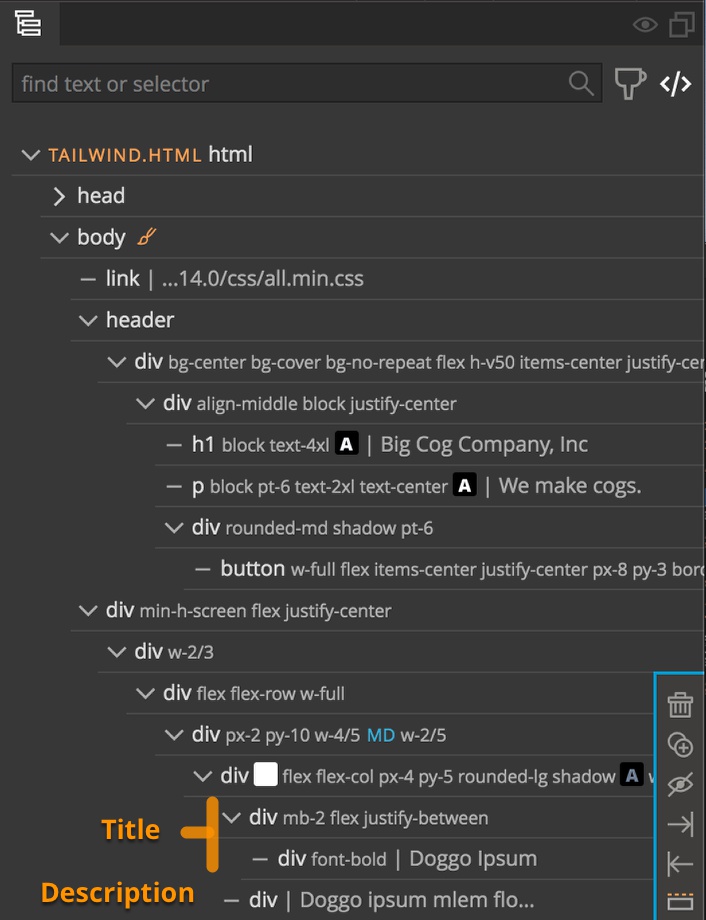
- Now we will add the actual content inside the box. First a title. Drag a div inside our newly created content box and add classes of ‘mb-2 flex justify-between’. Inside this add another div with a class of ‘font-bold’ then add your title. I’m going to add ‘Doggo Ipsum’. Here is what it looks like so far.
- Add another div below and add your description – I’m going to add some copy from Doggo Ipsum, because dogs! Make sure that you don’t embed the description div in the title div.
- Next we will add another section to contain the timeline and date node. Make sure the outside div is at the same level in the DOM tree as the div with a width of ‘4/5’.
This will be comprised of three nested divs. The first should have classes of ‘w-1/5 flex justify-center’. The next should have classes of ‘w-1 h-full flex relative bg-green-300 items-center justify-center’.
The inner-most should have classes of ‘leading-none font-thin text-center w-24 h-full flex absolute z-10 bg-white rounded-full border-2 border-green-300 flex-col justify-center’.
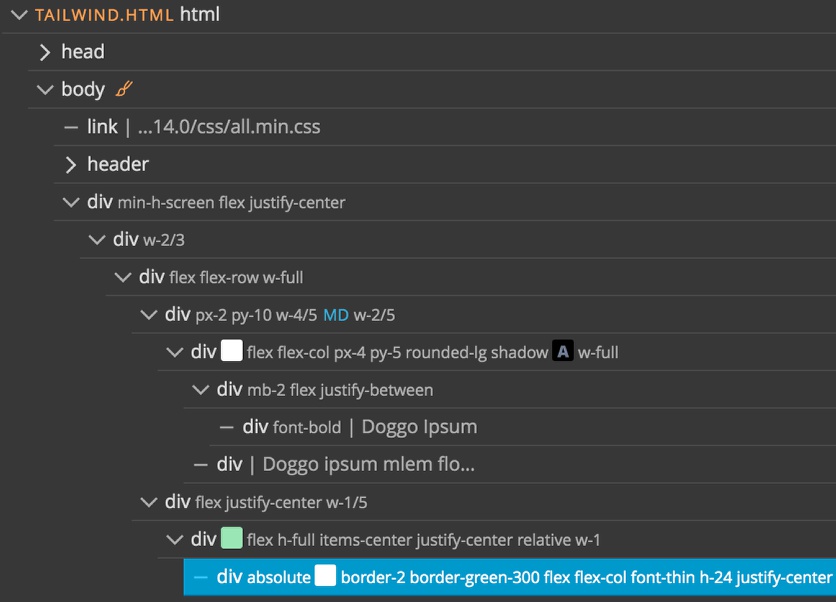
Note: the list of classes is cut-off in this picture.
- To add our date add one or more divs with the date inside. I added three divs – one for month, one for day, and one for year.
Looking pretty good! Let’s add the next dates in our time line.
- Much like with the other two timelines, we are going to save our initial timeline unit to the library as a snippet. Right-click on the div just below the one with a class of ‘w-2/3’ and from the context menu select ‘Add as HTML snippet’.
- Drag a new timeline item to the Page View or Tree panel below our first, but embedded within the div with a class of ‘w-2/3’. This will look fine on the small view, but on medium and larger we want to alternate the order.
- We are going to accomplish the change in order by adding three classes, one to the item outermost div, and one to the content-containing div. Select the outermost div and add the class ‘md:justify-end’. Do this by clicking the ‘MD’ tab’ and then the ‘Justify content’ end icon.
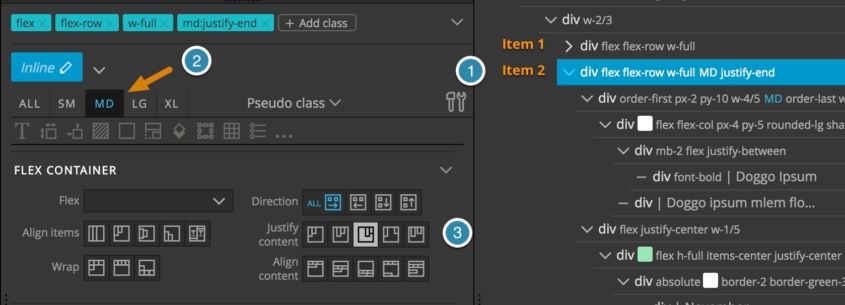
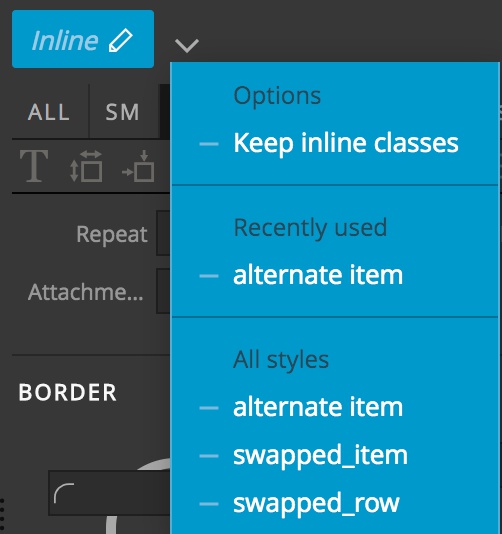
- Now select the next div and add classes of ‘order-first md:order-last’. Once we add those classes, we can actually save them to make it a little quicker for future items. Do this by clicking on the pencil icon at the top of the Tailwind classes panel and give the style a name – for example ‘alternate item’. Then on any new items that you want swapped to the right just click the downward caret and select the style.
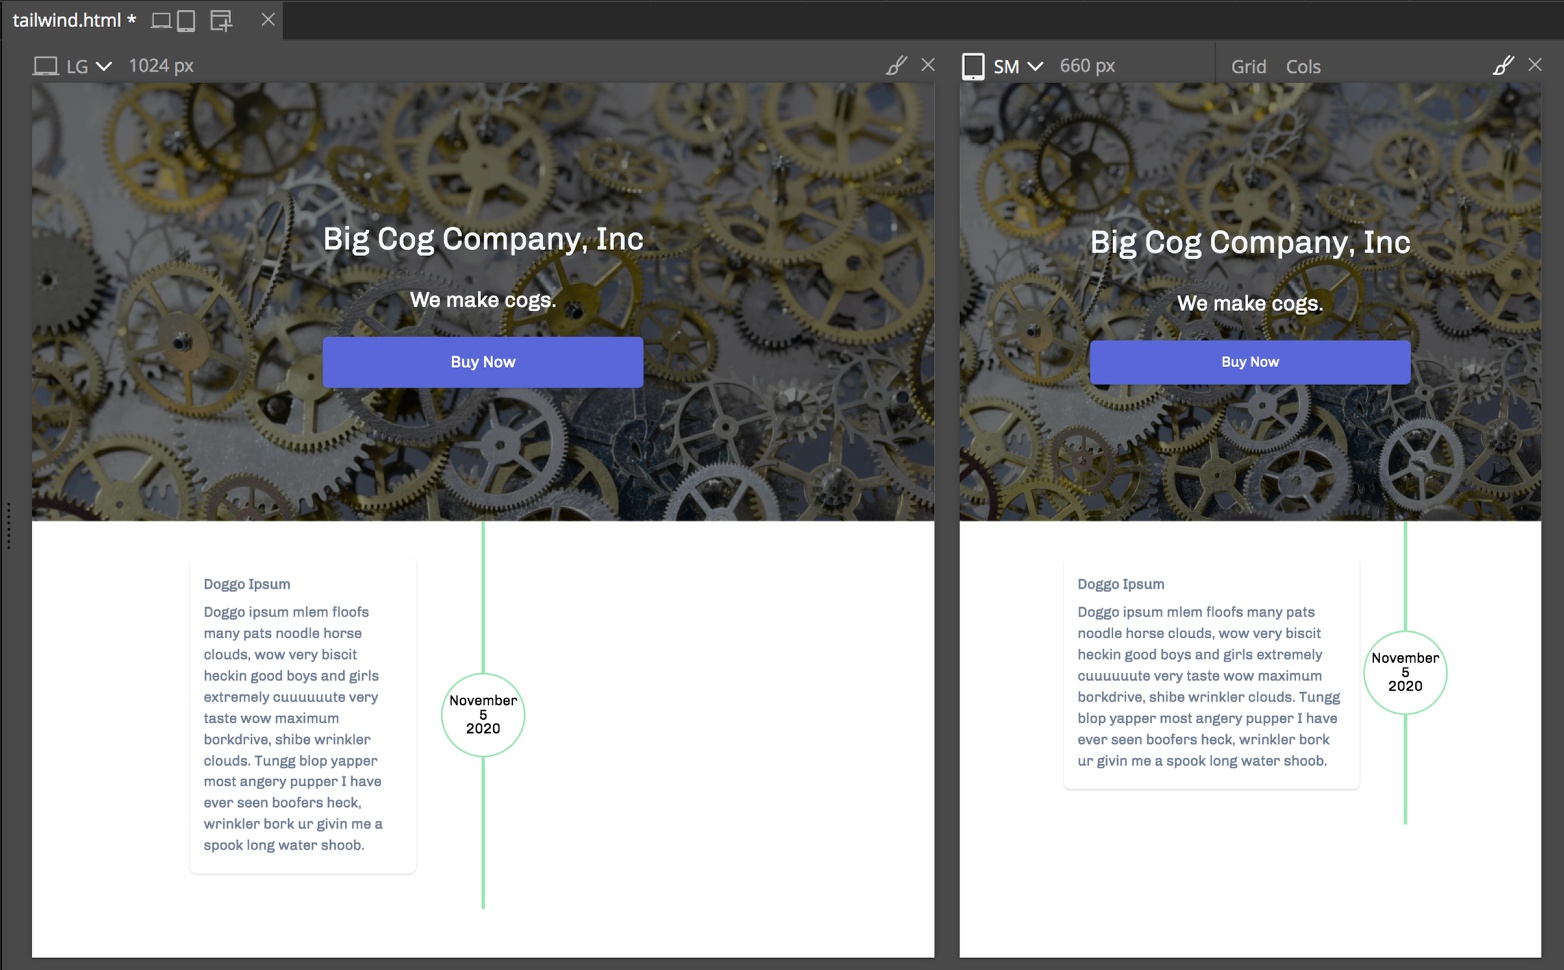
Our final timeline looks pretty good!
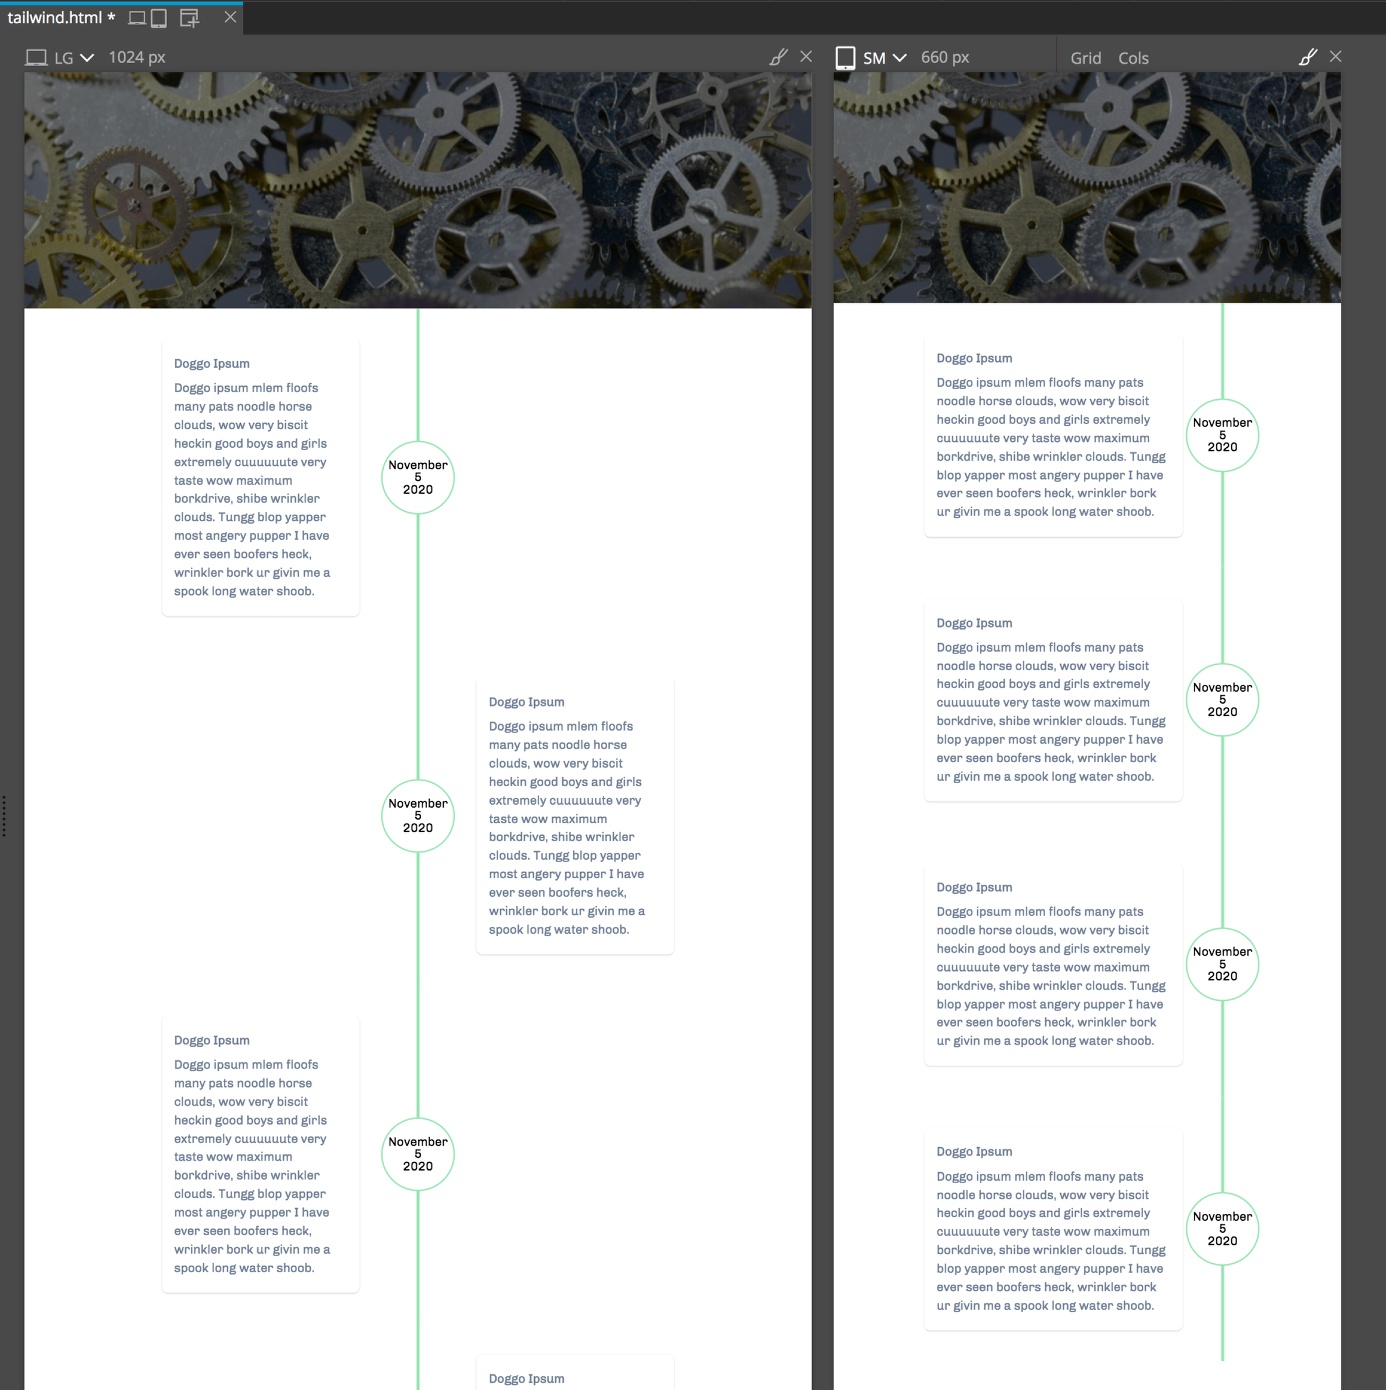
Obviously you can style this timeline to match the colors , font selections and other styles for your site. For example, you could change the date node to be square, instead of round, or add an image into the content cards.
That is it for this tutorial. You can download the finished project. I hope it helps you to put together your pages a little quicker and easier in Pinegrow.
Discuss this tutorial
Have questions or comments about this tutorial? Let’s talk about it on our forum.
Get in touch
Would you like to see your favorite theme or blocks library featured in the next tutorial? Let us know in the forum or by email!