Vue Designer is a visual IDE for Vue applications. It works with every Vite project and frameworks such as Nuxt and Iles.
Firstly, if you haven’t already, take a moment to visit the landing page for a quick summary of Vue Designer.
Quick Start
You can watch our short guide, or scroll down past the video for step-by-step instructions.
Open your Existing Project
If you are new to Vue Designer, we recommend starting with one of our quick-start templates or sample apps, as outlined in this guide.
That being said, it’s important to note that you can open any of your existing Vite-powered Vue apps in Vue Designer to visually work on your components. Please refer to the Config Panel guide for instructions.
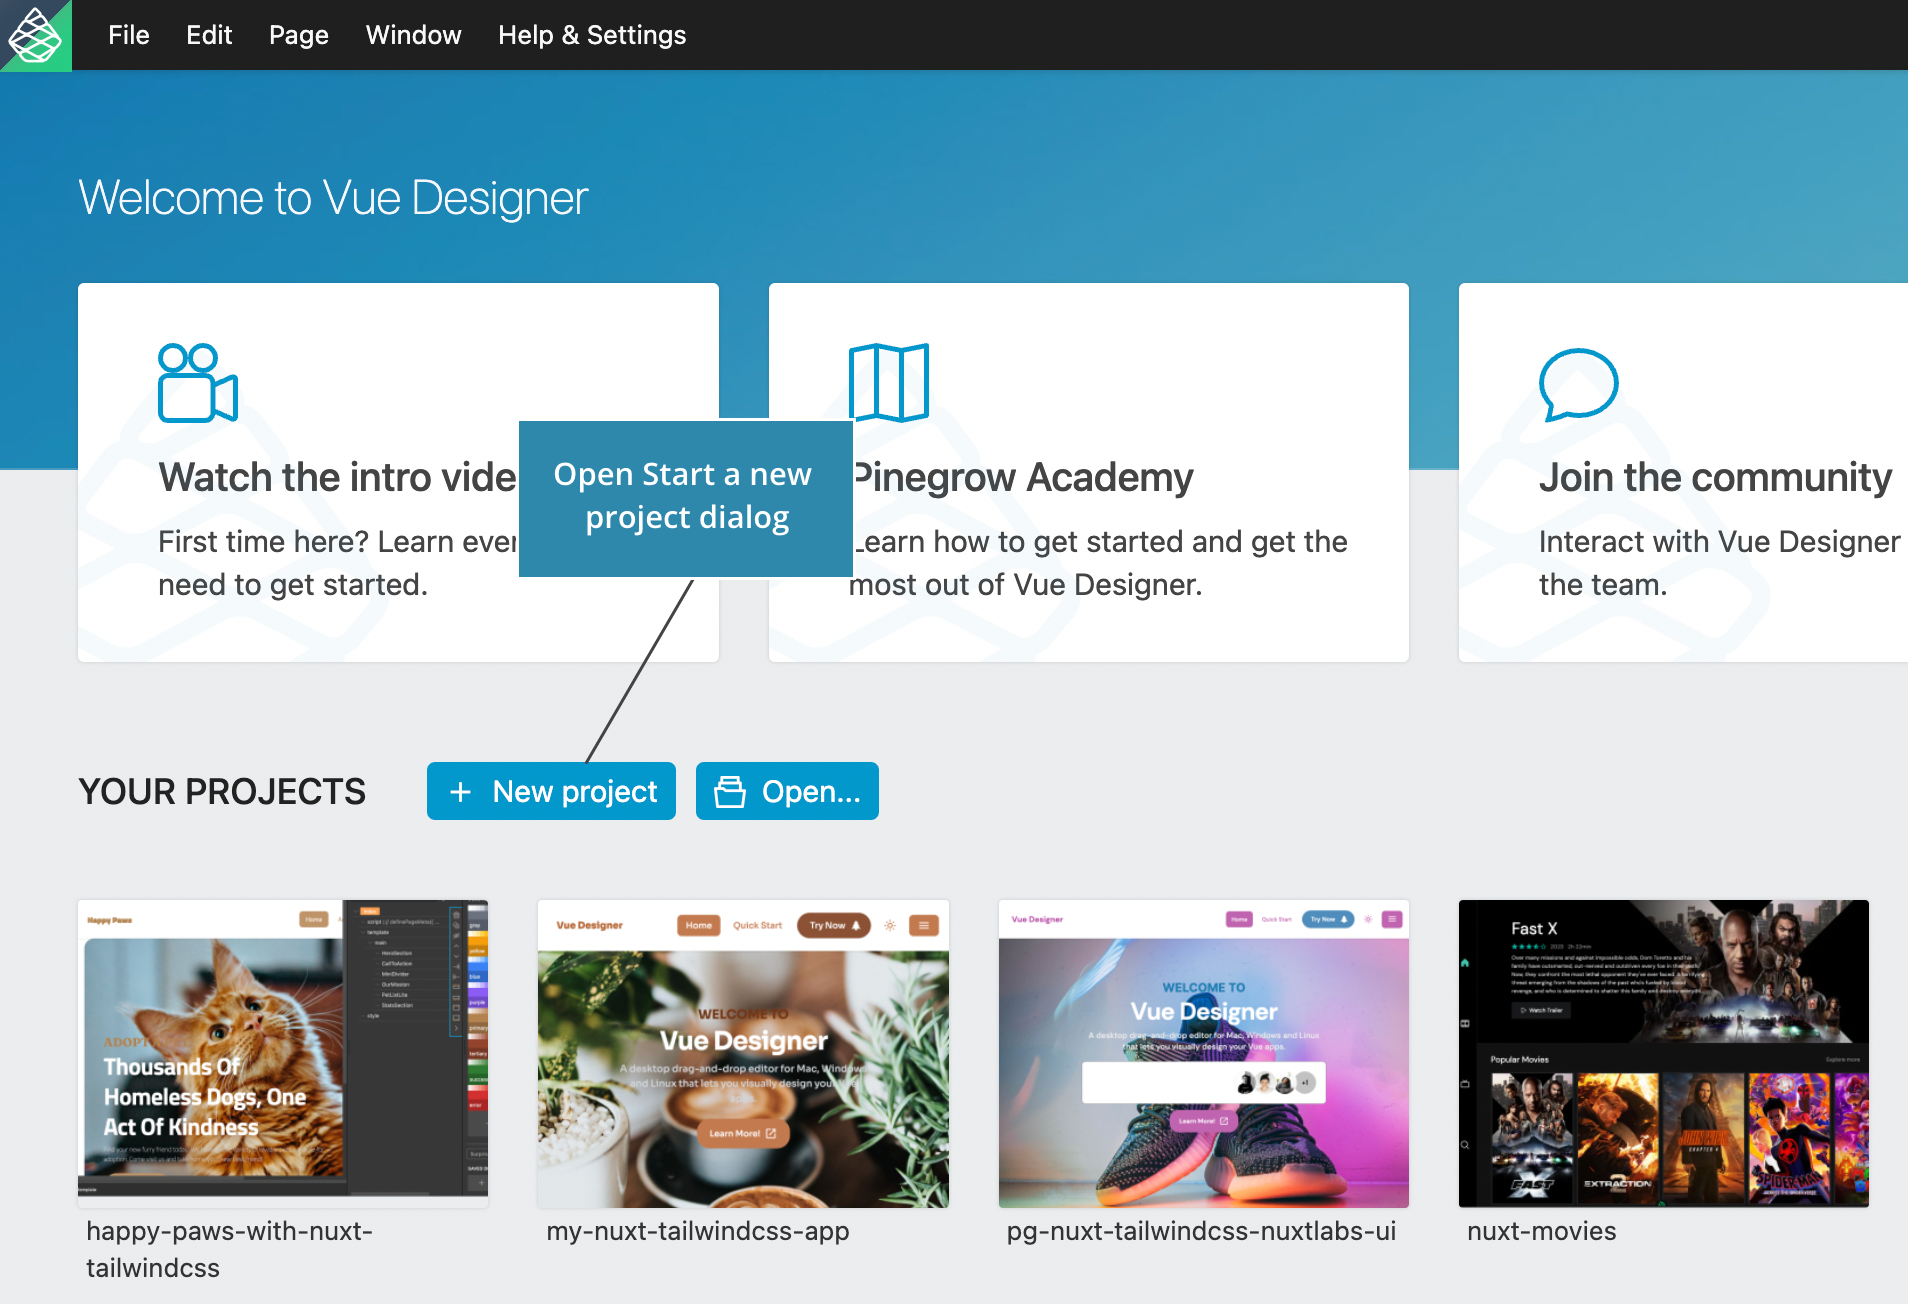
Create a New Project
To create a new project from the start screen, follow these steps:
Select the + New Project button.
The Start a new project dialog will appear, presenting you with a dual menu. The first row displays Vite and other supported meta-frameworks, while the second row displays the supported CSS/UI frameworks.
Note: In the future, we may add support for additional frameworks. Therefore, you may see more options in the dual menu than those currently displayed here.
Choose your desired combination from the available options.
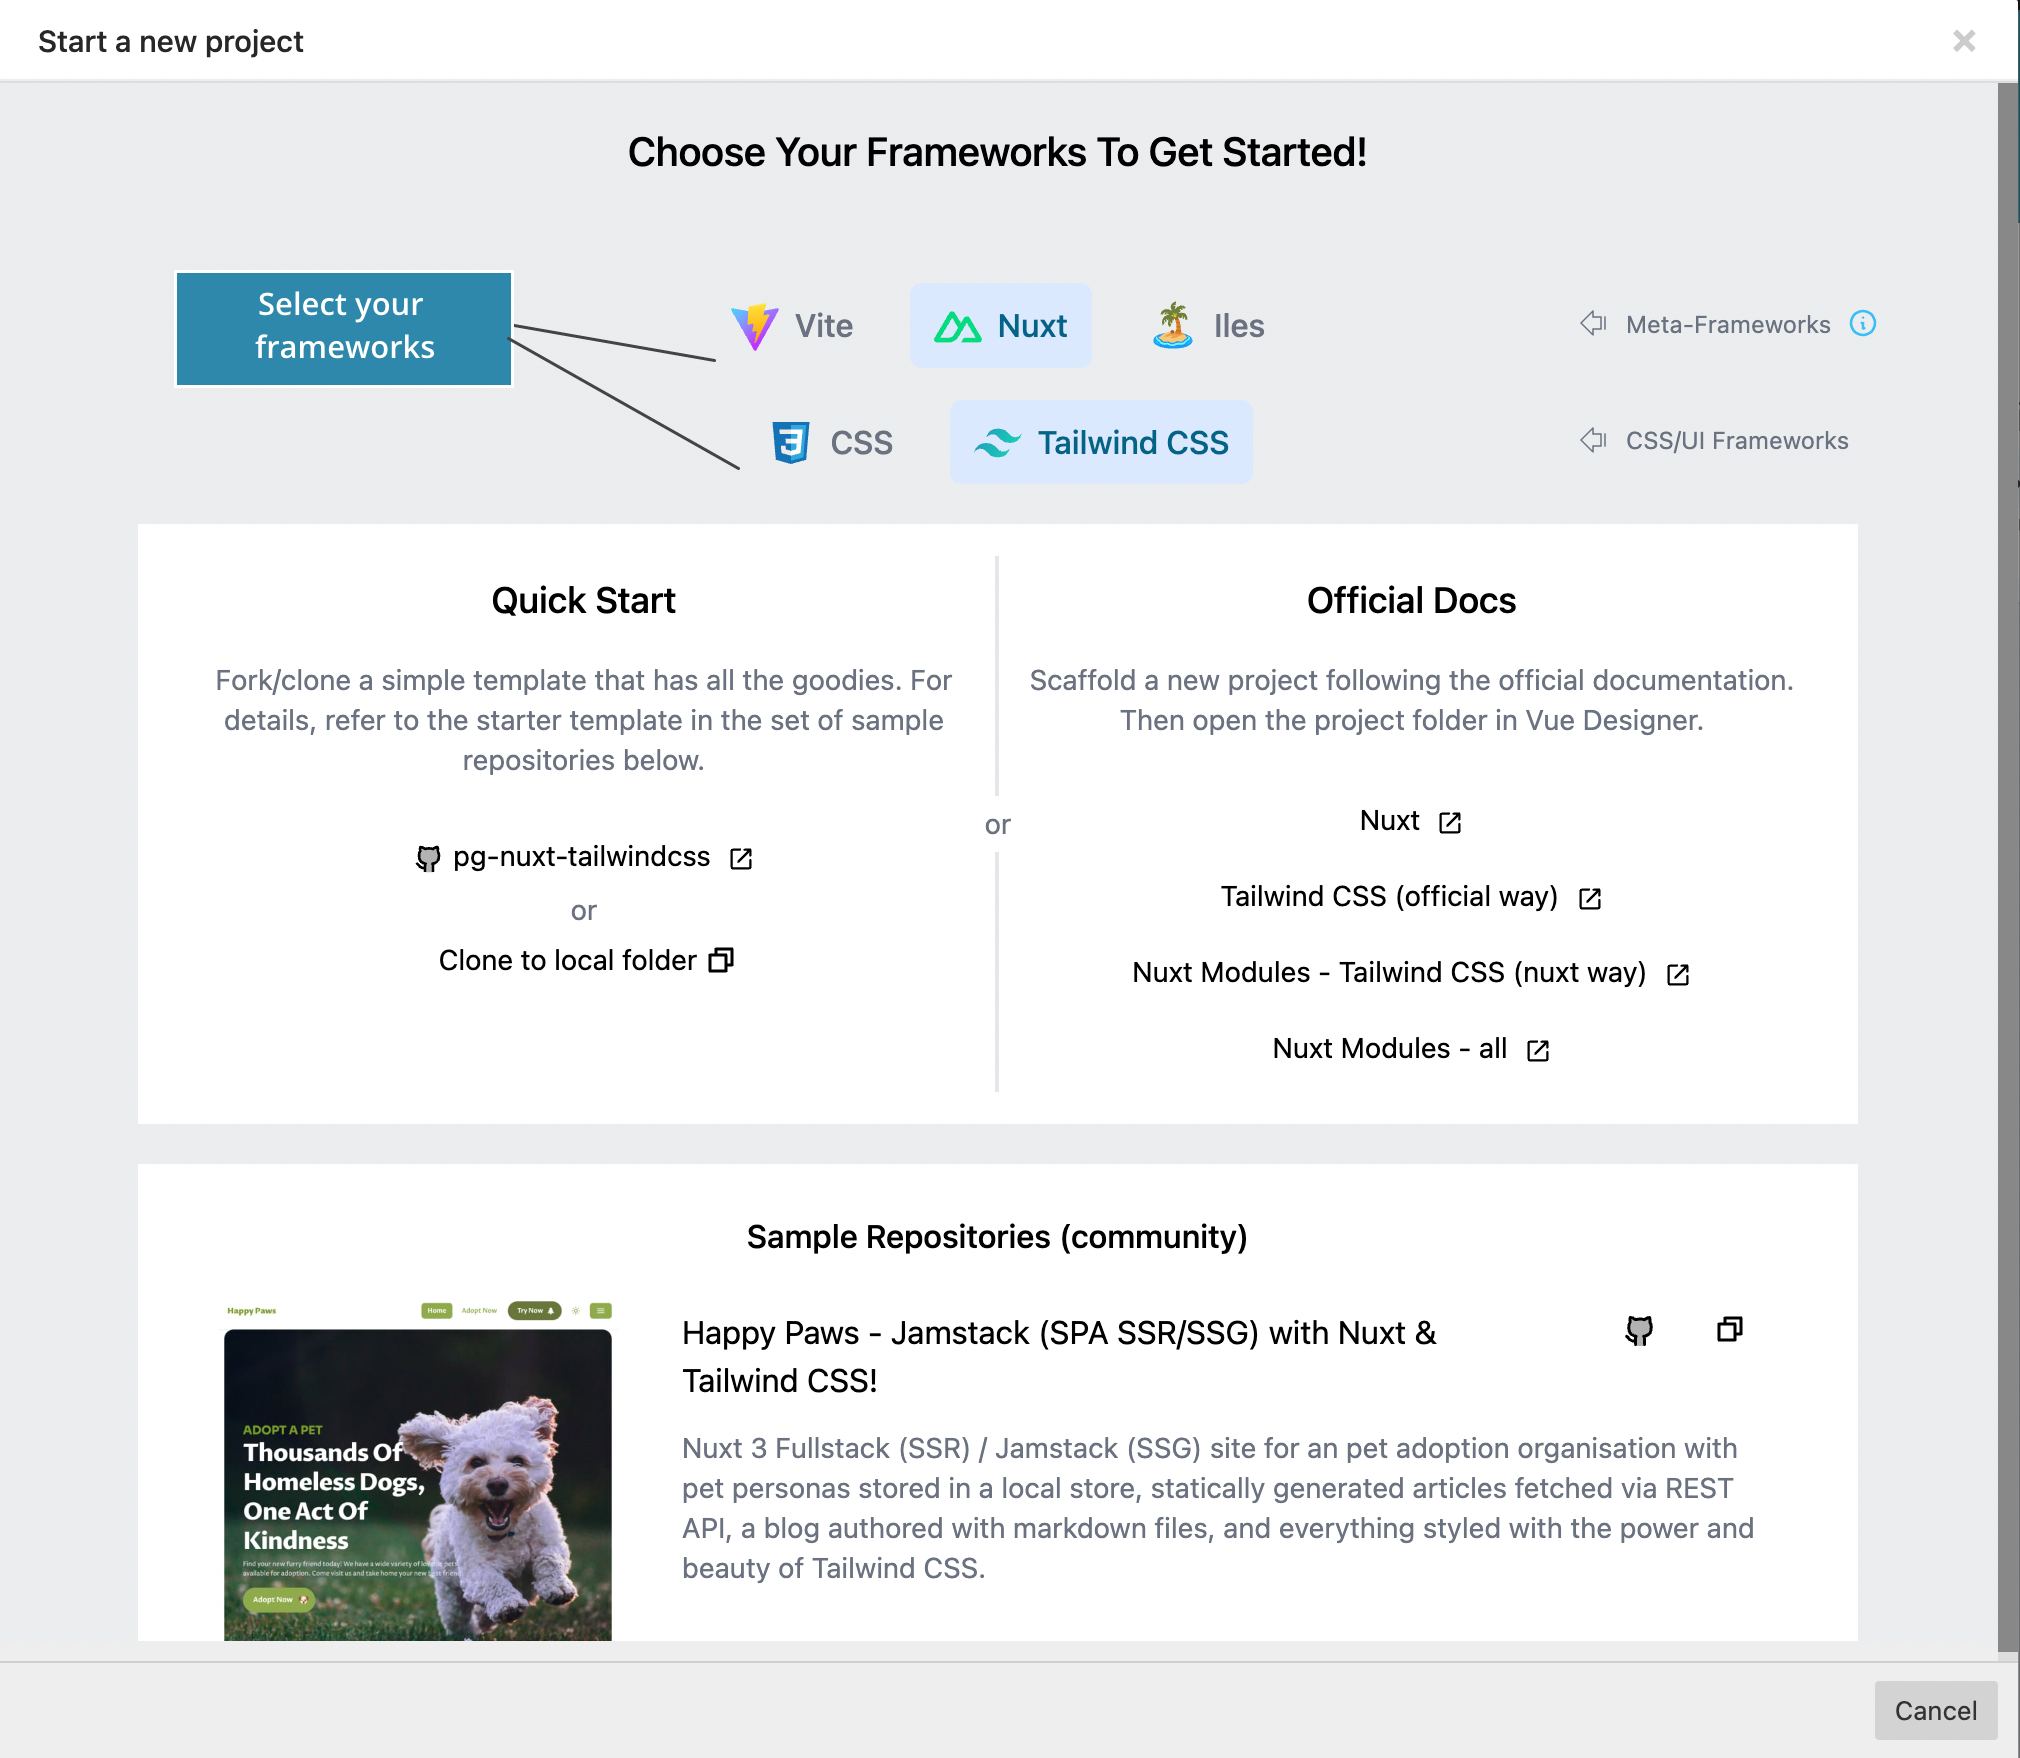
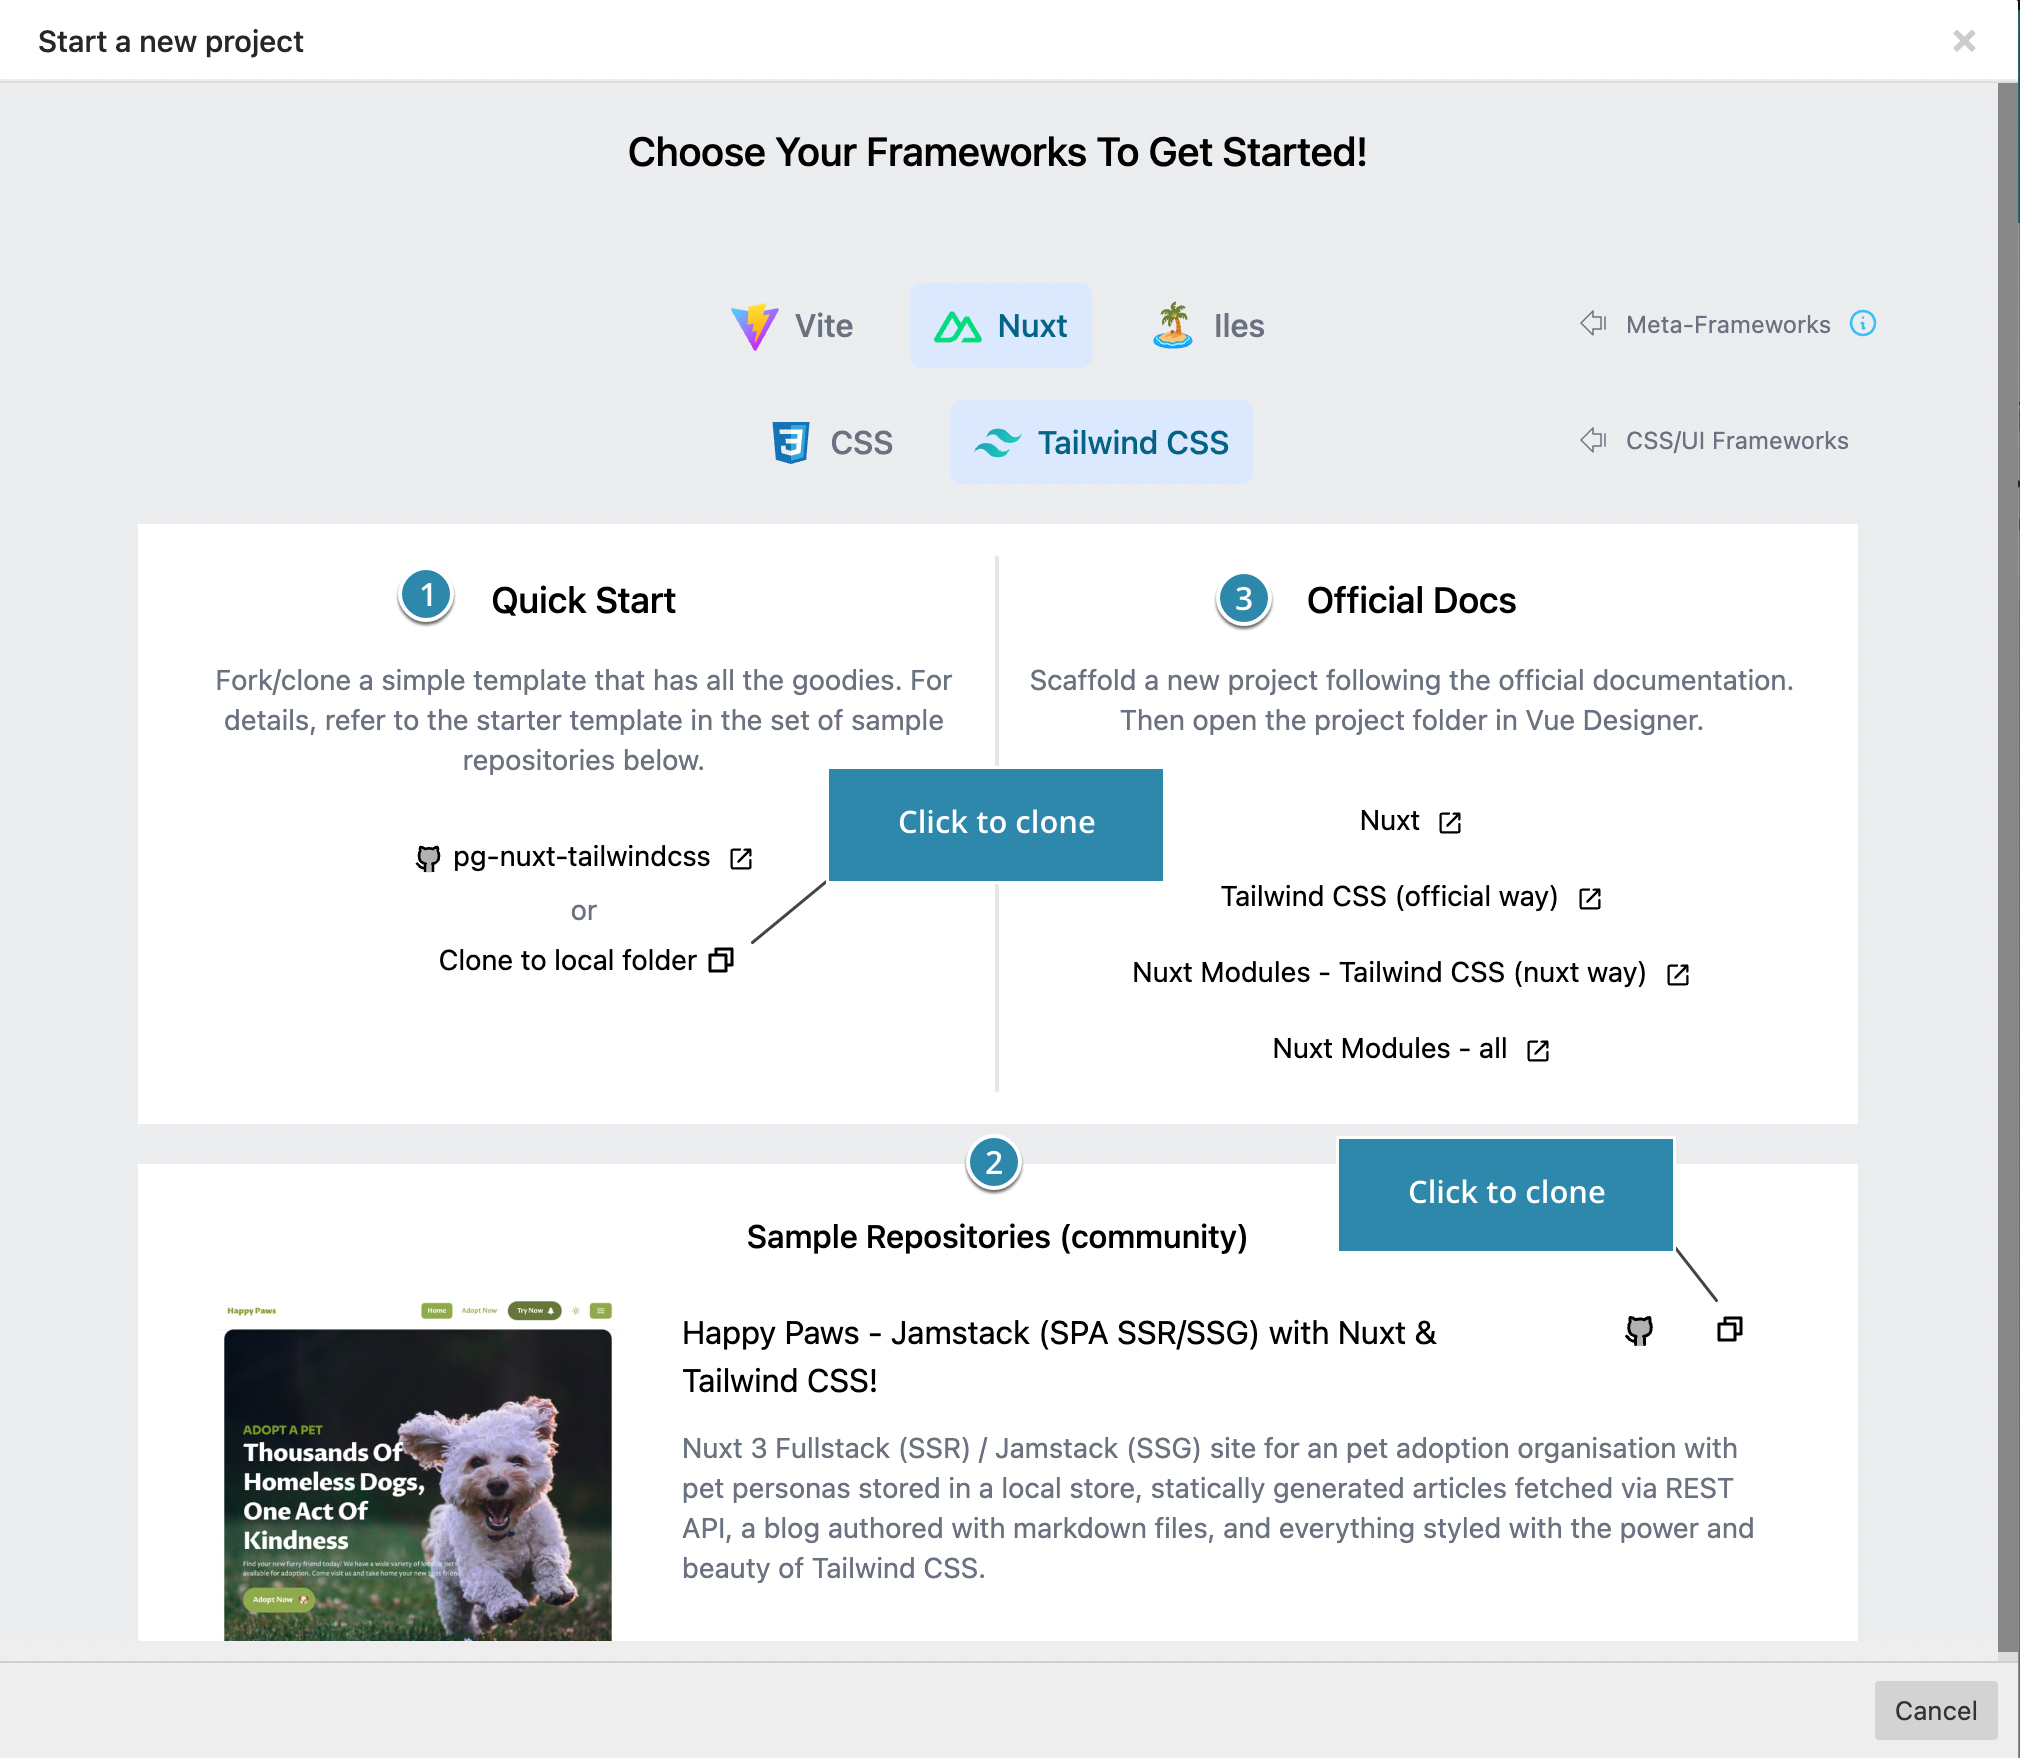
There are three ways to scaffold a new project:
- Quick Start – Fork or clone our quick-start templates from GitHub. Click on the Clone to local folder button, and the rest of this guide will cover this workflow.
- Sample Apps – You can also fork or clone one of the sample apps. Scroll down to discover more apps. Click on the copy icon, which performs the same action as cloning the quick-start template mentioned in (1) above.
- Official Docs – This requires adding the Pinegrow Vite Plugin or integration modules. Refer to Config Panel guide for instructions.
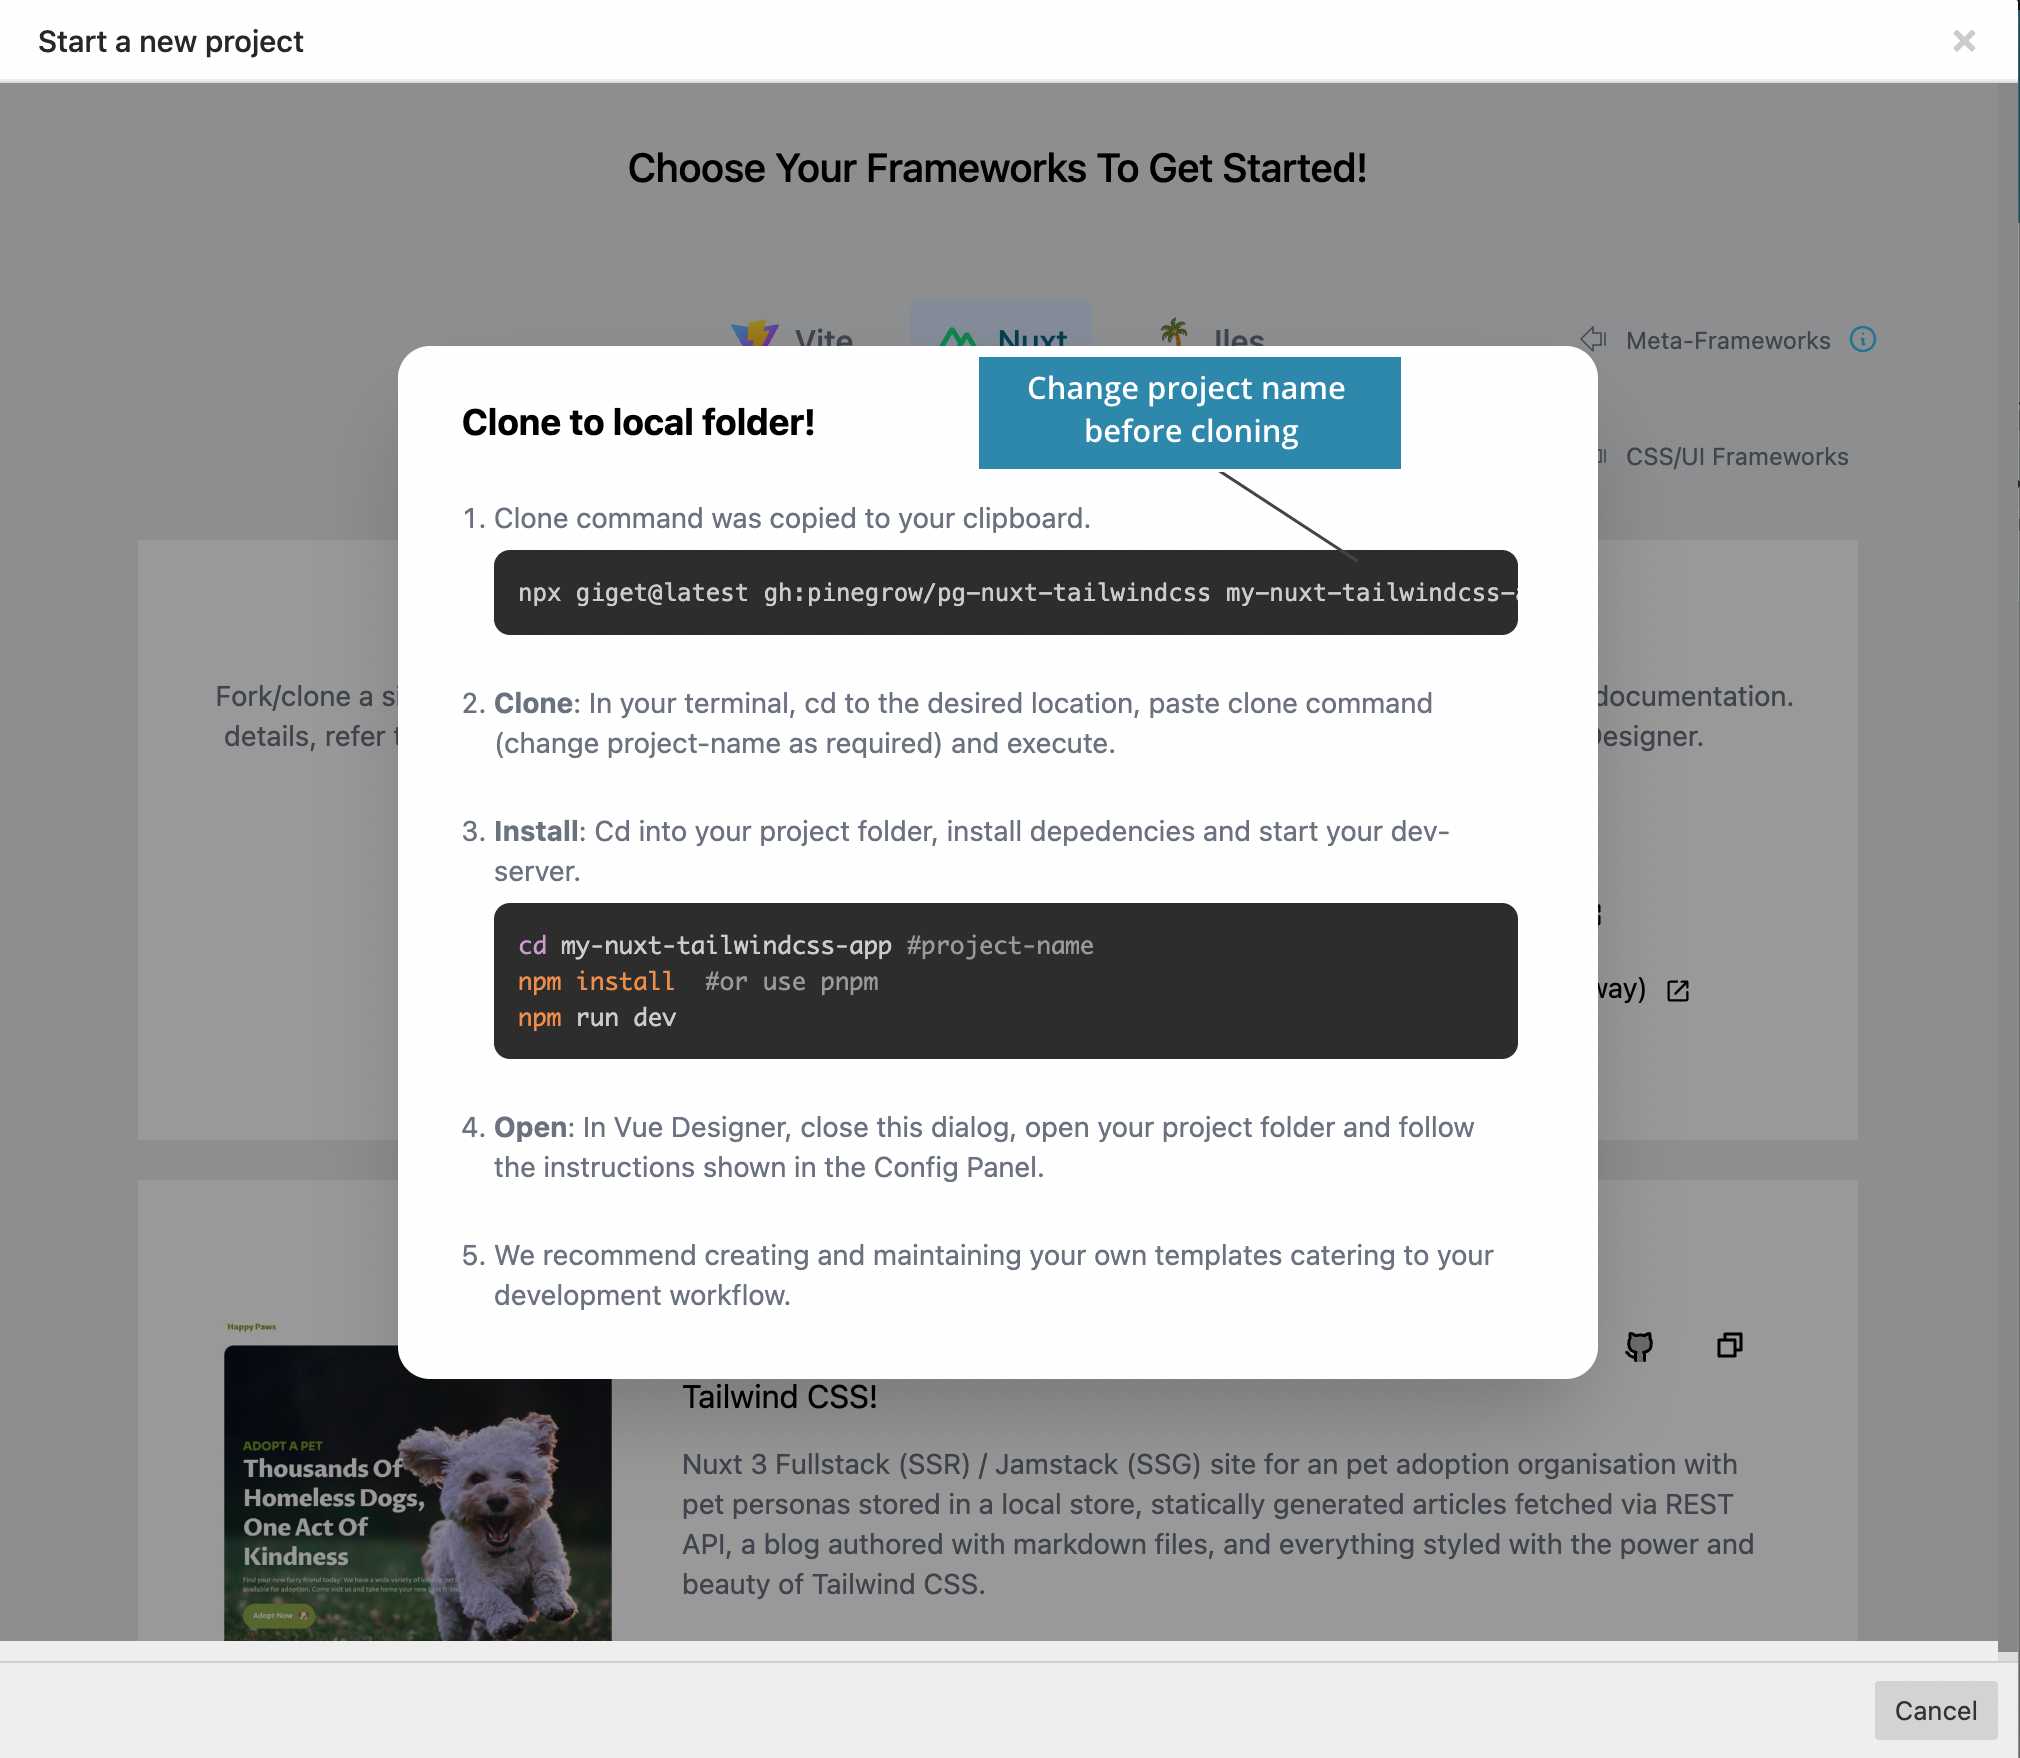
The clone command will be copied to your clipboard. Follow the instructions provided in this dialog. Feel free to change the name of the project folder in step 1 (e.g., my-nuxt-tailwindcss-app).
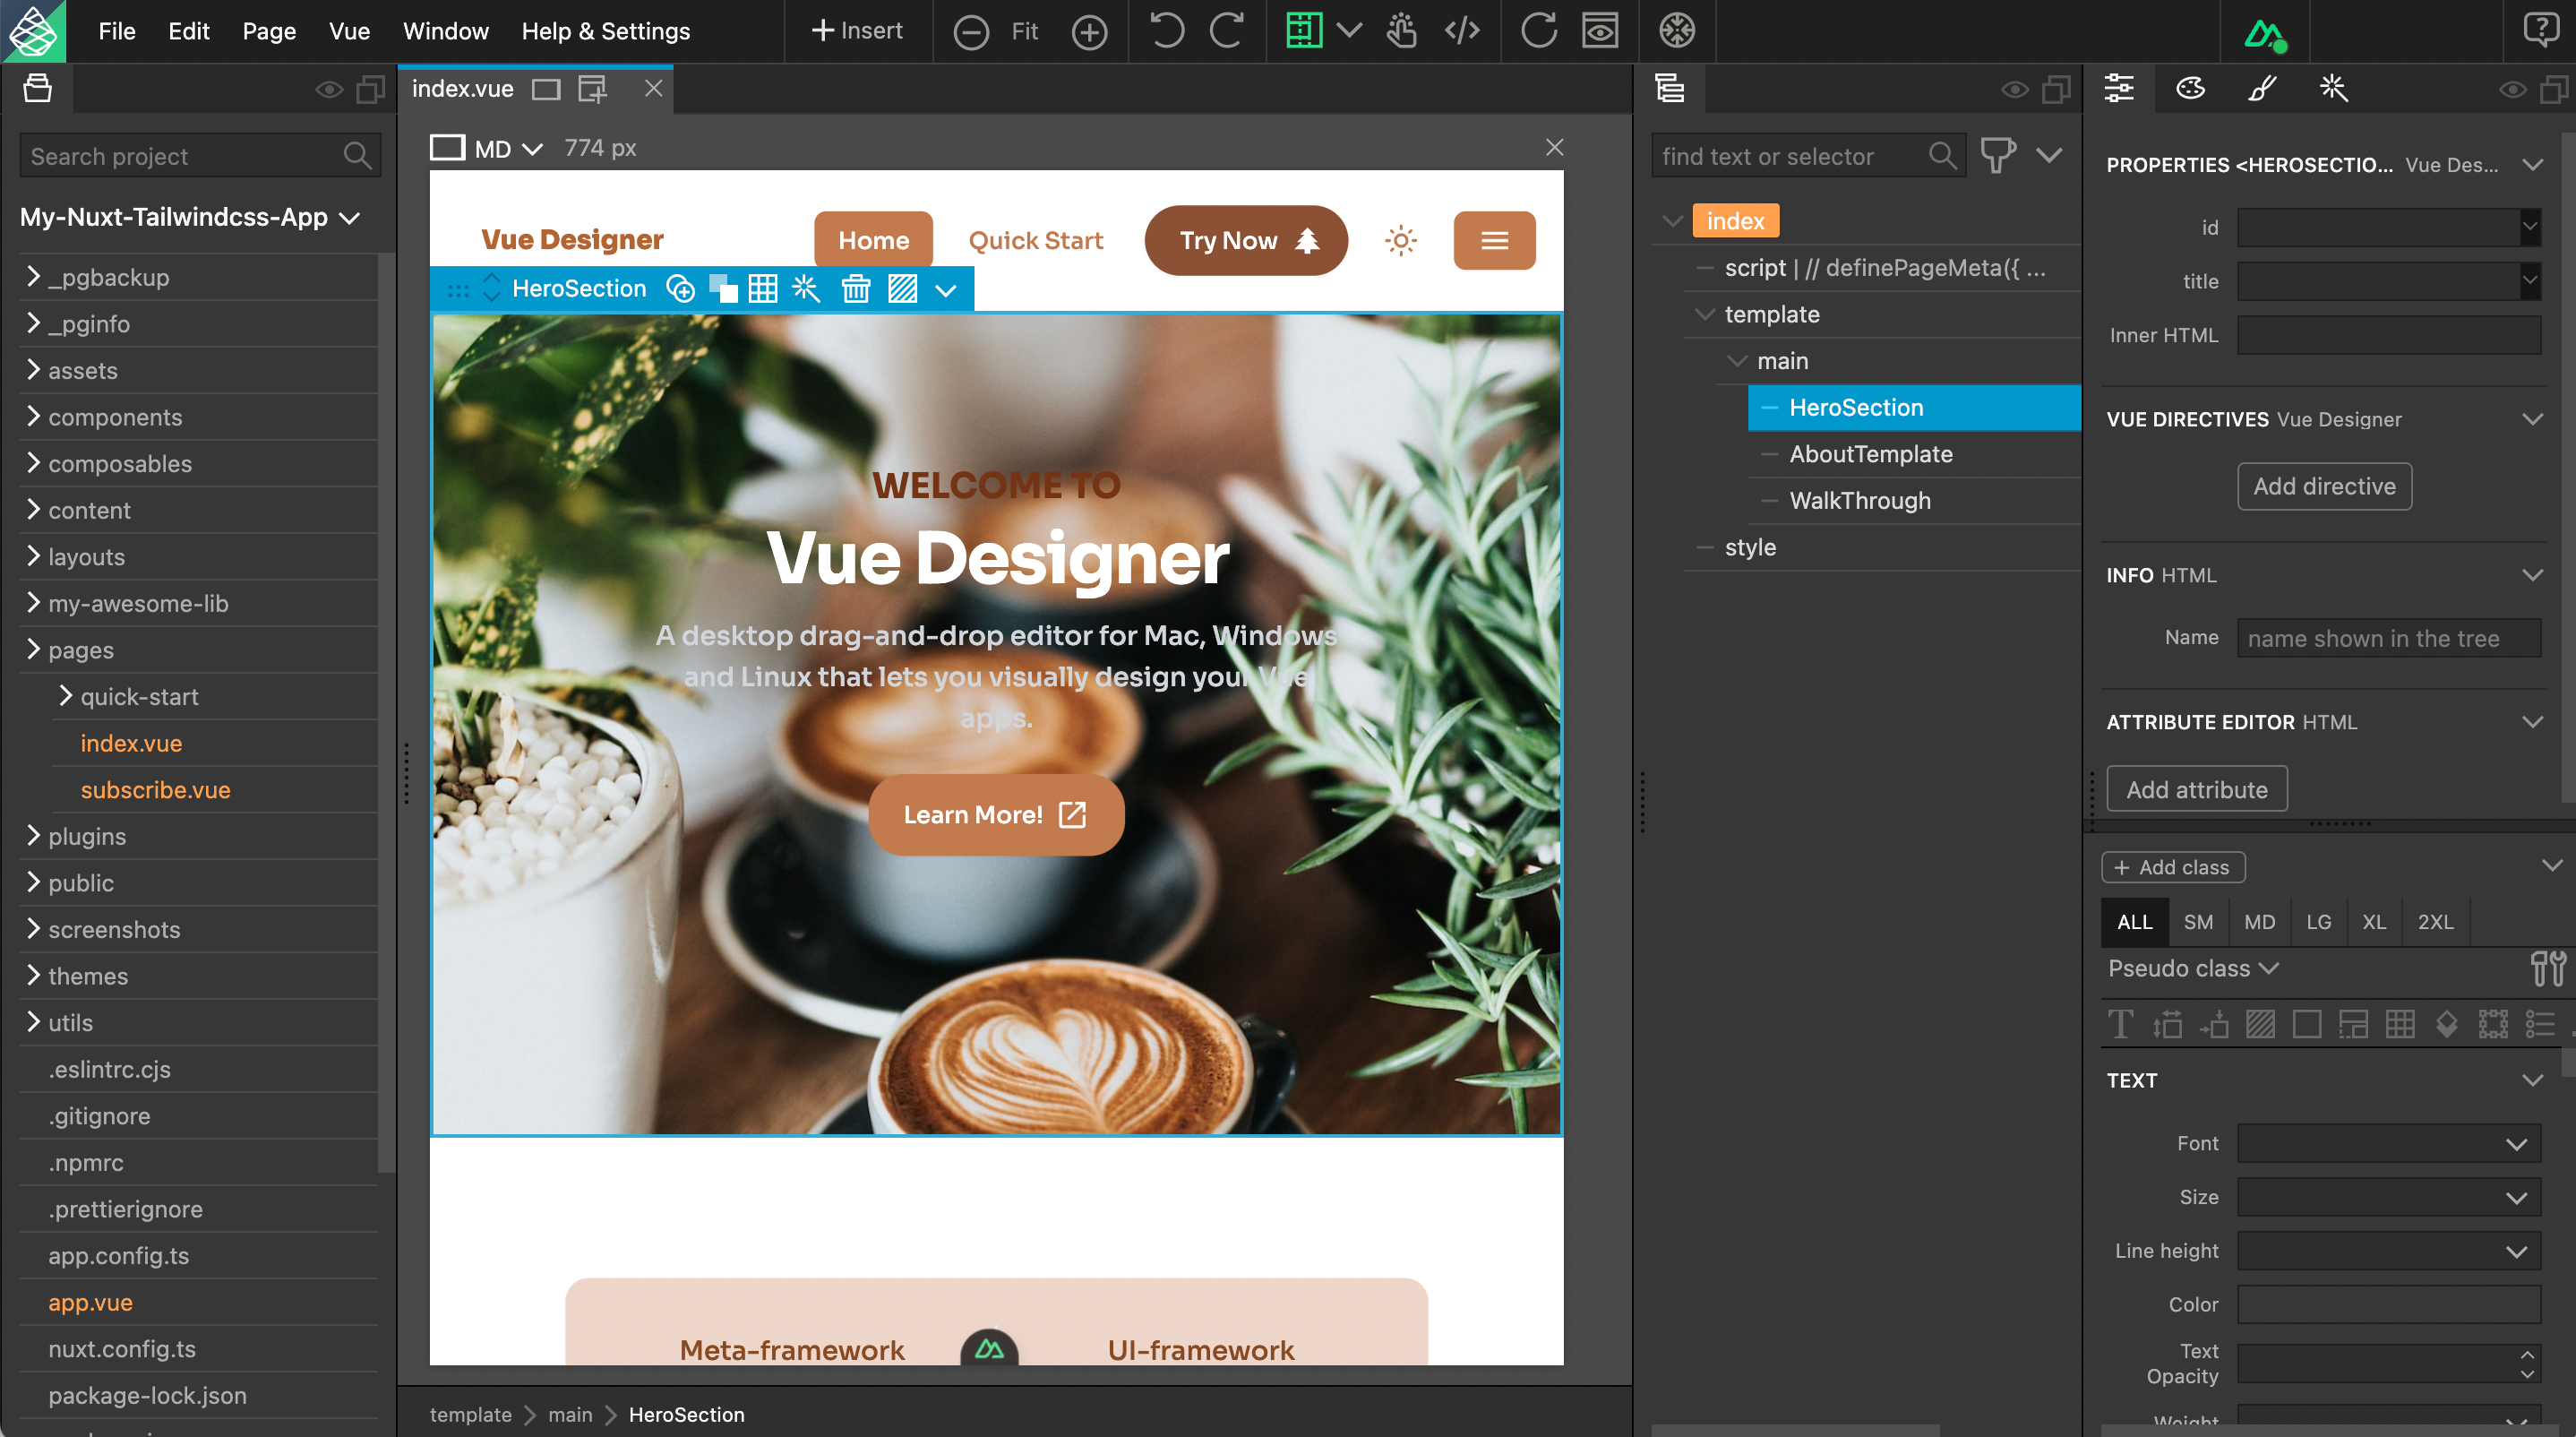
Once you open your project in Vue Designer, the interface will consist of multiple panels, a menubar, and a toolbar that includes the framework icon towards the right. We will cover the interface in detail later.
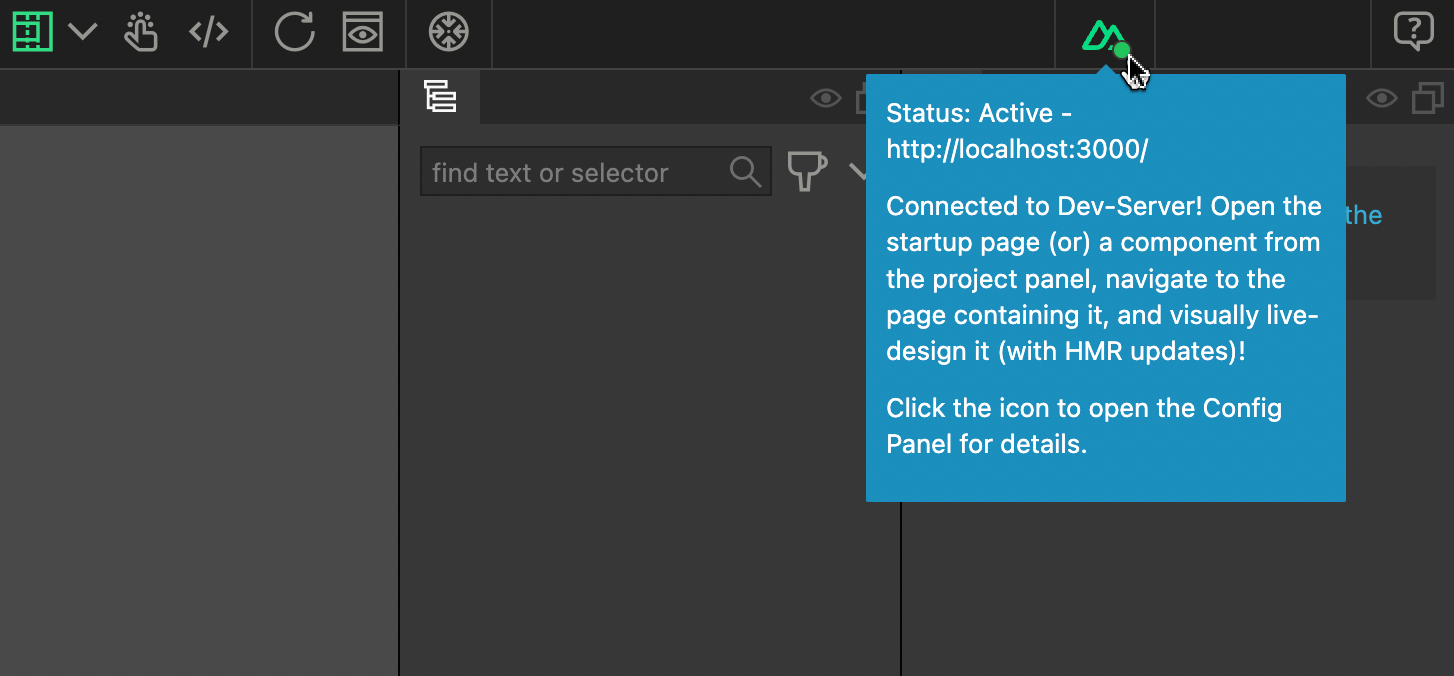
If you have already started your dev-server, the status displayed in the framework icon should ideally be green. If it’s gray, start your dev-server to establish the connection.
If you have any issues with establishing the connection, refer to the troubleshooting guide.
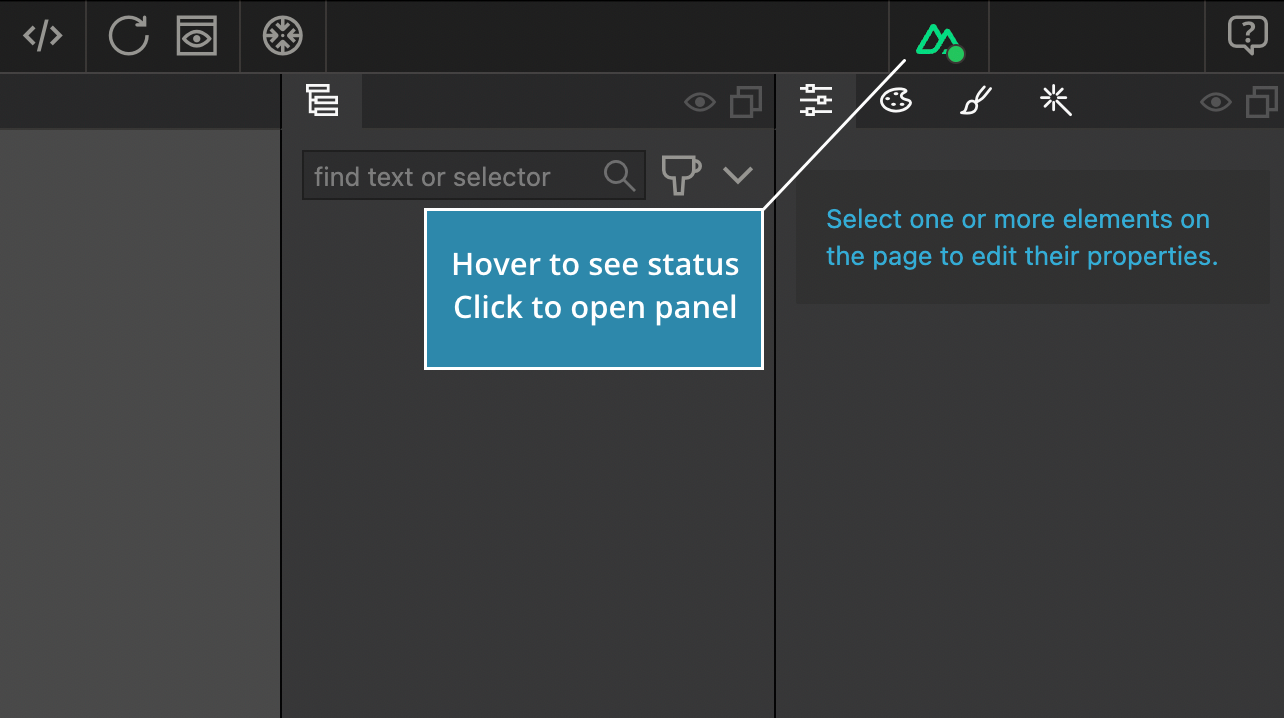
Hover over the framework icon, and the tooltip will explain the current status of the connection between Vue Designer and your dev-server.
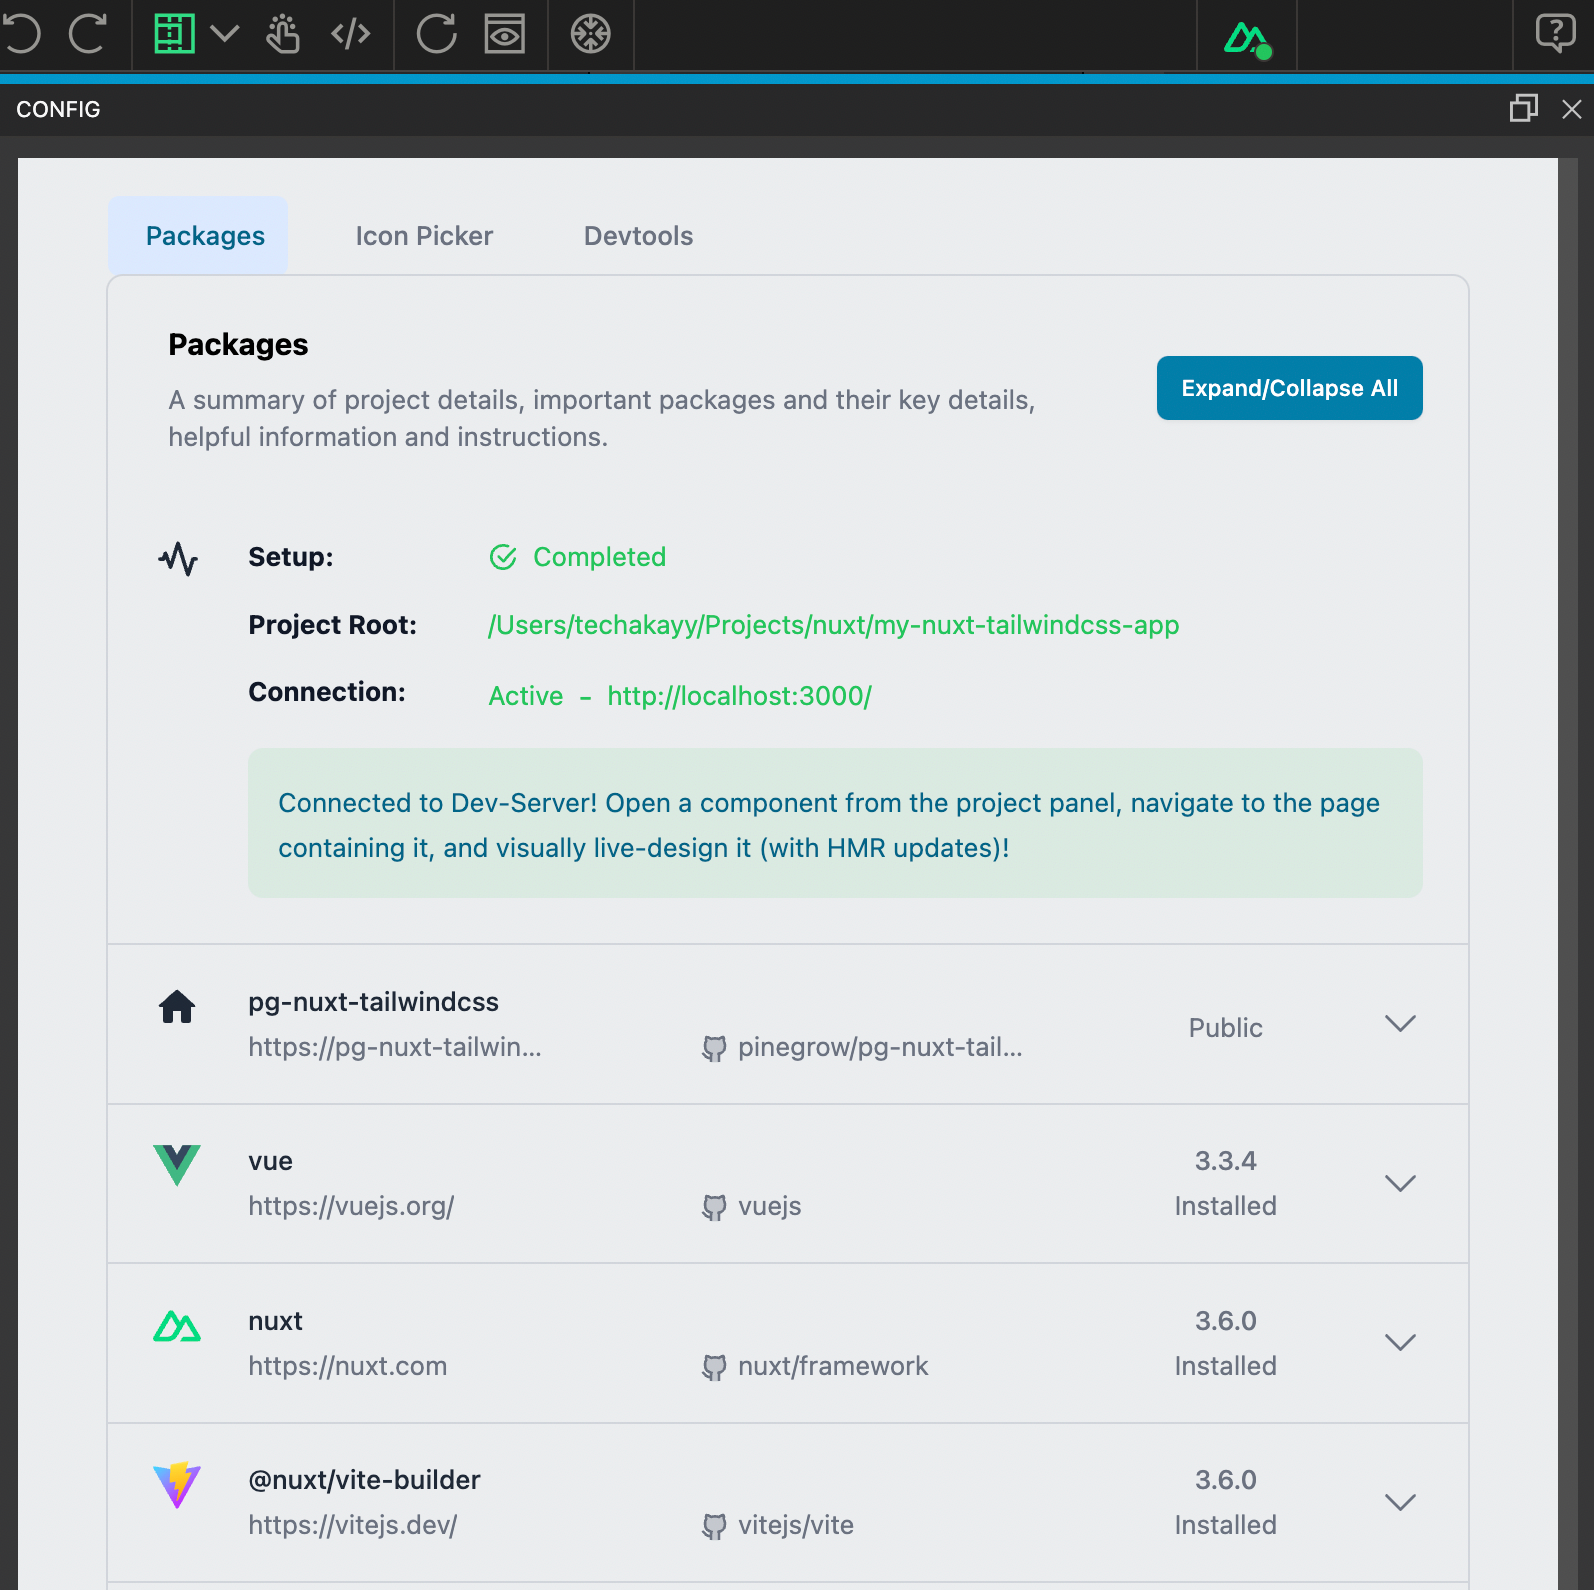
Click on the framework icon to open the Config Panel, which displays vital information about your project.
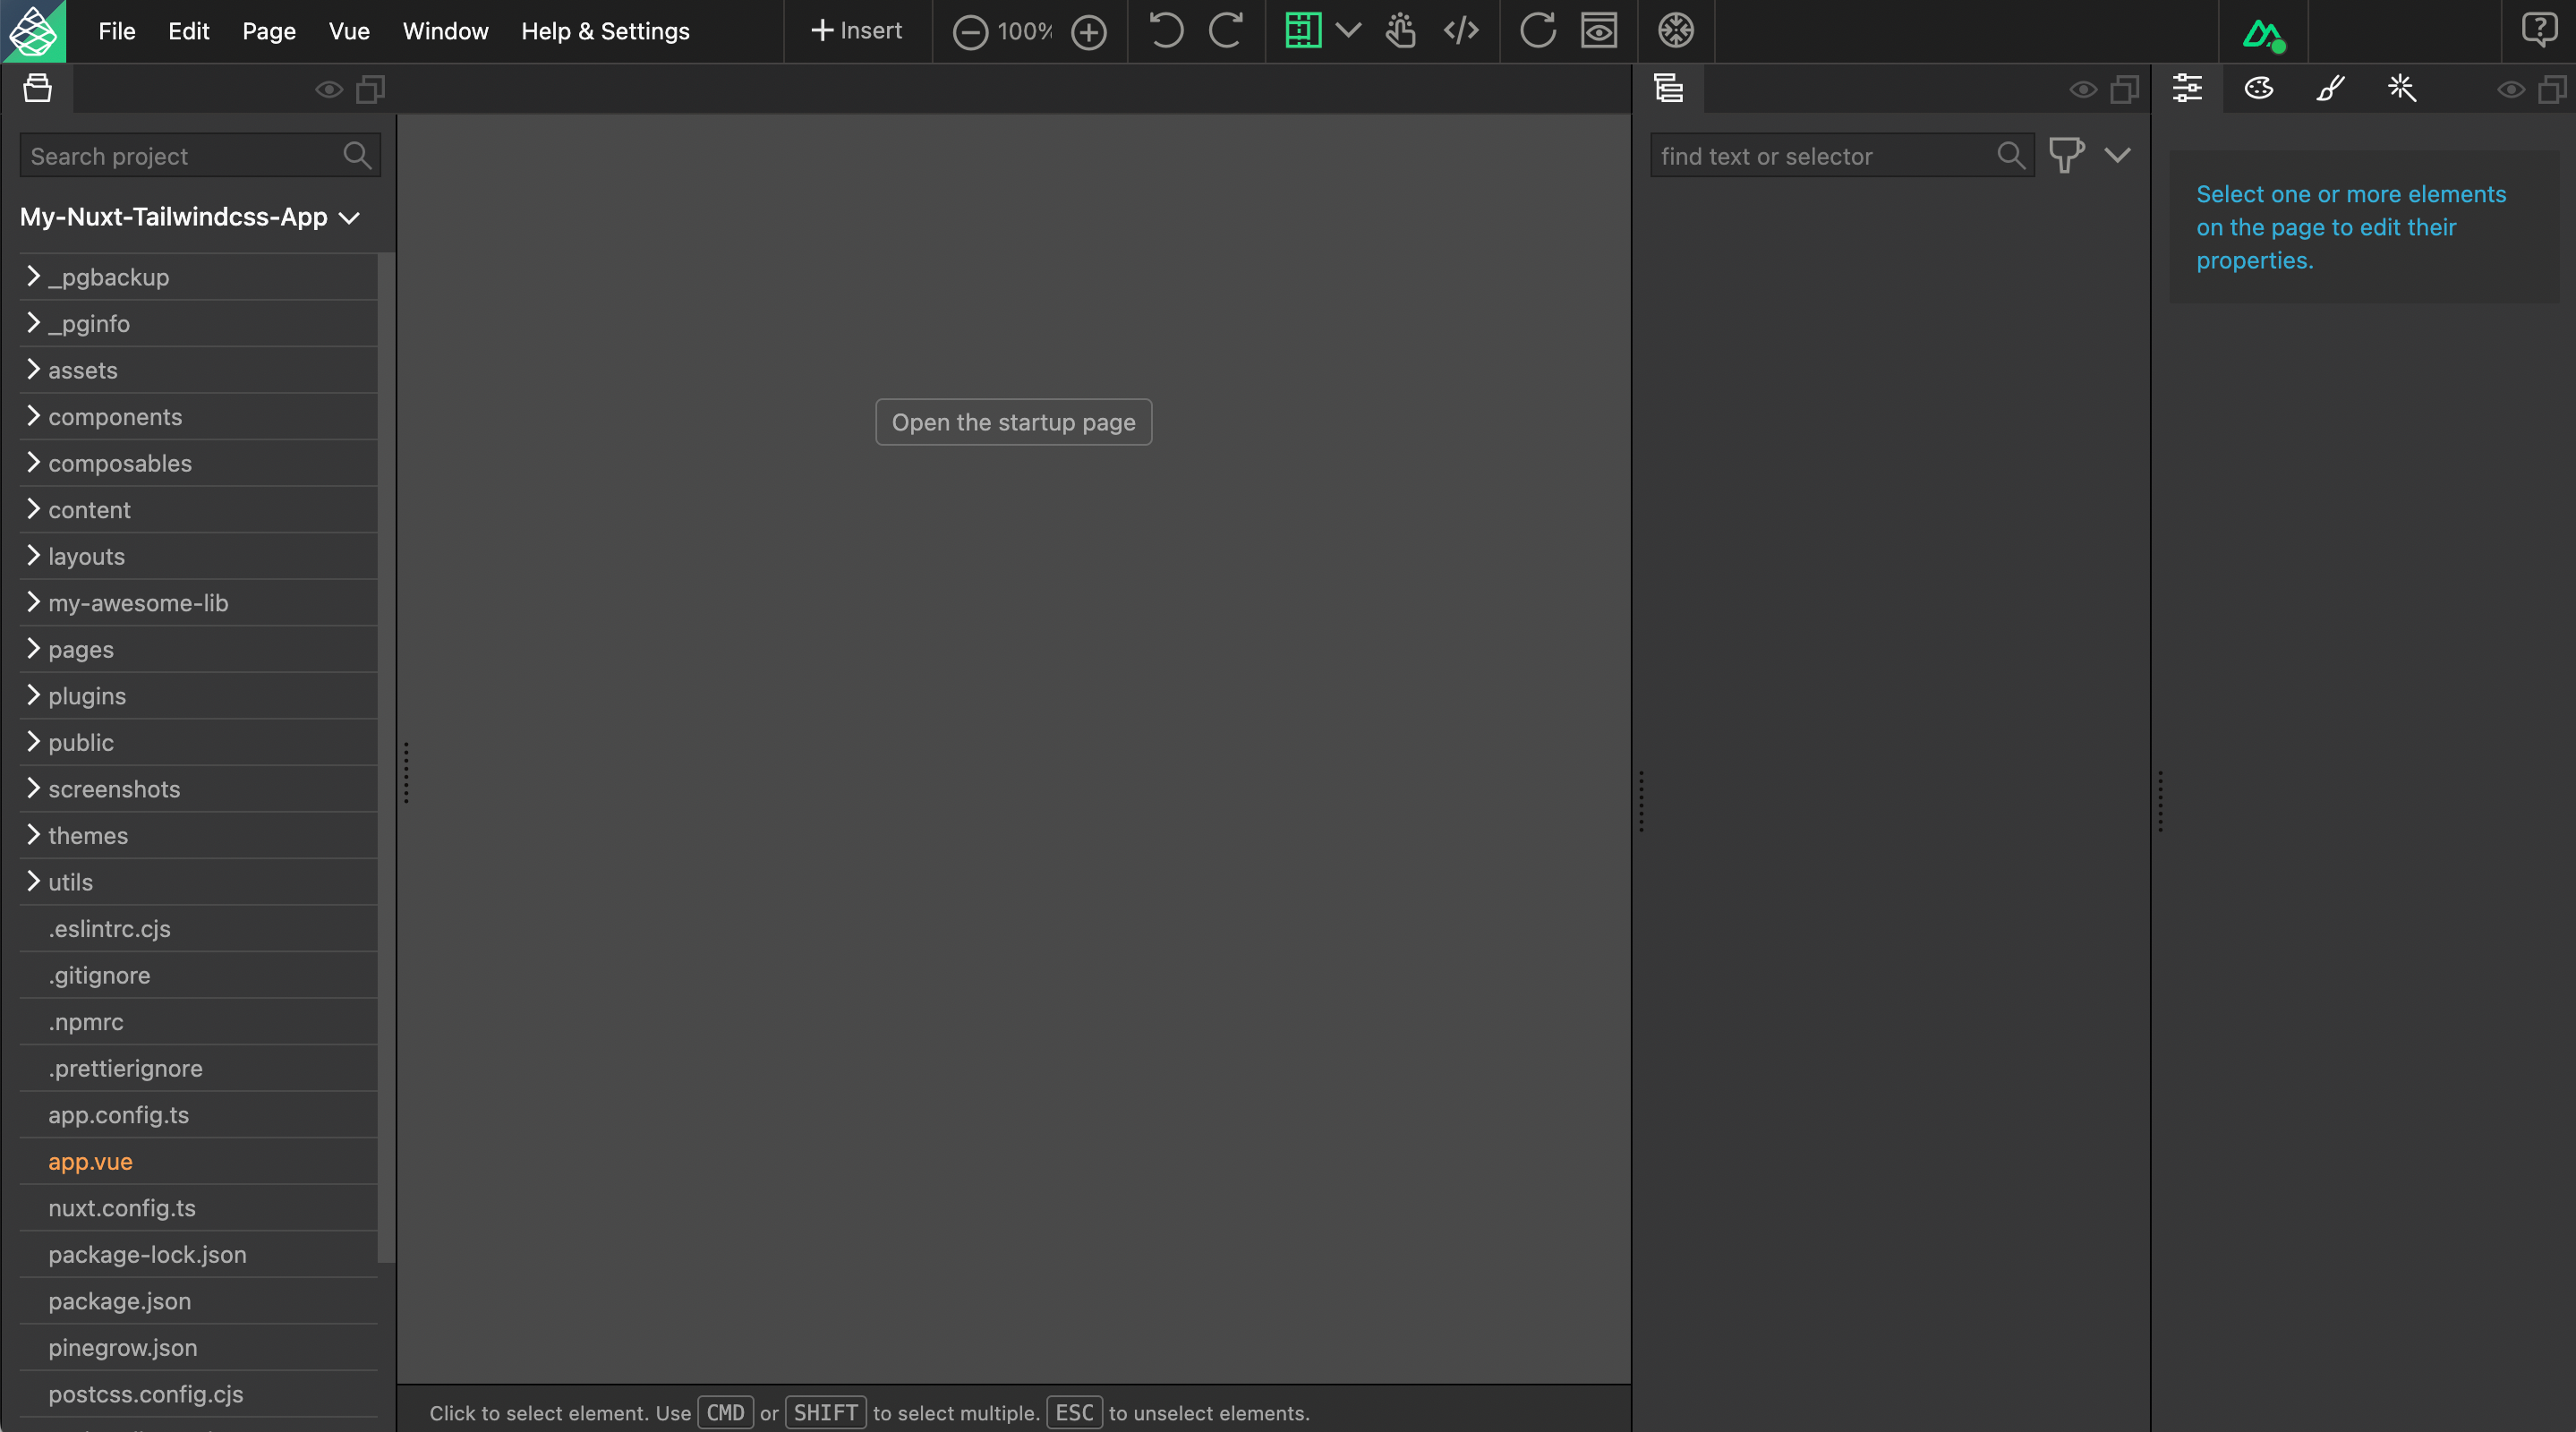
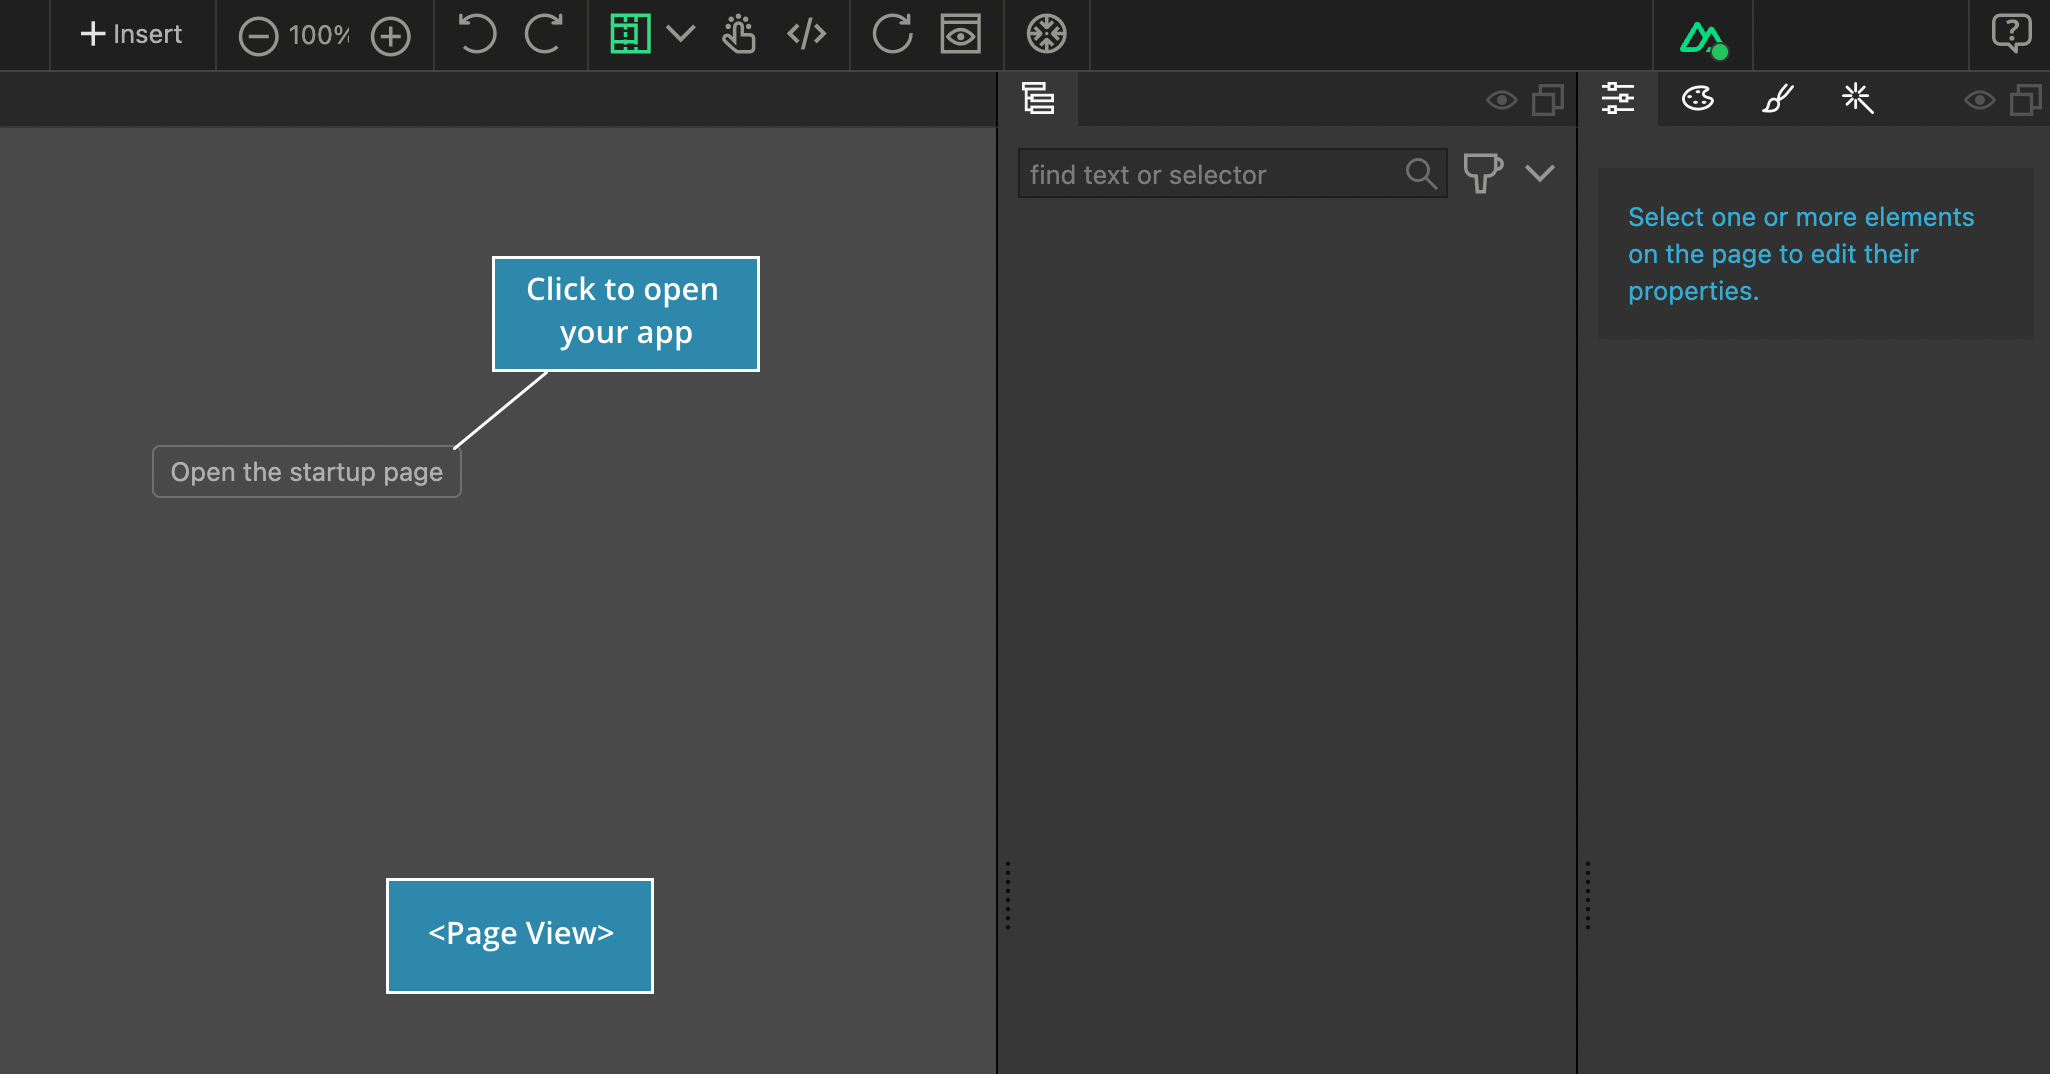
The Page View is the central area of the interface.
Click on the Open the startup page button. This will open your key *.vue file (pages/index.vue, pages/home.vue, app.vue or App.vue)
Congratulations! You have successfully created your first Vue project (in fact, a Nuxt project) using one of the quick-start or sample apps and opened it in Vue Designer.
We recommend you to check the README.md file to learn what’s included in your project.
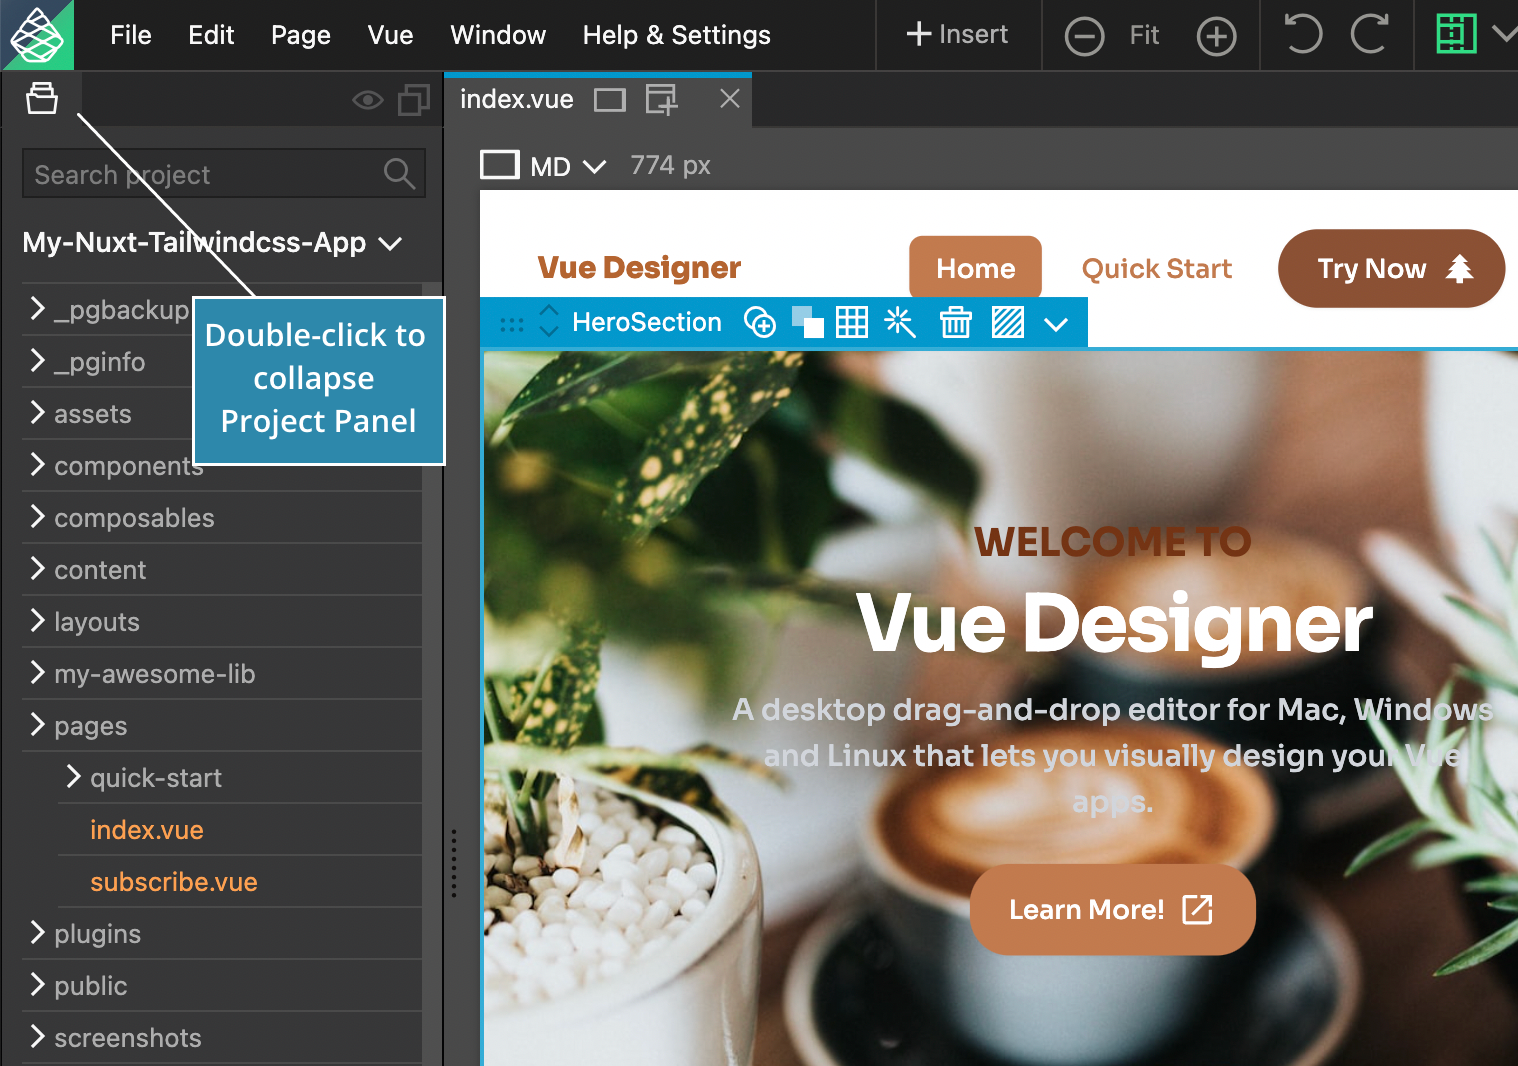
It’s a good idea to collapse the Project Panel when you’re not accessing any files in your project. Double-click to collapse/expand the panel.
We will cover more about the visual features and how to make the best use of them later on.