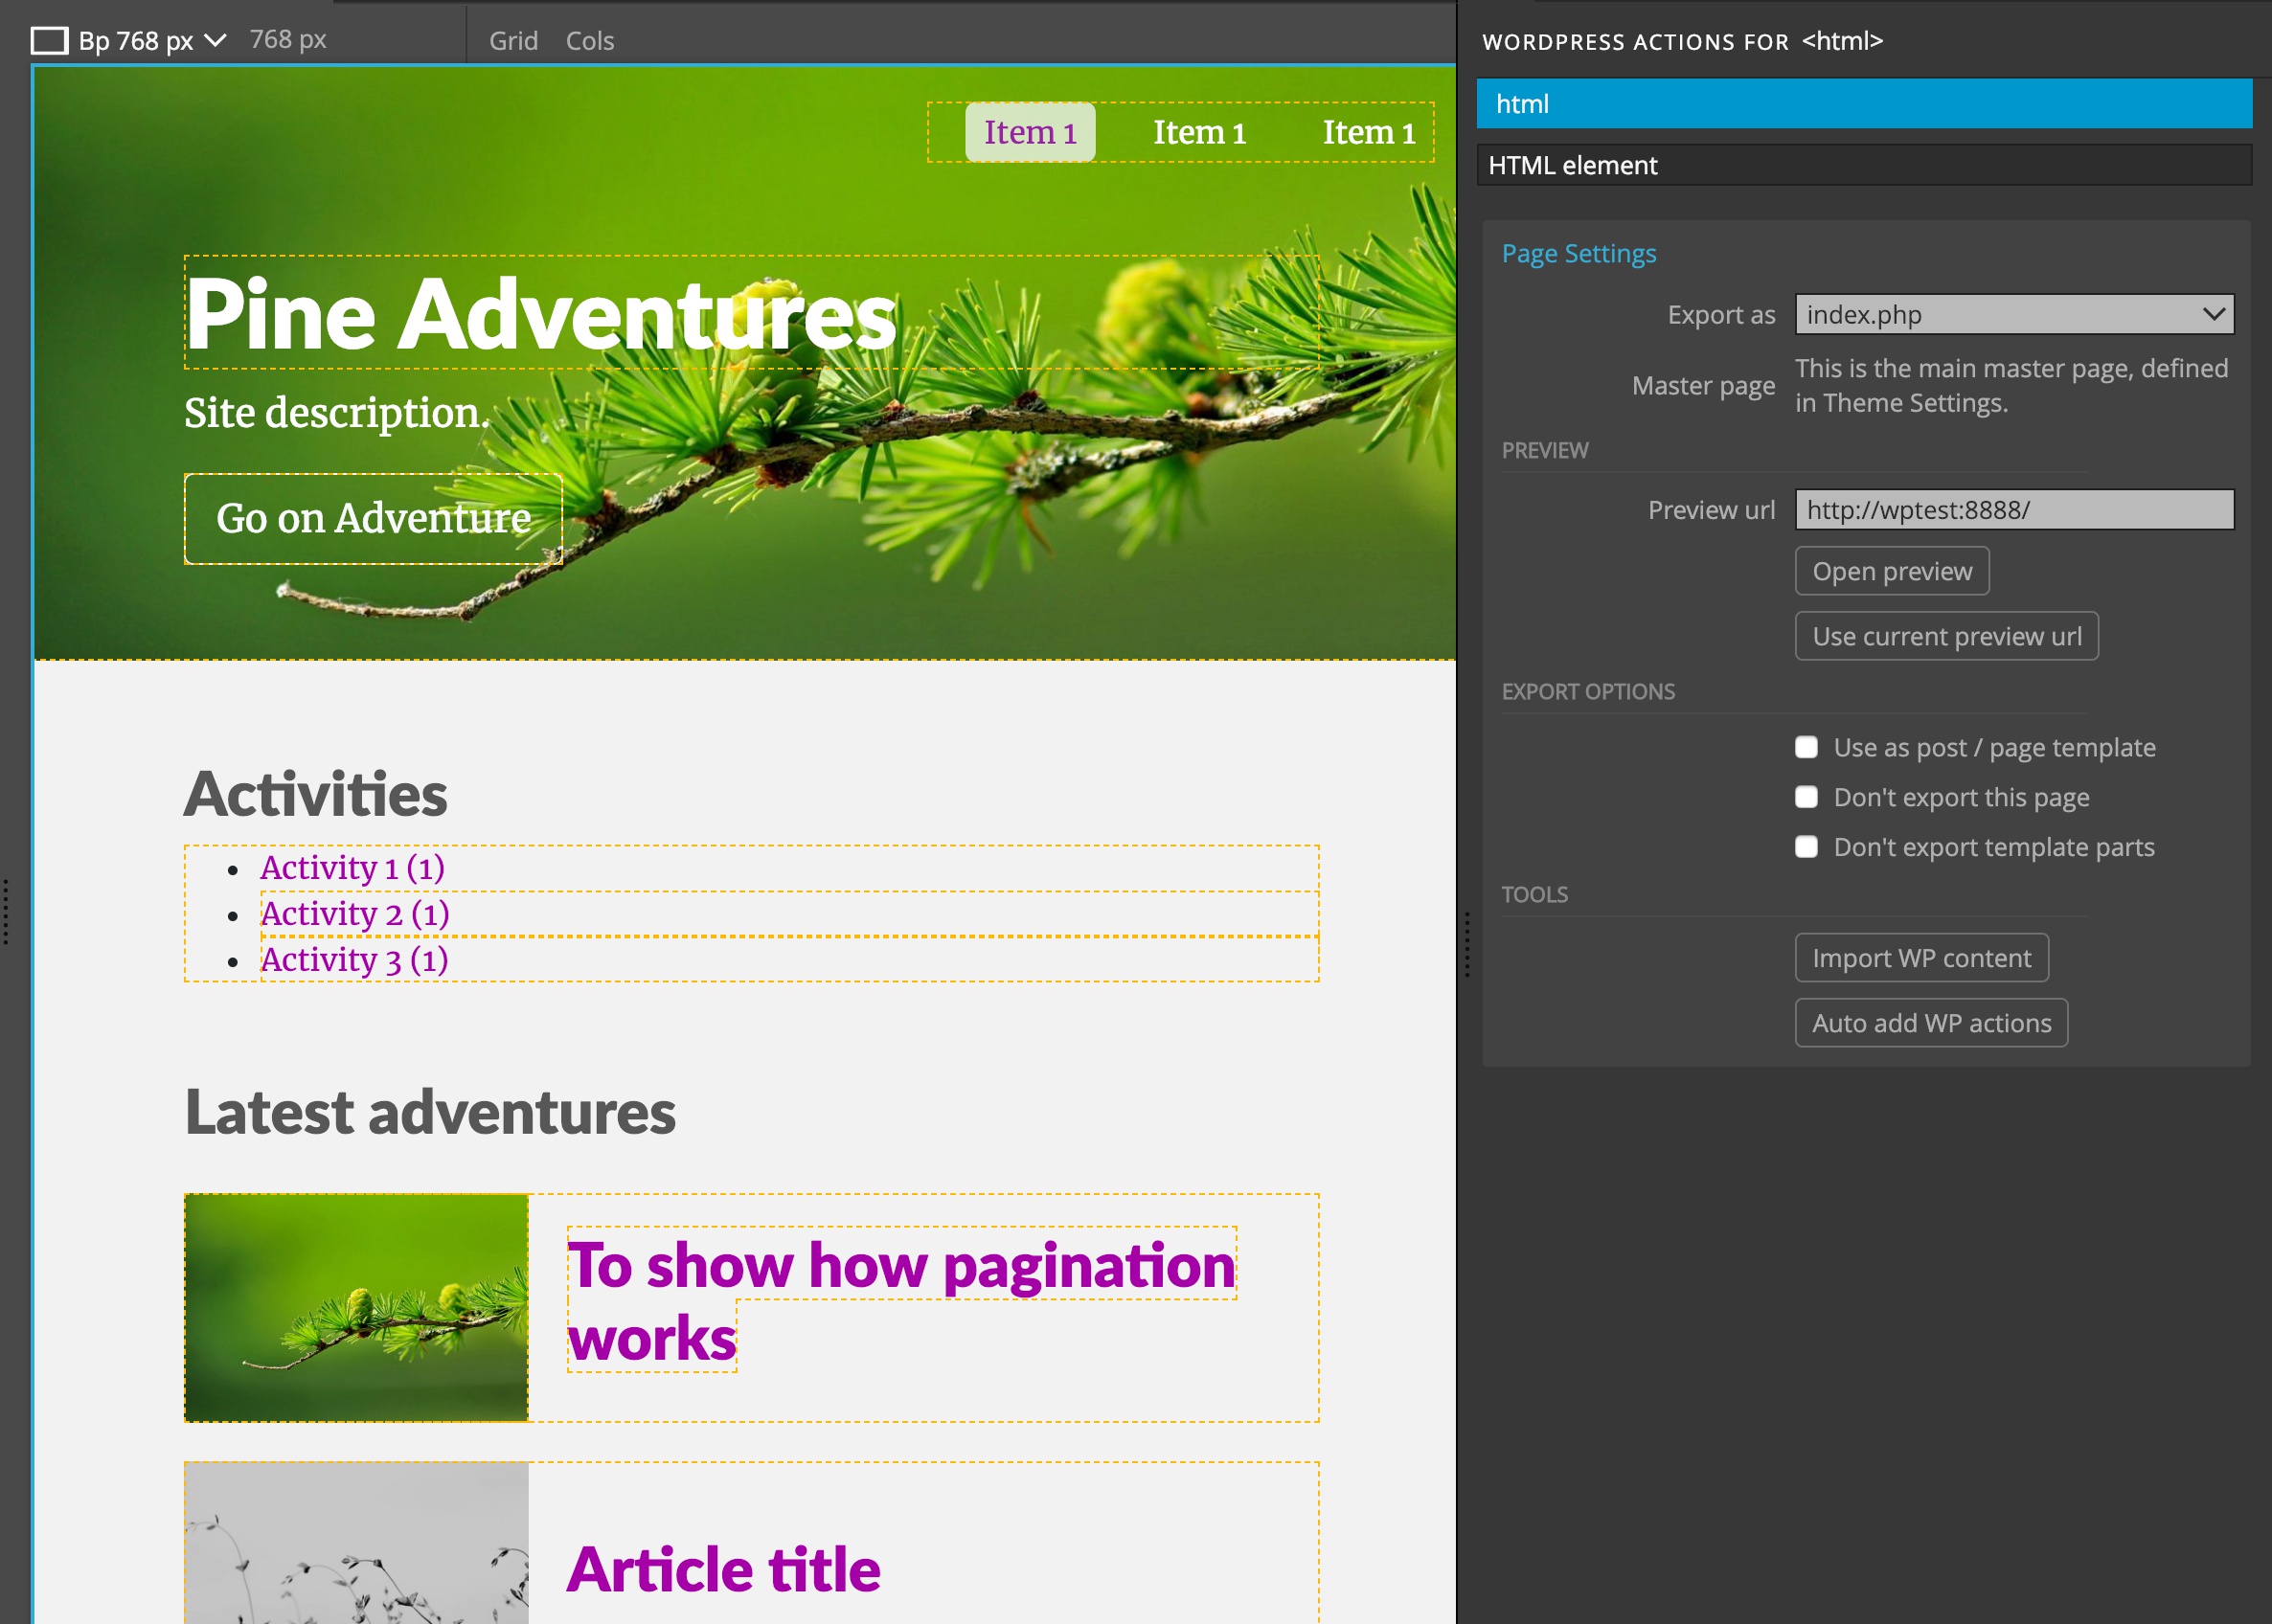
Page Settings determine how the template page will be exported to the WordPress theme.
By default, nothing will happen with HTML pages in the source project – they will be neither exported nor copied to the theme.

Once we click on the “Page settings” button in the WordPress panel, the page is set to be exported to the theme.
By default, pages are exported to WordPress theme under their own name and with .php file extension.
Unless we paid attention to naming HTML files according to WordPress standard, the names of the files probably don’t match with the required names of exported templates.
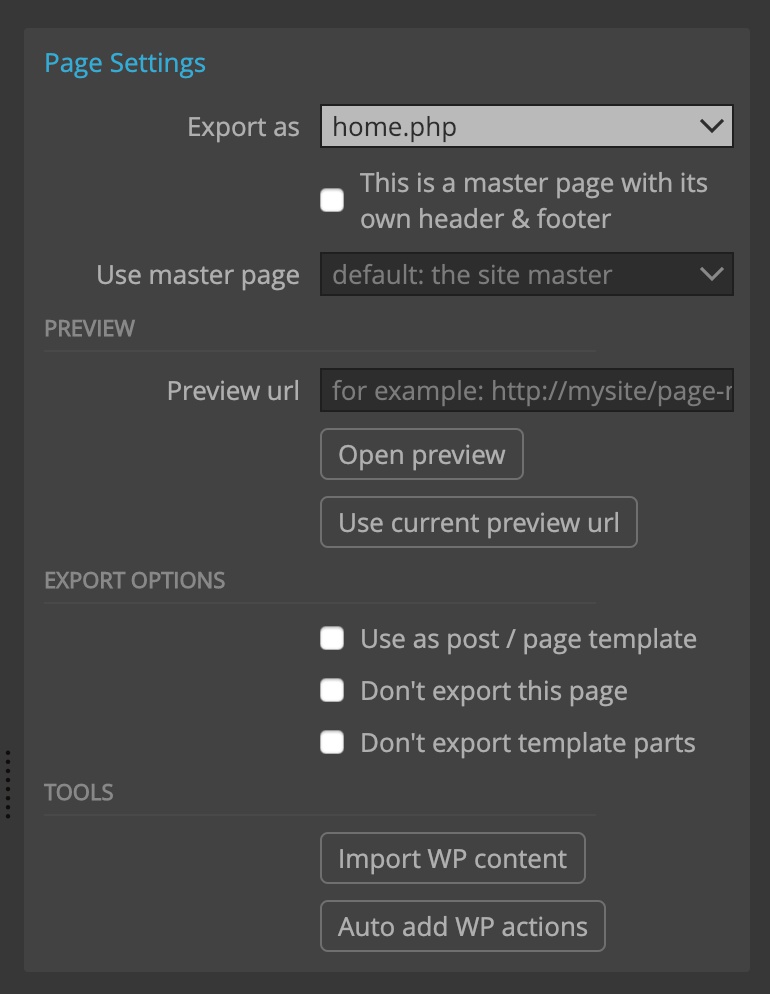
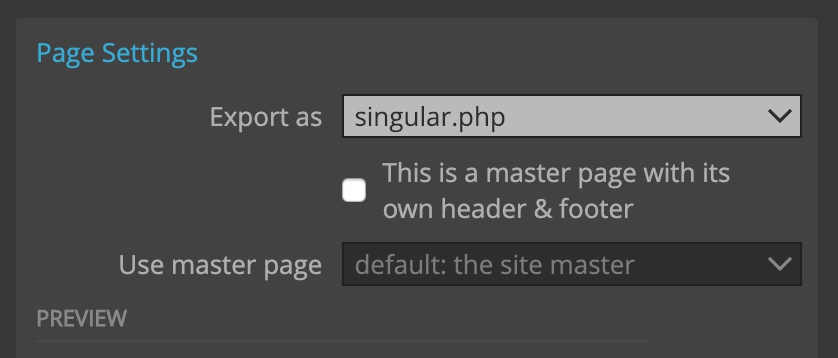
Export as
So, we use the Export as setting to decide the template name of the exported file. Template names play important role in WordPress.
WordPress decides which template file to use based on what it wants to display. If that file is not present, it looks for the next appropriate file. In the end, if no specialized template files are present in the theme, it uses index.php.
For example, take a look at the list of files that WordPress engine goes through when displaying a single page. If the file exists, it is used to display the page, otherwise WordPress looks for the next file in the line.
- {custom}.php
- page-{id}.php
- page-{slug}.php
- page.php
- singular.php
- index.php
In the end, index.php is used if other template files are not found. That’s why every WordPress theme needs at least the index.php template.
“Export as” dropdown offers a list of the most useful template names, alongside their description
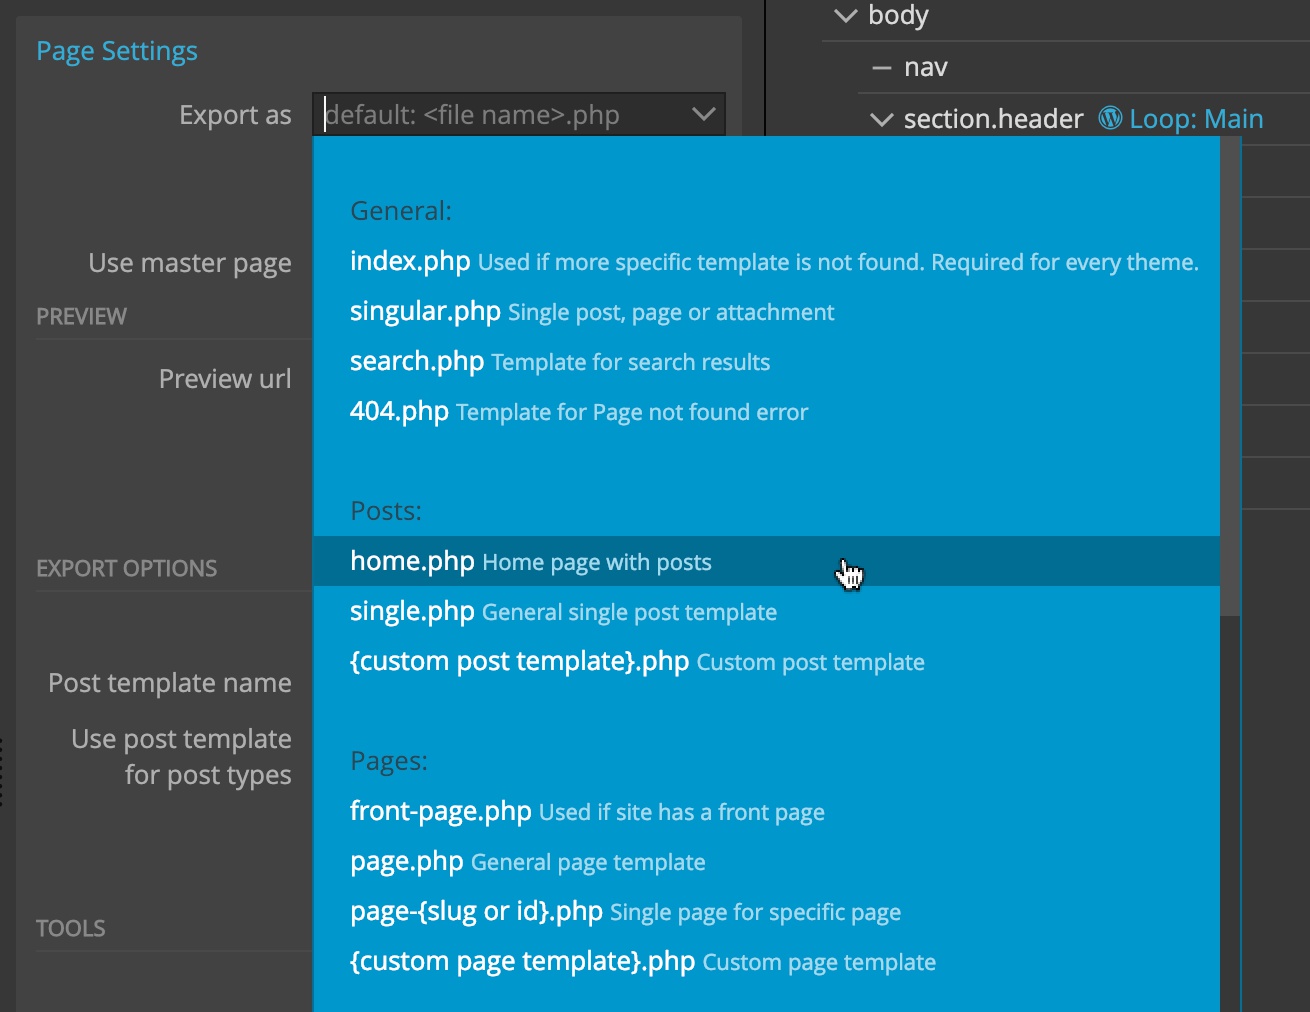
There should be only one exported file per template name in the project. For example, having page1.html and page2.html both export as singular.php will just lead to one export overwriting the other.
Take a look at the guide to choosing the right template name for details.
Define a master page
“This is a master page checkbox” lets us decide if the page will be a master page, or if it will reuse headers and footers of another master page.
Note, this checkbox is not available on the main master page that is selected in Theme Settings.
In most cases, there should be only one master page per project, usually index.html, the main file selected in the Theme settings.
Master page exports its header and footer that is then included in other pages that use this master page.
In case the page contains some unique features in its header (head element with styles, scripts…) or in its footer (scripts included at the end of the body), then this page should be a master page and export & use its own header and footer.
Use master page
For pages that are not master pages, this setting lets us choose which master page’s header and footer they will use.
By default, the page will use header and footer of the site master file that is chosen in Theme settings.
Preview
Preview URL lets us override the default Theme settings preview url.
If we enter a relative URL, it will be appended to the main preview url.
The preview URL should contain the address on the local WordPress installation that uses this template file for displaying information.
For example, the page that exports as single.php (display of a single post) should have the url that displays one of the posts on the site, for example http://mysite.local/2019/5/2/my-post
Why is preview URL important?
Because it lets us do useful tasks.
First, we can open the page preview that will open the preview url in a floating preview window. The window will be refreshed every time we save the page.
The “Use current preview url” will use the current display in the preview window as the preview URL for the page. We can use the preview window to navigate to the page of interest and then use this button to use its address.
The second reason for using previews is that it lets us import page content from the WordPress site. More about that in the Tools section.
Export options
Post templates
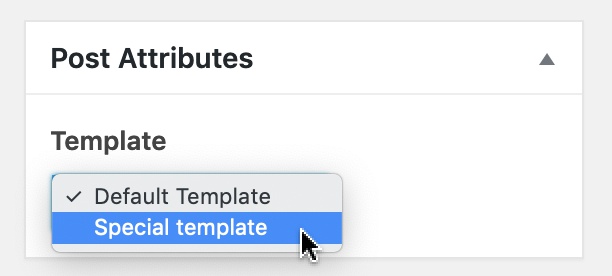
“Use as post / page template” lets us define the page as a custom template for certain post types.
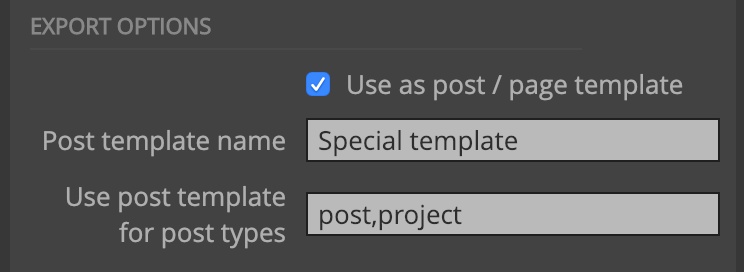
When editing such posts in WordPress, we can then select the template from the list of custom templates.
Don’t export the page
The page itself will not be exported, but any registered customizer controls, menus, post types and such will still be exported to the theme.
We can use this to define a settings page – a special page that uses WordPress actions to register stuff in the theme without exporting the page itself.
Don’t export template parts
This – not often used – feature will skip exporting any template parts that are defined on the page. The setting is here mainly for compatibility reasons.
Tools
Importing WordPress content
Pressing the “Import WP content” button will fetch a preview page and extract content (images, texts, titles, posts…) and insert them into the HTML page.
This is very useful, especially if our HTML page doesn’t include any placeholder content.
Note, imported images will be hot-linked to the local WordPress site. That means that they will not show up if the site is not running.
Not all content can be imported. Pinegrow tries to import as much content as possible.
Imported content is saved directly in the HTML files. That means that it will be overwritten if we re-export HTML form a tool we use to build the HTML website.
But, that’s not an issue – we just re-import the WordPress content.
Auto add WordPress actions
This is an experimental feature that tries to automatically add appropriate WordPress action to the HTML page.
It doesn’t modify any existing WordPress actions.
Among other things, it looks for Show Posts actions and tries to add Post links, Post content, Post featured image and similar, to elements inside the Show Posts element.
That means that you can re-run the command after you add Show Post action to the page.
It works well with some specific website formats, for example with HTML exported from Webflow CMS.
Saving the settings
Saving the page will save page settings.