Attributes are editable properties of a block. Editable attributes make blocks much more useful, because we can use the same block type with different content.
Our About me block will have editable title, description, image and the button (we will take care of the counters in the next part).
Title
To make the heading editable, select the <h3> element and add Block Attributes action:
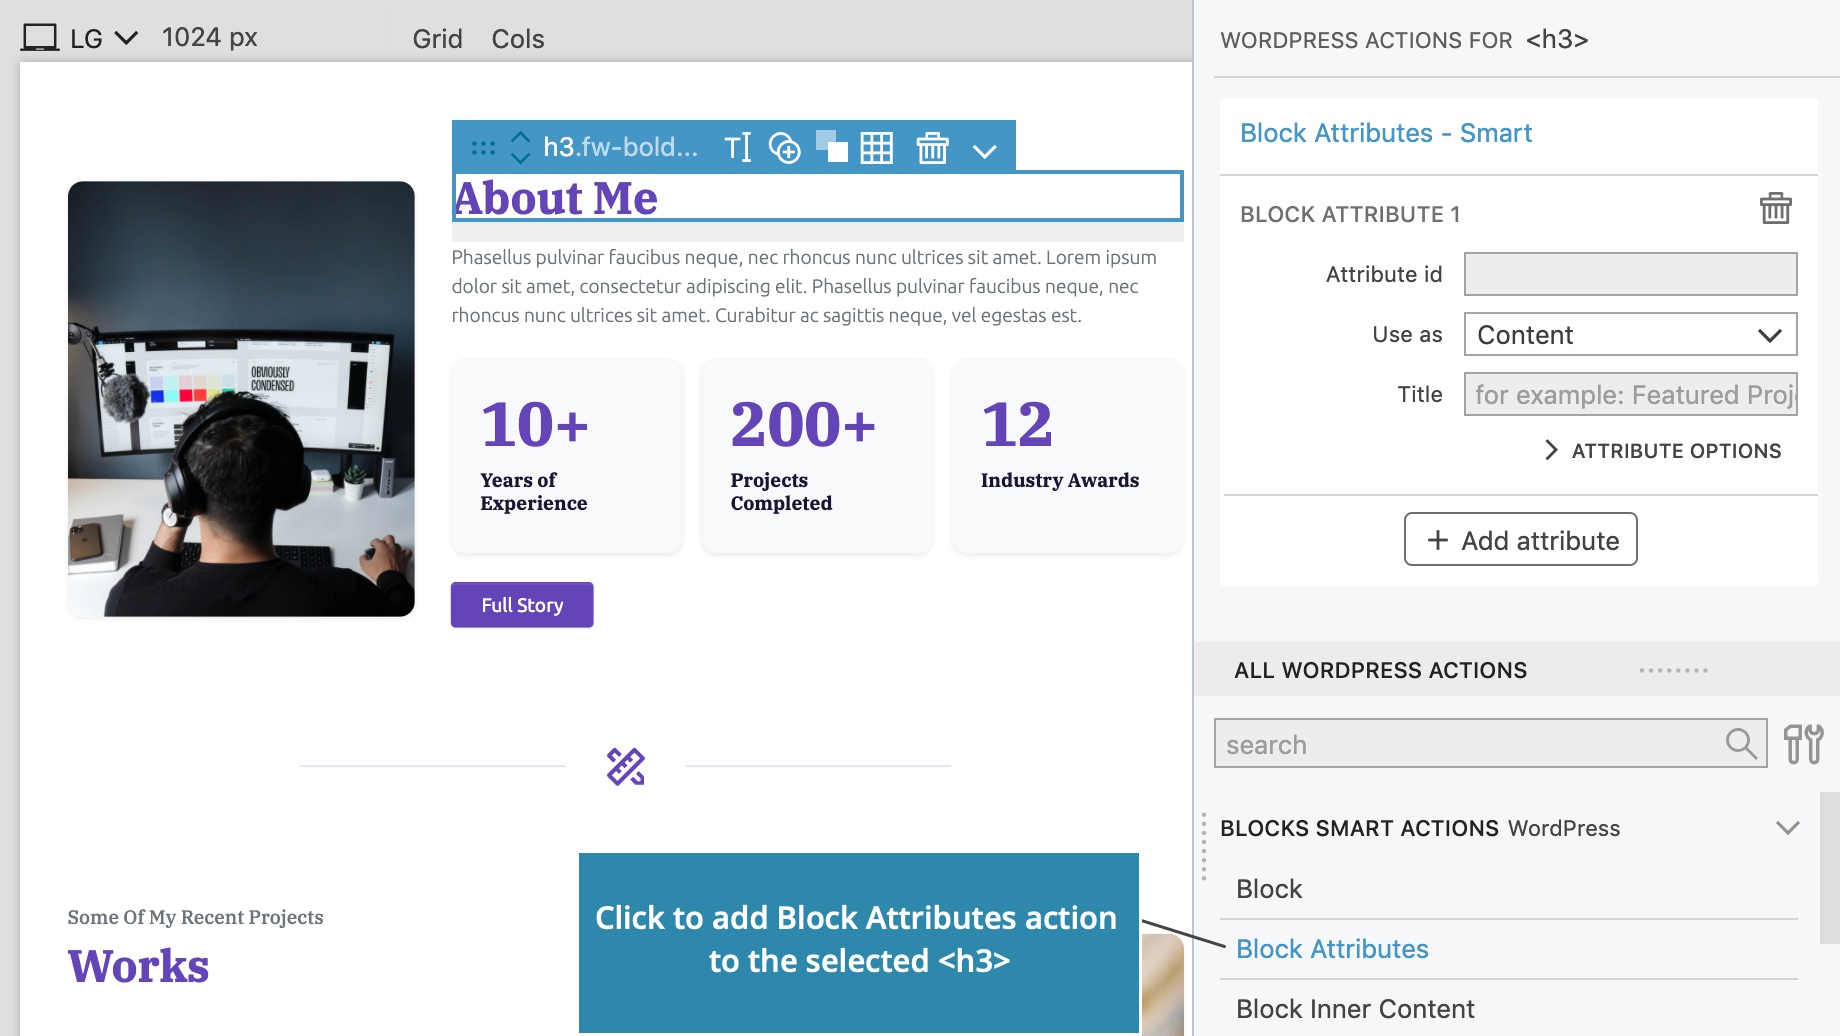
Each attribute needs an id, such as title. Attribute id needs to be unique within its block.
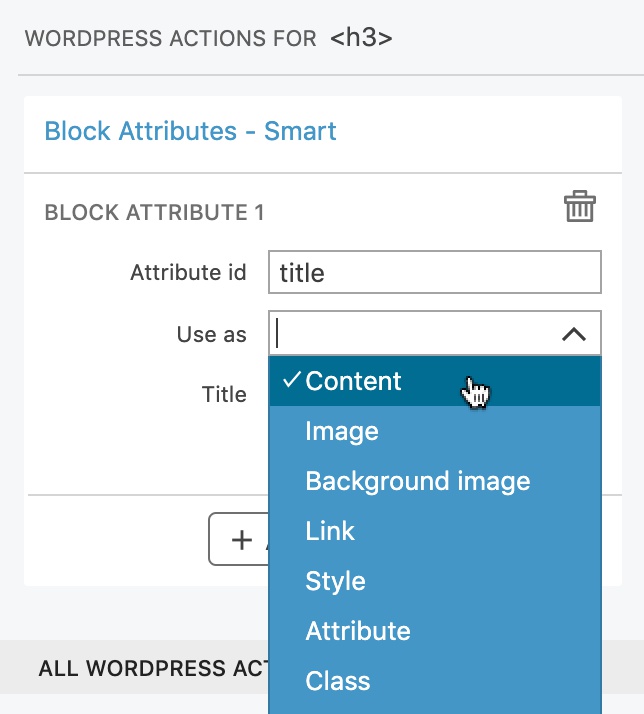
Next, we set how the attribute is used on the selected element. Will it set the element inner content, add a class, set a style, element attribute…?
For the title attribute we will select Content. The attribute value will replace the inner content of the <h3> element.
Title is a human readable name of the attribute.
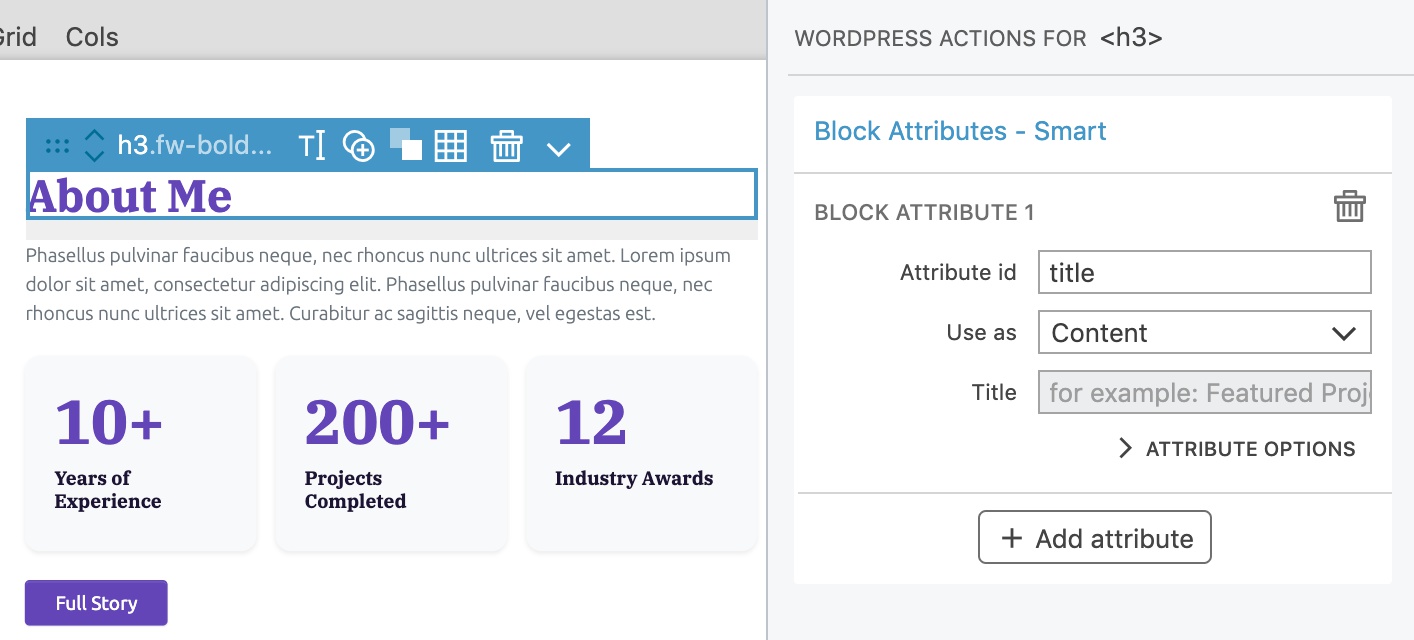
What to do if the attribute value is not set?
Attribute options let us further customize the attribute.

We have two options: use the default value or remove the element from the output.
Default values are taken from the source HTML element. For example, if the attribute is used as the element content, its default value will be the element content found in the source HTML. In this case we will leave the setting as it is and use the default value.
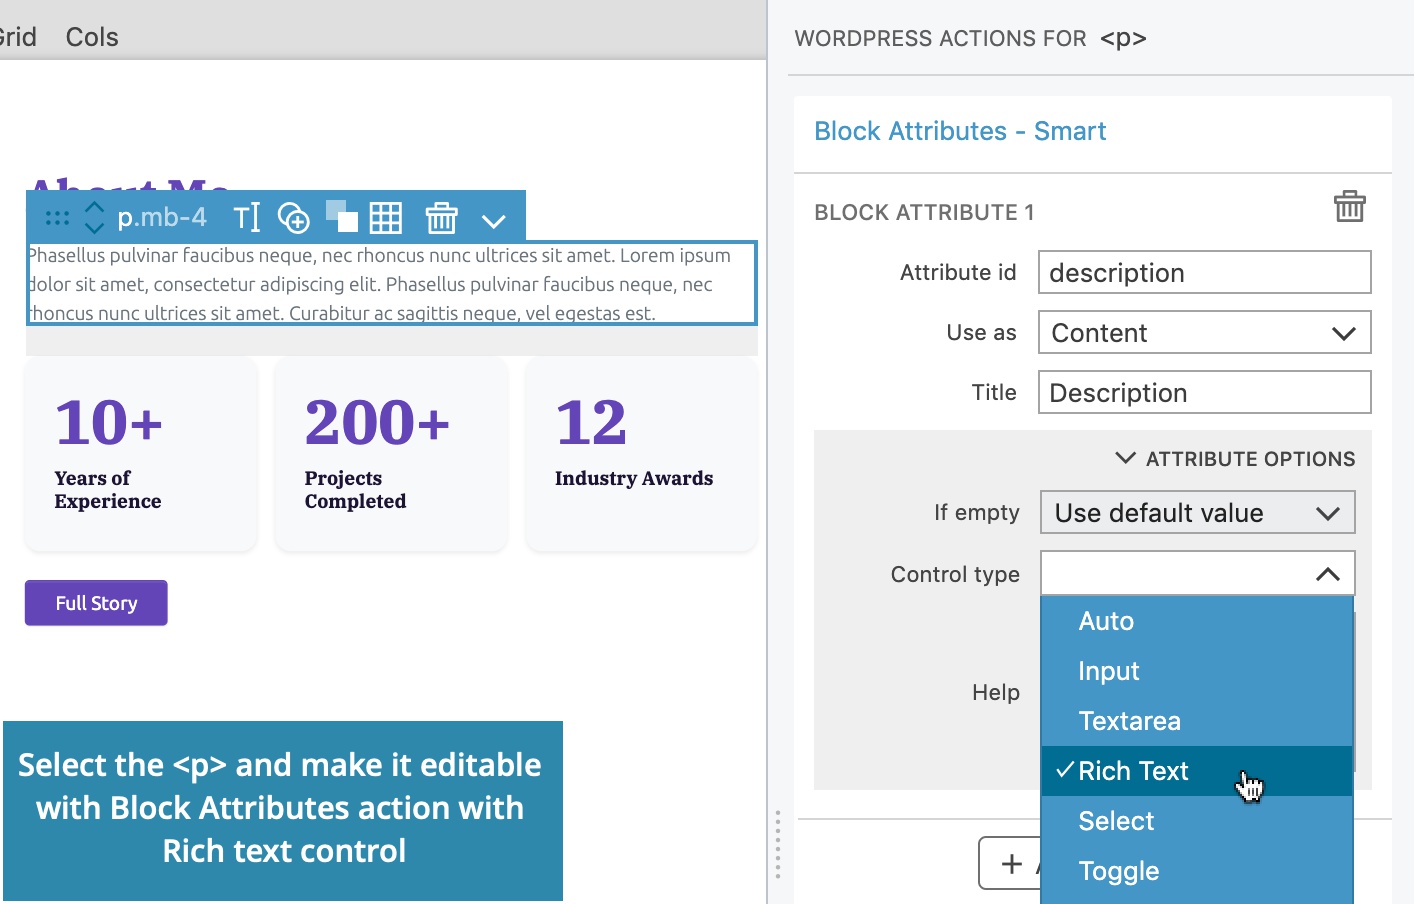
Description
To make the description editable, select the <p> element and add Block Attributes action with the id description. Here we will set the control type to Rich text, so that we can format the text if needed.
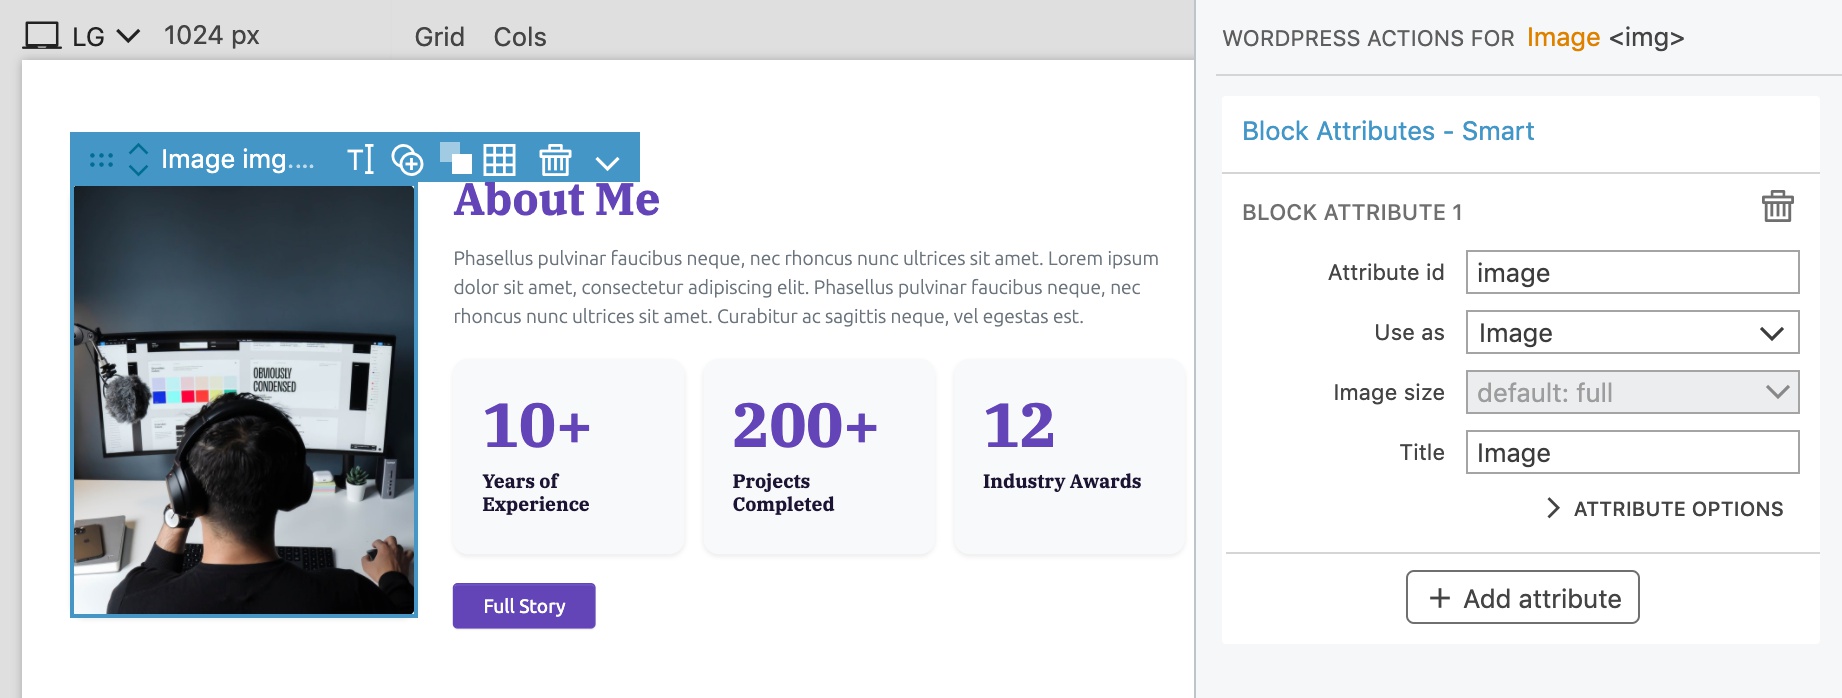
Image
To make the image editable, we select the <img> element and add the Block Attributes action. The attribute will be used as the value of src attribute and image selector control will be displayed in the sidebar.
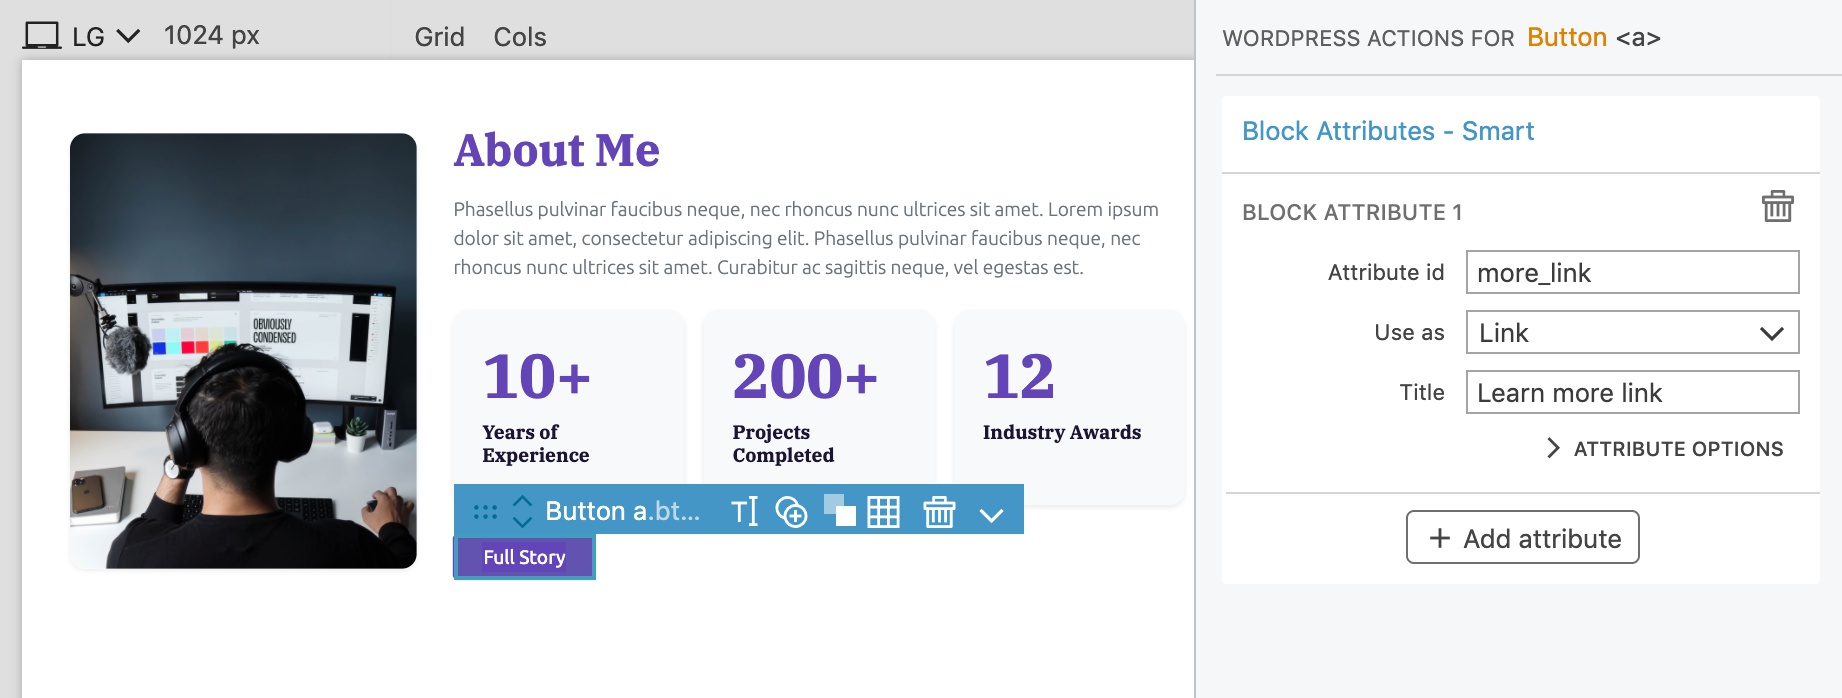
Button
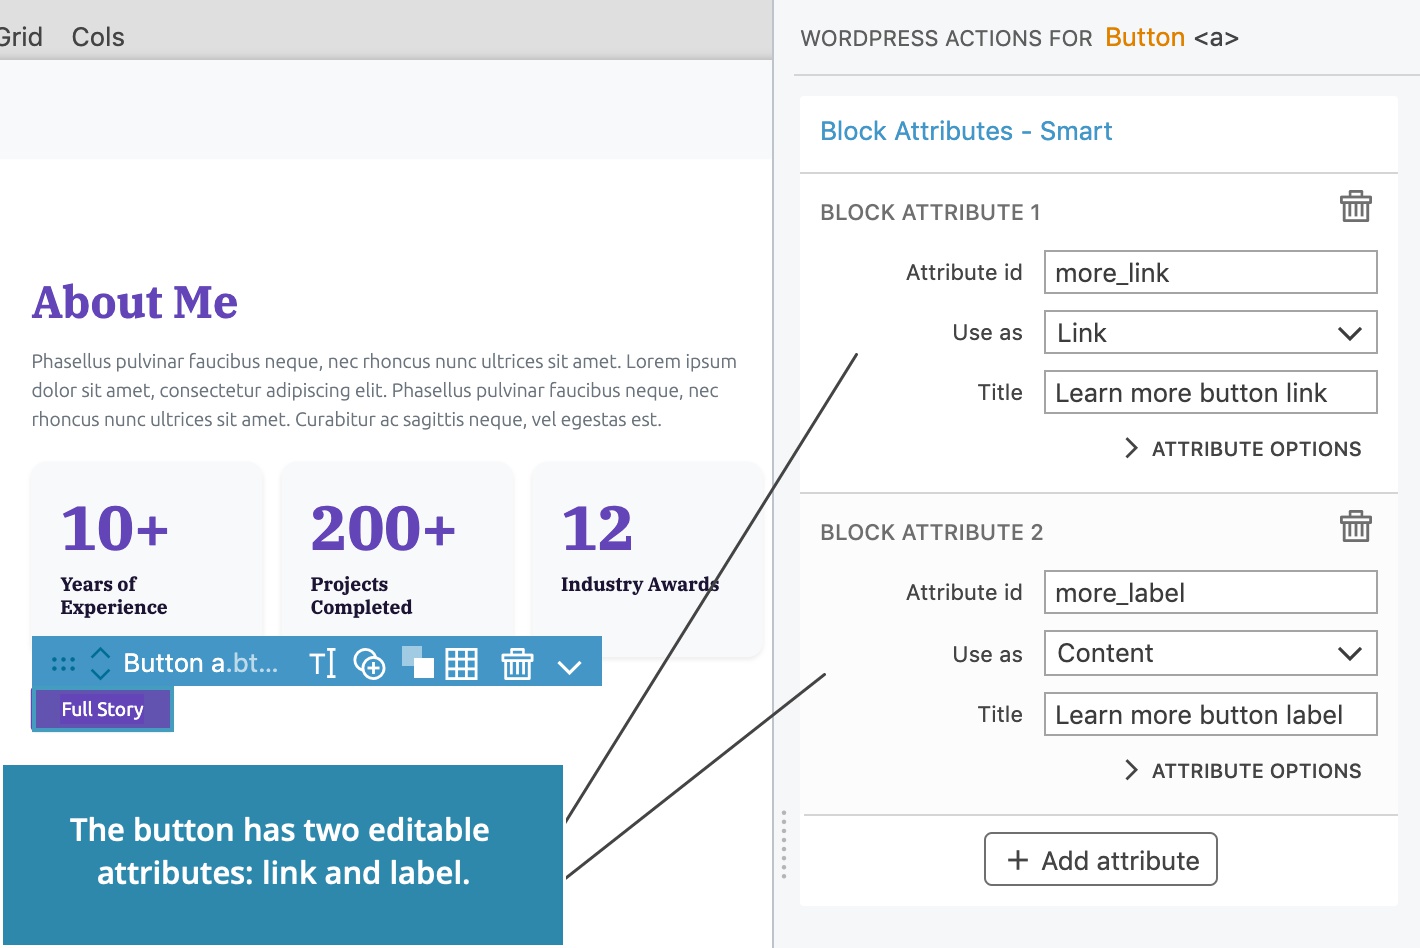
Then select the button <a> and add Block Attributes action. Select Use as “Link” to make the href editable:
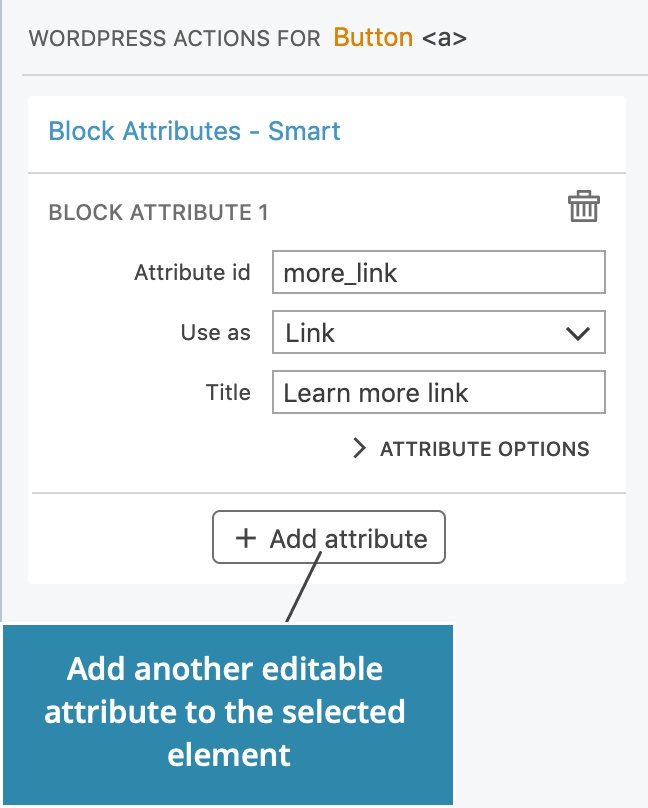
Let’s also make the label editable. Click on the Add attribute button on the Block Attributes action to add another editable attribute to the selected element:
Here, we will make the Content editable:
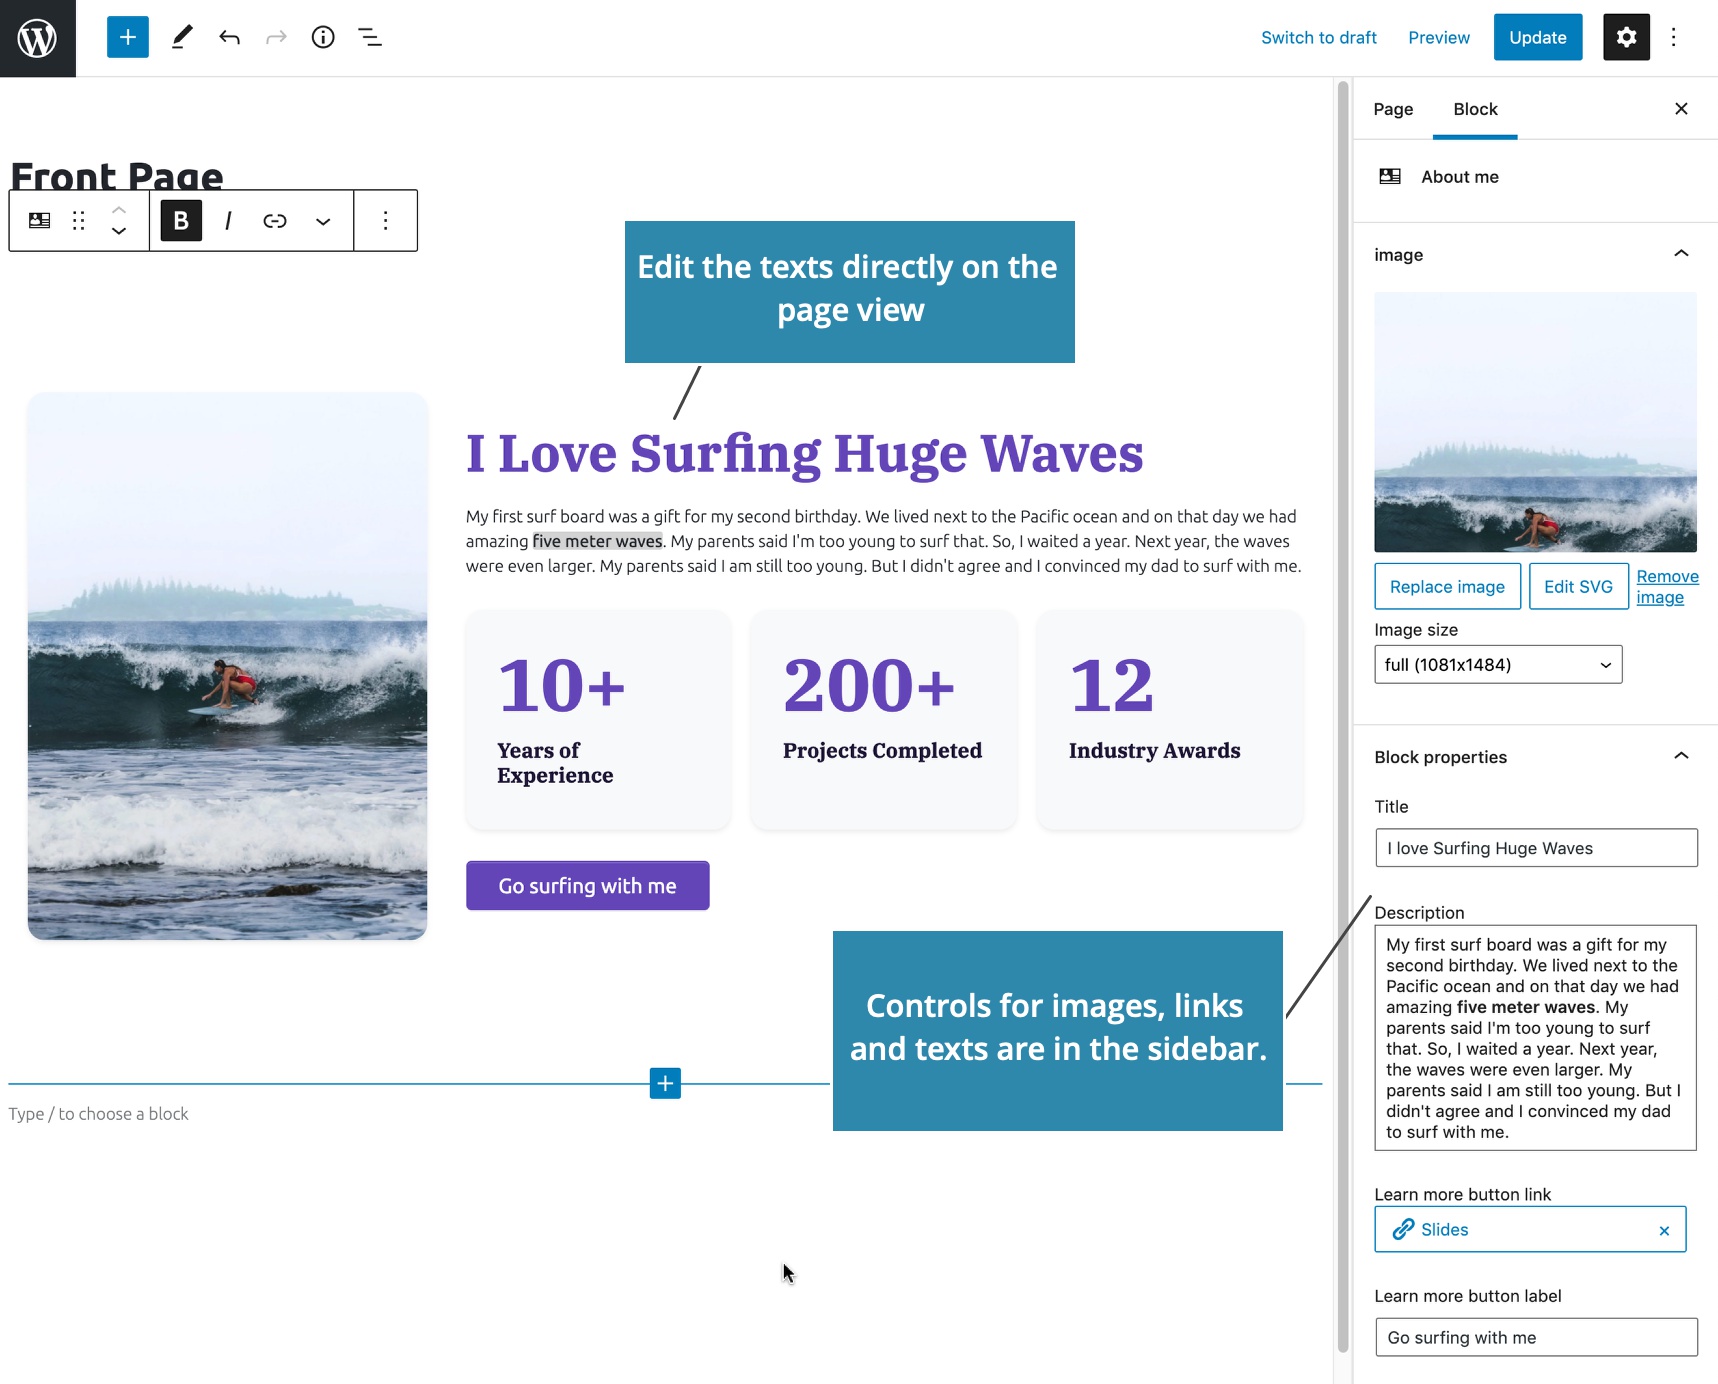
The block is now editable!
Export the project and reload the Block editor.
Now we can edit the title and description directly on the block, and customize all its properties in the sidebar.
Learn more about Block Attributes action.
Next step
We need to make the counters editable as well. We could use a fixed number of counters and make their numbers and descriptions editable with attributes such as Counter number 1, Counter label 1, Counter number 2…
But, we have a much better solution: nested blocks.
Next step: Adding inner blocks (blocks within the block).