Post Breadcrumbs displays the hierarchical path to the current post, either with links to post parents or with links to post categories.
This action can only be used together with Show Posts action.
Breadcrumbs are a very effective navigation control for showing how the current post fits into the content structure of the site. They let visitors quickly navigate between the site and they help search engines discover the content structure.
Post Breadcrumbs action provides simple yet flexible way for displays breadcrumbs without relying on any WordPress plugins.
Content structure
Post Breadcrumbs action can display two types of breadcrumbs:
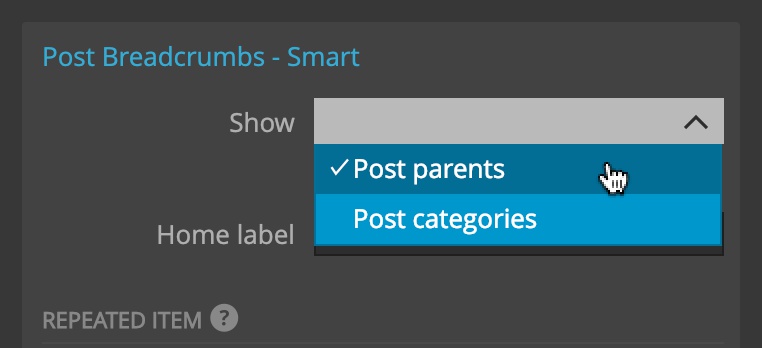
Post parents
Post parents display breadcrumbs with parents of the current post or page. This is useful with structured post types. Most often, this is used with pages, but in WordPress, any custom post type can be declared as hierarchical, meaning that posts can have parents and sub-posts.
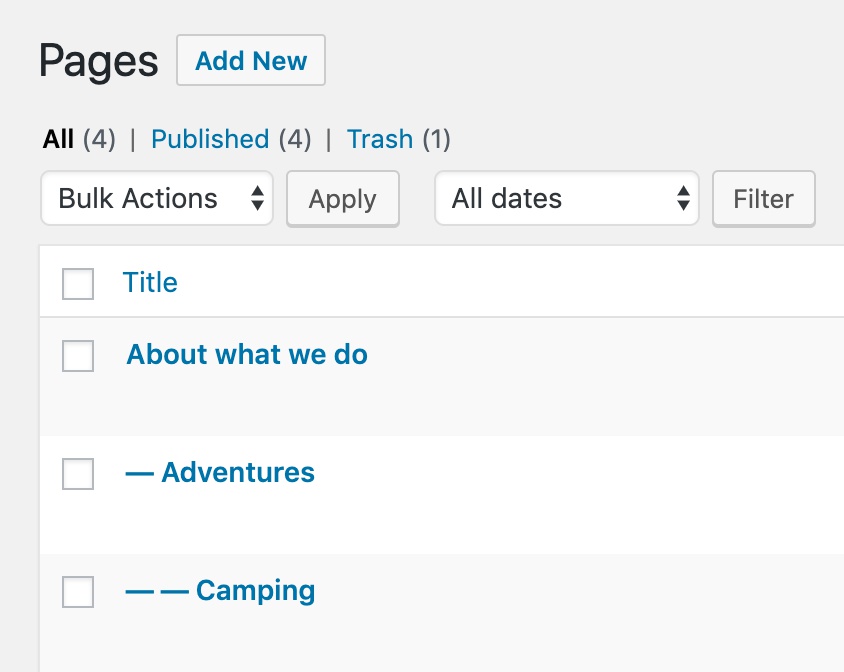
For example, here we display breadcrumbs for the page that is nested two levels deep in the page structure.
The page in WordPress dashboard:
Breadcrumbs:

Post categories
Post categories display breadcrumbs with the current post, its main category and all category parents.
Let’s take a look at the two examples.
In the first example we’ll display breadcrumbs for the post on the site with a simple flat category structure.
The category structure in WordPress dashboard:

Breadcrumbs show link to the site home, the category and the current post:

In the second example we’ll use structured categories. (In WordPress, categories can have sub-categories.)
The post in the dashboard:
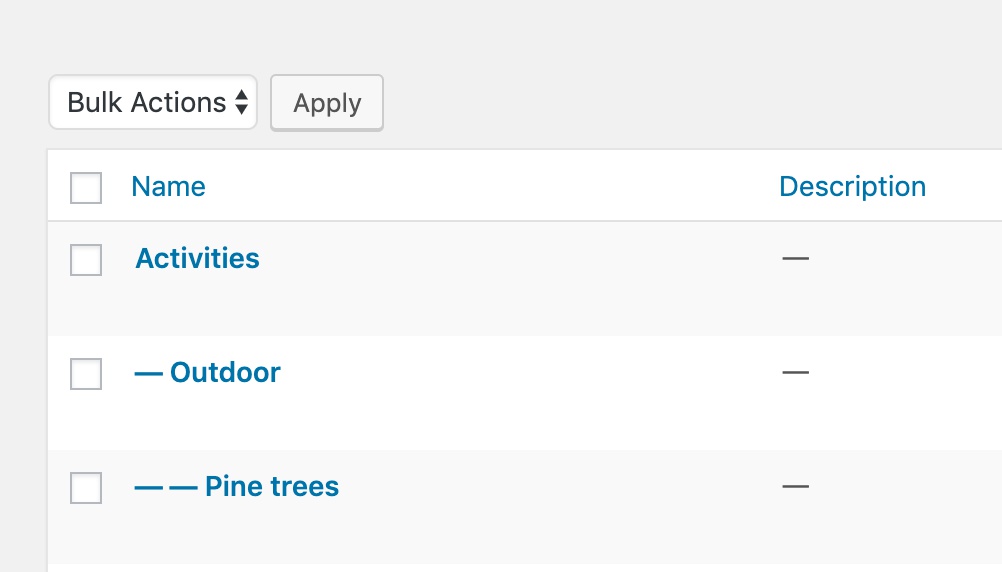
Breadcrumbs show the link to site home, the chain of categories (Activities, Outdoor and Pine trees) and the current post:

Displaying the breadcrumbs
How are the breadcrumbs displayed?
Post Breadcrumbs action works in two modes:
- Automatic, where it tries to detect (or create) the correct HTML structure, or
- Customized display, where we tell it how to show the breadcrumbs.
Automatic display
If we don’t set any action parameters, the action will look for list items <li>, divs <div> or links <a> in the element to which it is assigned.
If any of these is found, it will be used as a template for displaying each breadcrumb.
If no such element is found, the action will display breadcrumbs in a list of links.
This might be enough for some simple cases, but in practice, we often need more control over how breadcrumbs are displayed.
Customized display
Post Breadcrumbs action gives as a lot of control over how the individual breadcrumbs items are displayed by letting us select HTML elements as templates.
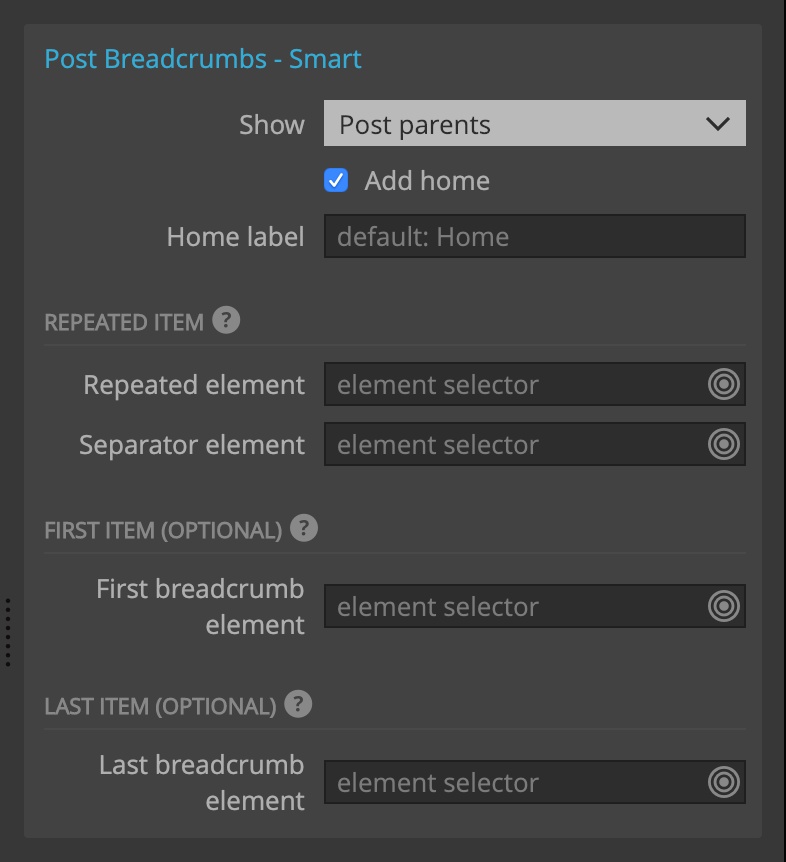
Add link to home
Select “Add home” checkbox to add the link to the site home at the beginning of the breadcrumbs navigation.
Use “Home label” setting to customize the label for the home link. By default, “Home” is used.
Repeated item
Repeated item is the element that will be used to display individual breadcrumbs.
We select the Repeated element and optionally, specify the element that should hold the name of the item and the separator that should be placed between the items.
For example, let’s say we have the following layout:
div.breadcrumbs
    a.button Link 1
    a.button Link 2
    a.button Link 3
We add the action on the top element and then select the Repeated element:

div.breadcrumbs       <— Post Breadcrumbs
    a.button Link 1   <— Repeated element
    a.button Link 2
    a.button Link 3
The output will be:

By default, the name will be displayed in the first text-only element within the repeated element, or in the content of the element itself. For most cases, that’s just what we want. But if necessary, we can use the Name element to selector to select the element for the name. Note, this element must be located within the Repeated element.
Note, there is no need to add “Don’t export” action on any placeholder elements on the same level as the Repeat element. All such elements will be automatically skipped when exporting the theme.
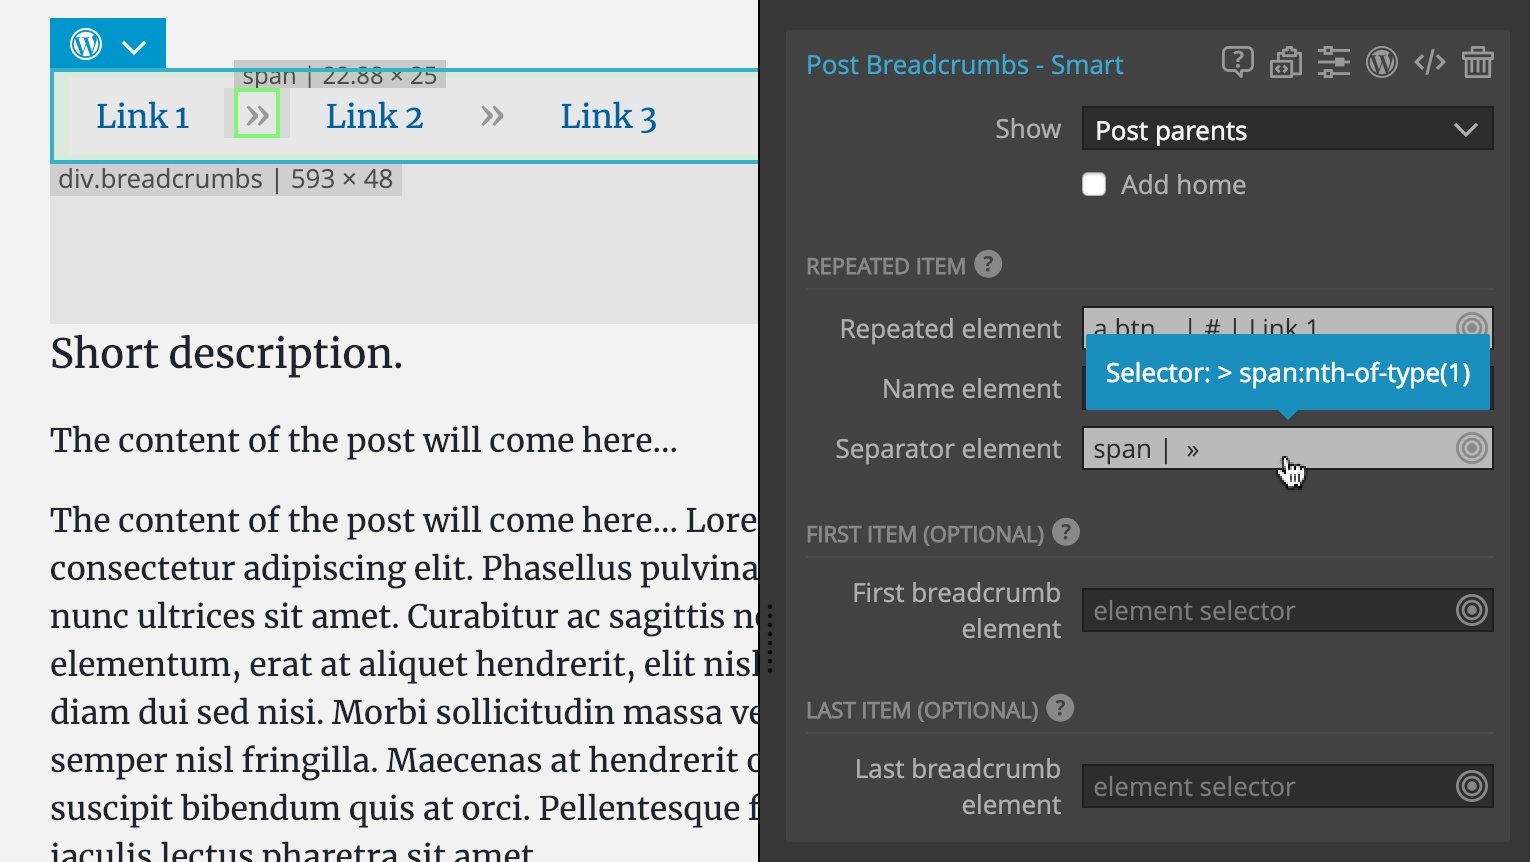
Separator
Now, let’s say we want to add a separator between items. Of course, doing that with CSS is the preferred approach. But sometimes it is simpler to just add an extra element to the layout.
Here, we added a span element with the text » and we selected the span as the Separator:
div.breadcrumbs        <— Post Breadcrumbs
    a.button Link 1    <— Repeated element
    span »             <— Separator
    a.button Link 2
    span »
    a.button Link 3
Output:

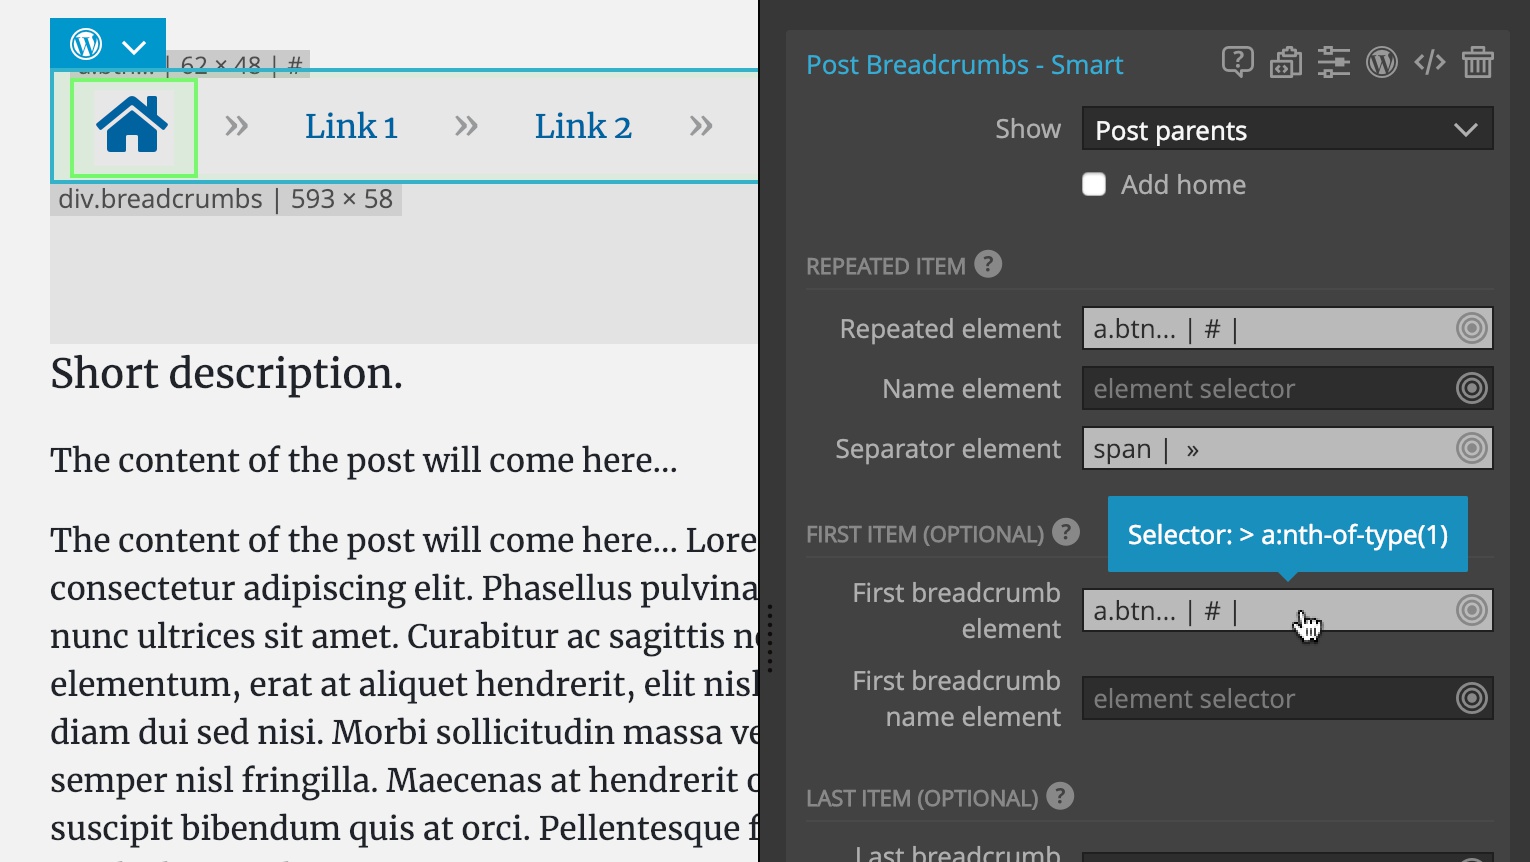
In some cases we need to display the first item differently than the rest. The first item usually refers to the home of the site. We might want to apply different styling or use a home icon instead.
The first item
To do that, we add the home item to the layout and then select it as the First item element.
The first item is usually used for displaying the link to the site home. Check the “Add home” checkbox to add the link to the site home to breadcrumbs. (Note, that screenshots below have this option unintentionally unchecked).
Here, we added an icon for the first item. We leave the First item name element empty because we will display the home icon instead.
div.breadcrumbs        <— Post Breadcrumbs
    a.home             <— First item element
        i.icon-home
    a.button Link 1    <— Repeated element
    span /             <— Separator
    a.button Link 2
    span /
    a.button Link 3
Output:

Note that you’ll probably have to reselect Repeated element after adding a new element to the layout in order to point selectors to the correct elements.
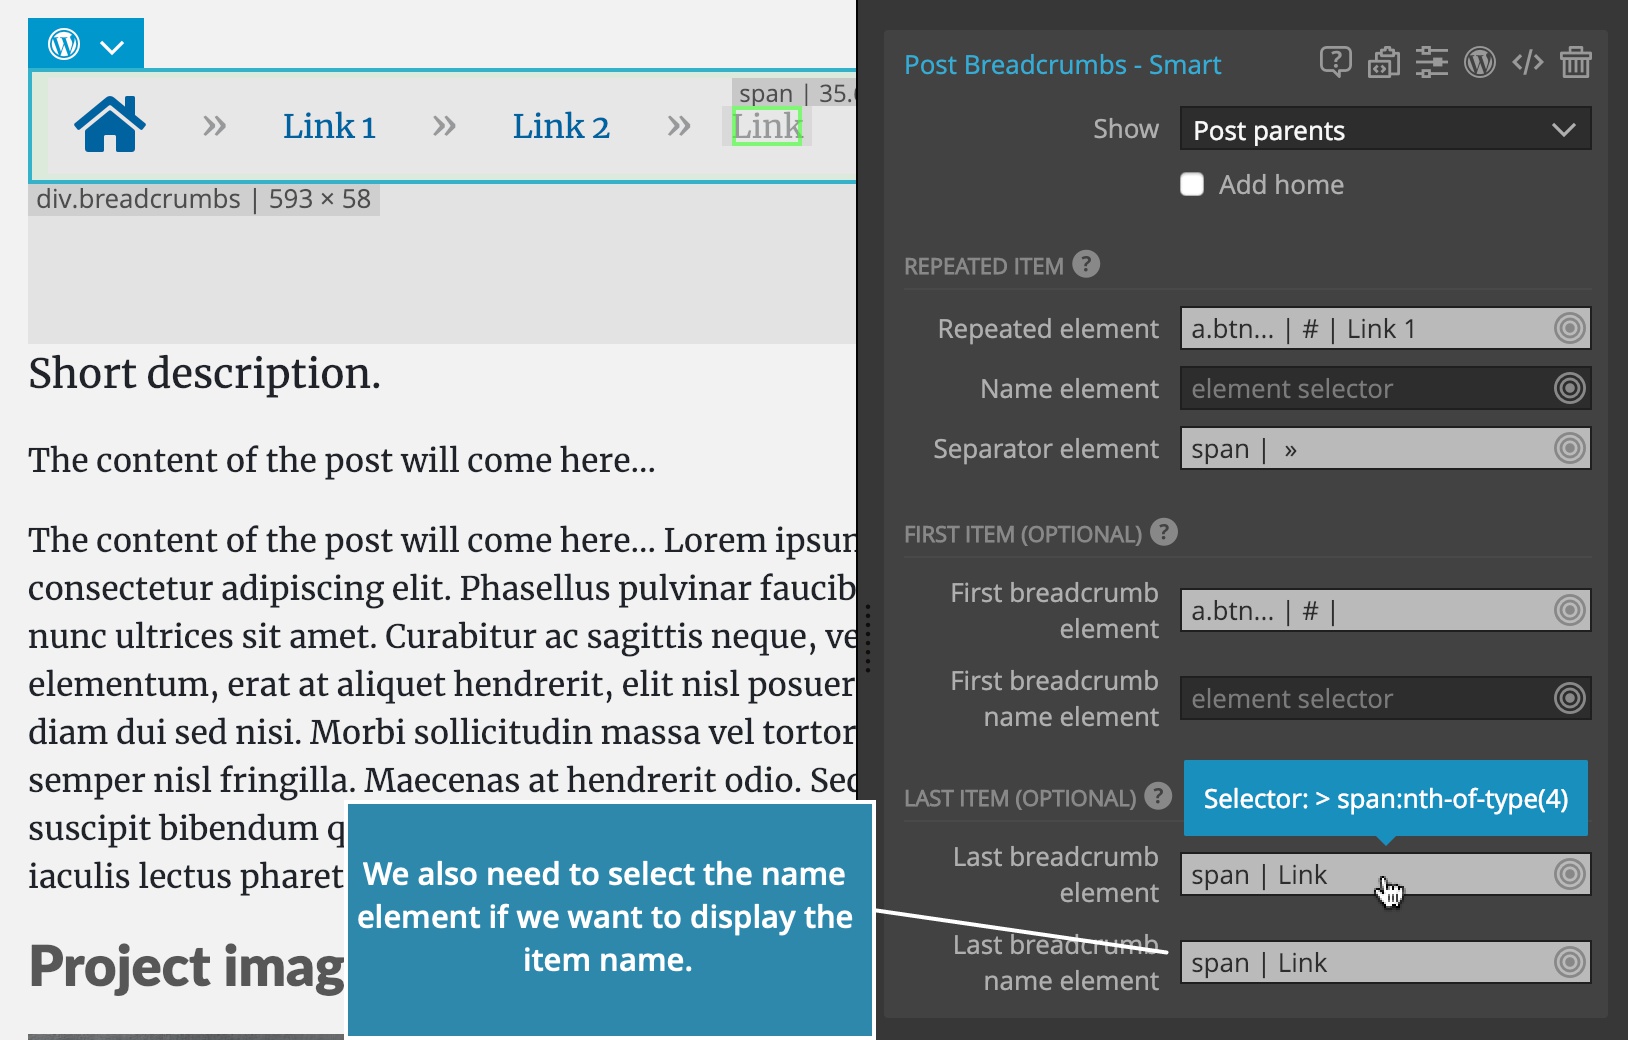
The last item
Notice that all breadcrumbs items are links. Usually, we don’t want to link the last breadcrumb because that post is currently displayed.
To do that, we add a text only element at the end and select it as the Last element:
div.breadcrumbs        <— Post Breadcrumbs
    a.home             <— First item element
        i.icon-home
    a.button Link 1    <— Repeated element
    span /             <— Separator
    a.button Link 2
    span /
    span Current page  <— Last item element, Last item name
Note that you have to also select the name element for the Last item if you want to display the name of the last breadcrumb item.
Output:

In this way we can use any HTML layout we want to display customized breadcrumbs.
And again, we can see the smartness of Smart actions at work: Smart actions adjust the WordPress output to our custom layout, instead of forcing us to adopt layout that is generated by WordPress.
Troubleshooting
Changing the HTML layout, classes and ids of the element with the Post Breadcrumbs action can cause Repeated element selector and other selectors to be invalid or to point to the wrong element.
So, if you get unexpected results after changing the layout, try reselecting the element selectors.