Let’s build a custom block together.
We will start with a HTML landing page implemented with Bootstrap 5. The steps described in this guide assume that the theme export is already set up.
Download and set up the project
Would you like to follow the steps described in this guide? Download the project and set up the theme export.
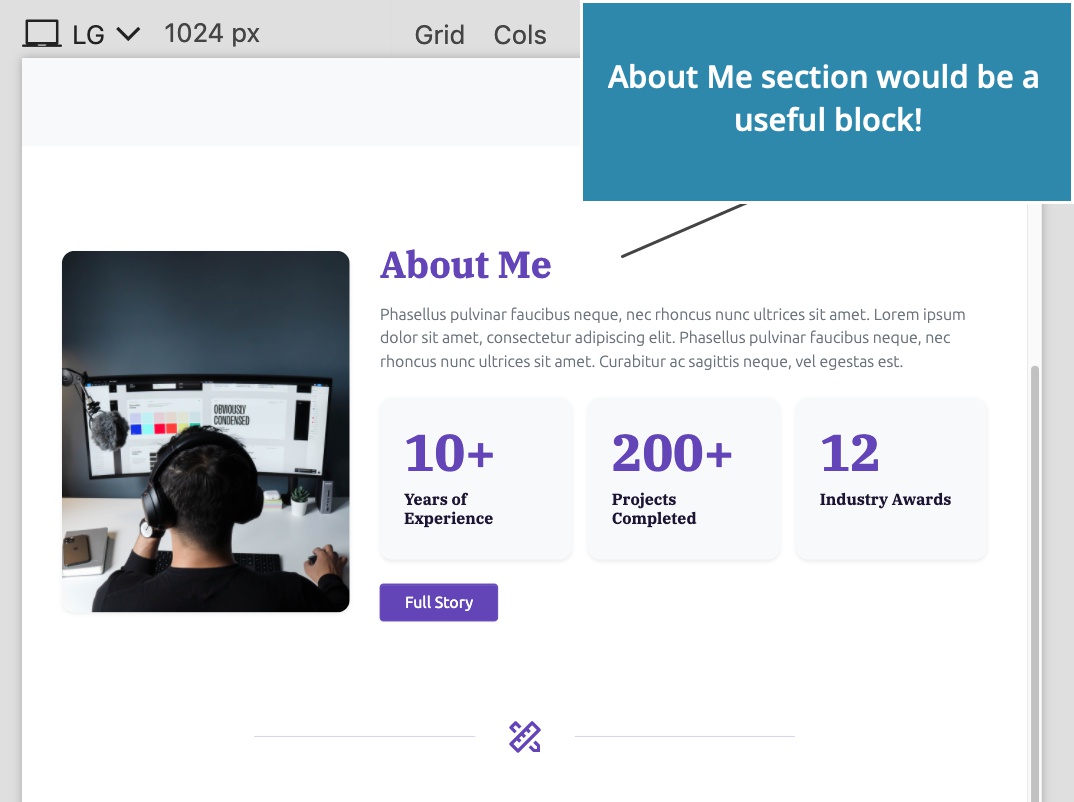
Decide which element to convert into a block
The page has an About Me section that would work great as a block:
Add the Block action
To create a new block type, select the About Me <section> HTML element and add the Block action from the WordPress panel.
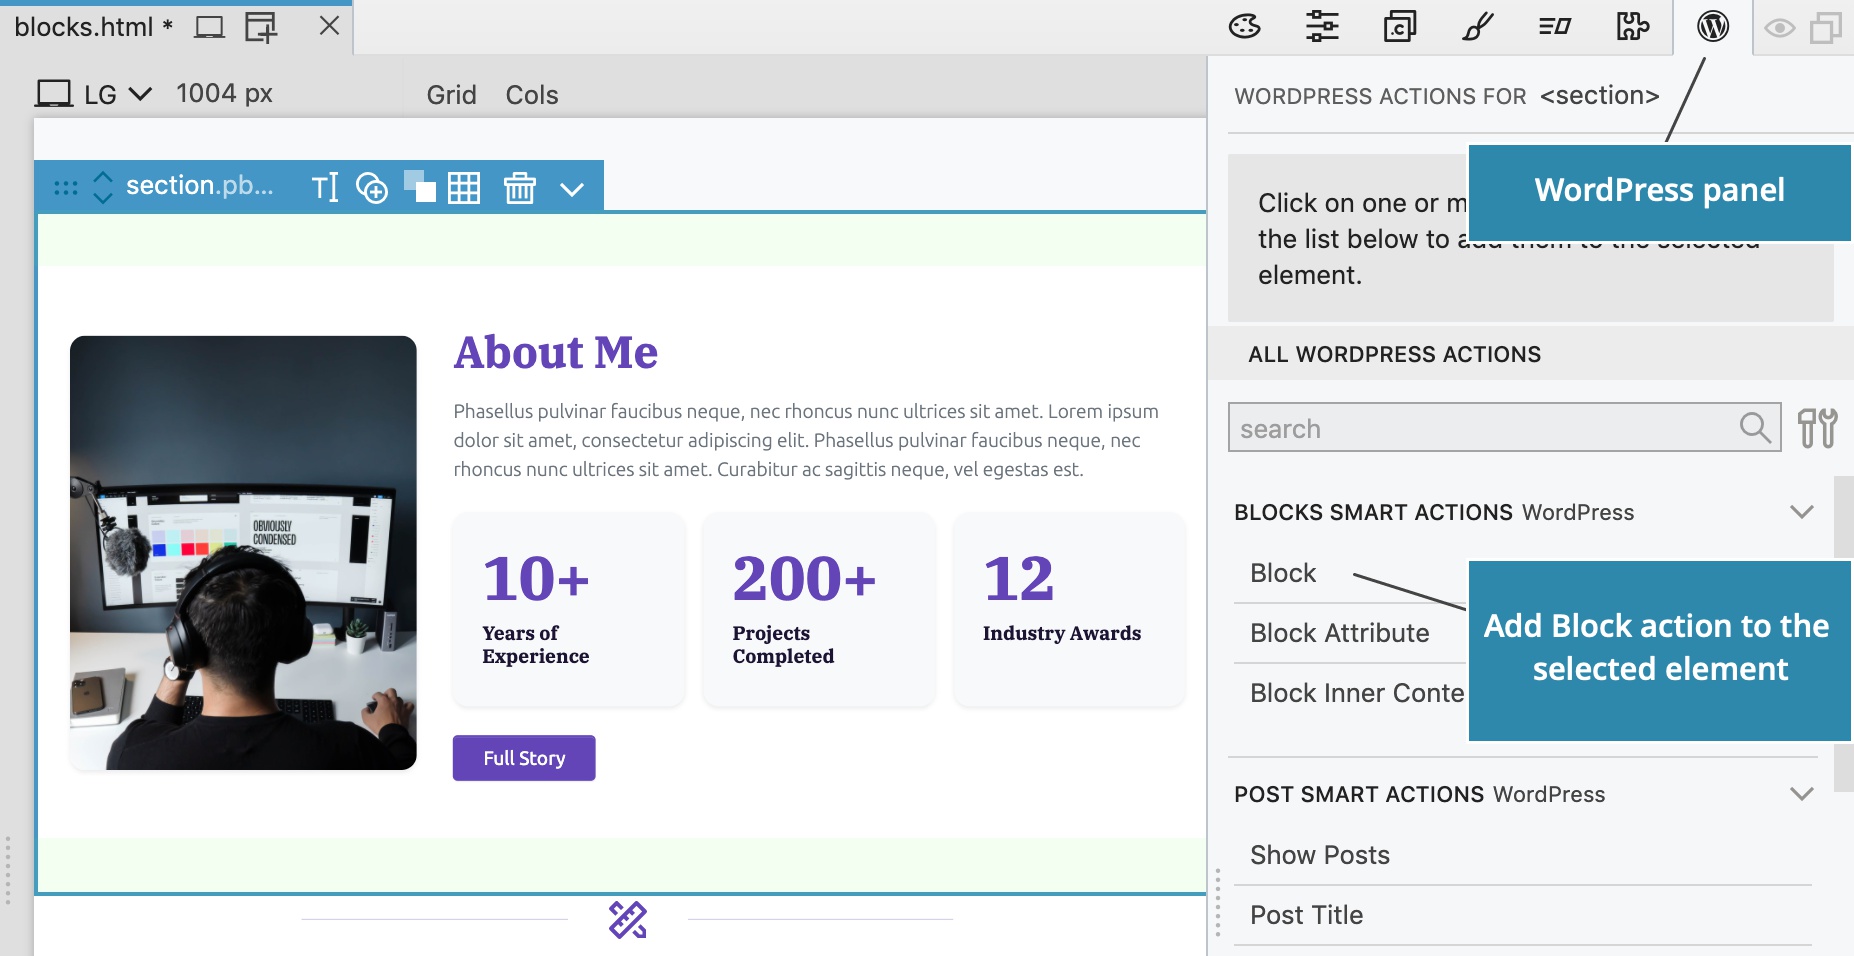
Block action settings are now shown in the WordPress panel:

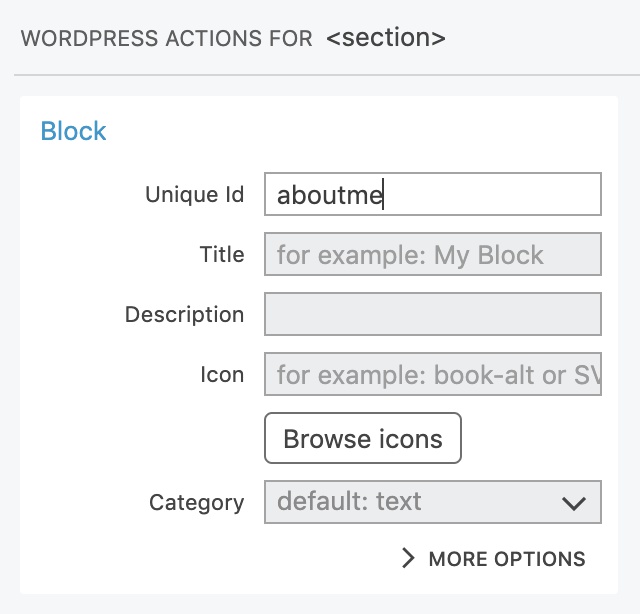
Give the block a unique id
Each block needs an id. In WordPress the whole id consists of the namespace (theme or plugin slug, for example), followed by the block id, for example mytheme/aboutme.
On Block action, we just enter the main id, in our case aboutme. Pinegrow will automatically prepend the theme / plugin slug as the namespace during export.
Describe the block
Name, description and icon help users find and understand the function of the block.
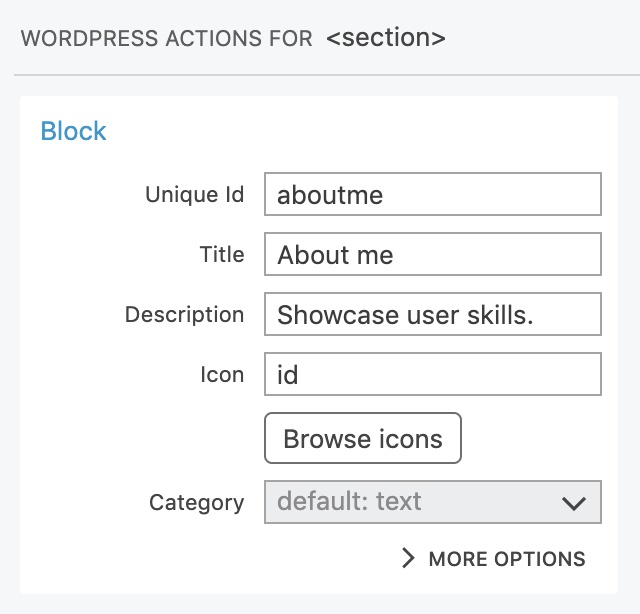
Icon can be one of built-in WordPress dashicons, or SVG image code. We will use the icon named id.
Category places the block into one of predefined WordPress block categories or into a custom category.
Regular and dynamic blocks
Let’s take a quick peek into the More options section, without having to change any settings there.
The main setting there is Block type that selects the way how the block is implemented.
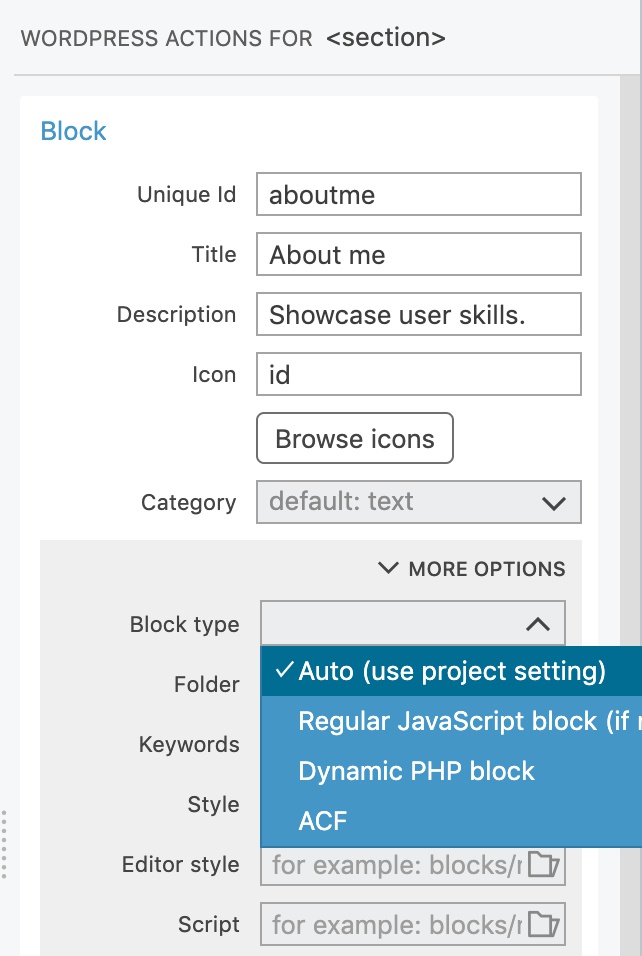
There are two types of native WordPress blocks that don’t require any plugins: regular and dynamic.
- Regular blocks are implemented in JavaScript and offer the best editing experience and performance. But, such blocks can not use WordPress actions such as Show posts.
- Dynamic blocks are implemented in PHP and render their content on the server, every time they are displayed. They can use any WordPress action and always display up-to-date information. The editing process has delays due to server-side rendering.
ACF blocks are implemented as Advanced Custom Fields PRO Blocks. They offer a mix of browser-side and server-side rendering.
Learn more about the difference between regular, dynamic and ACF blocks.
We will leave the Block type setting on auto in order to generate a regular JavaScript block.
Export the theme
Export the theme…
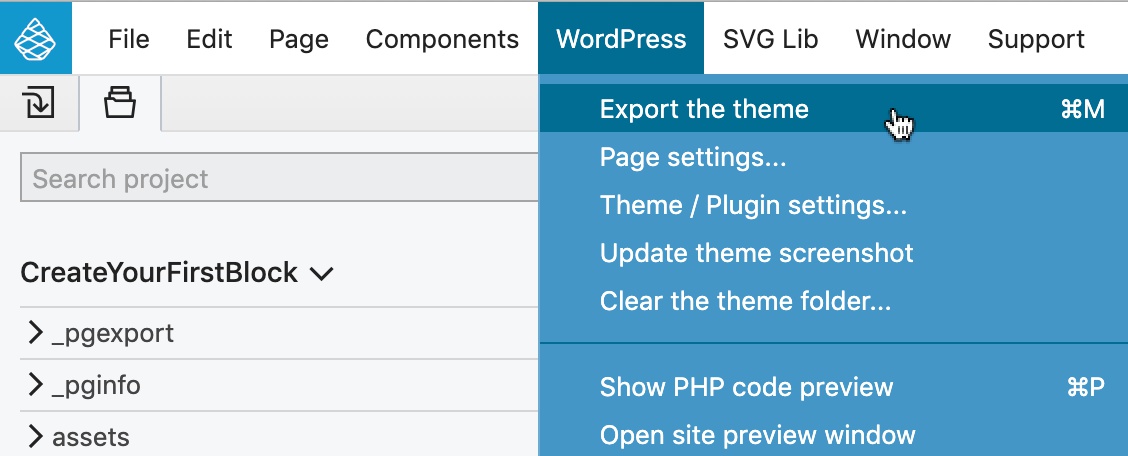
…and reload the Block editor.
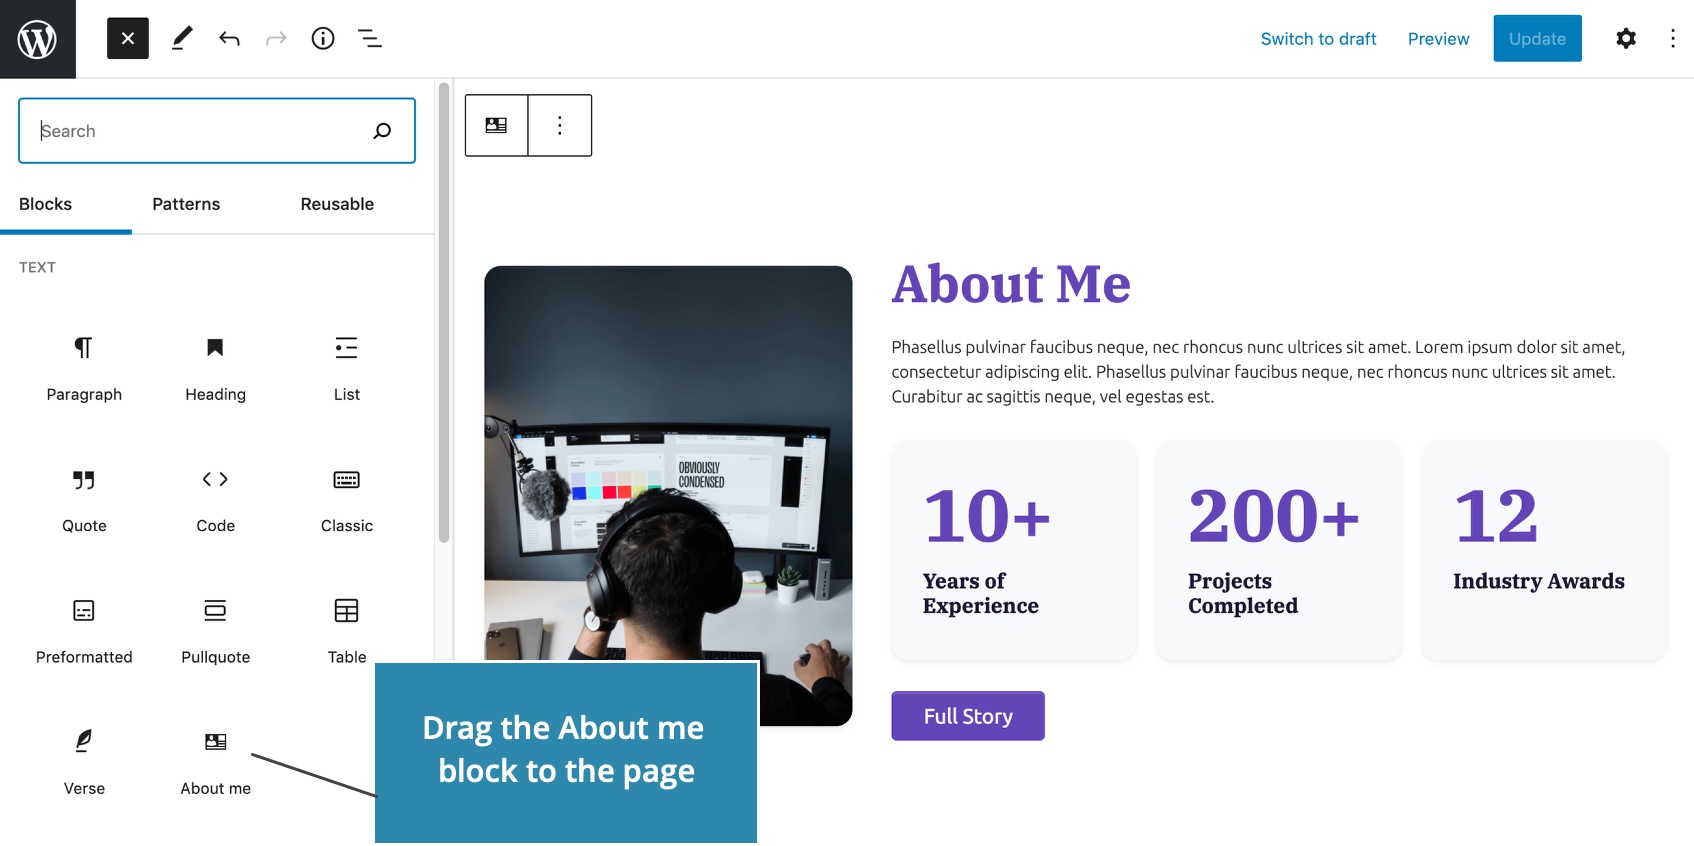
Use the block in the block editor
Our About me block is listed in the block library from where we can drag it to the content:
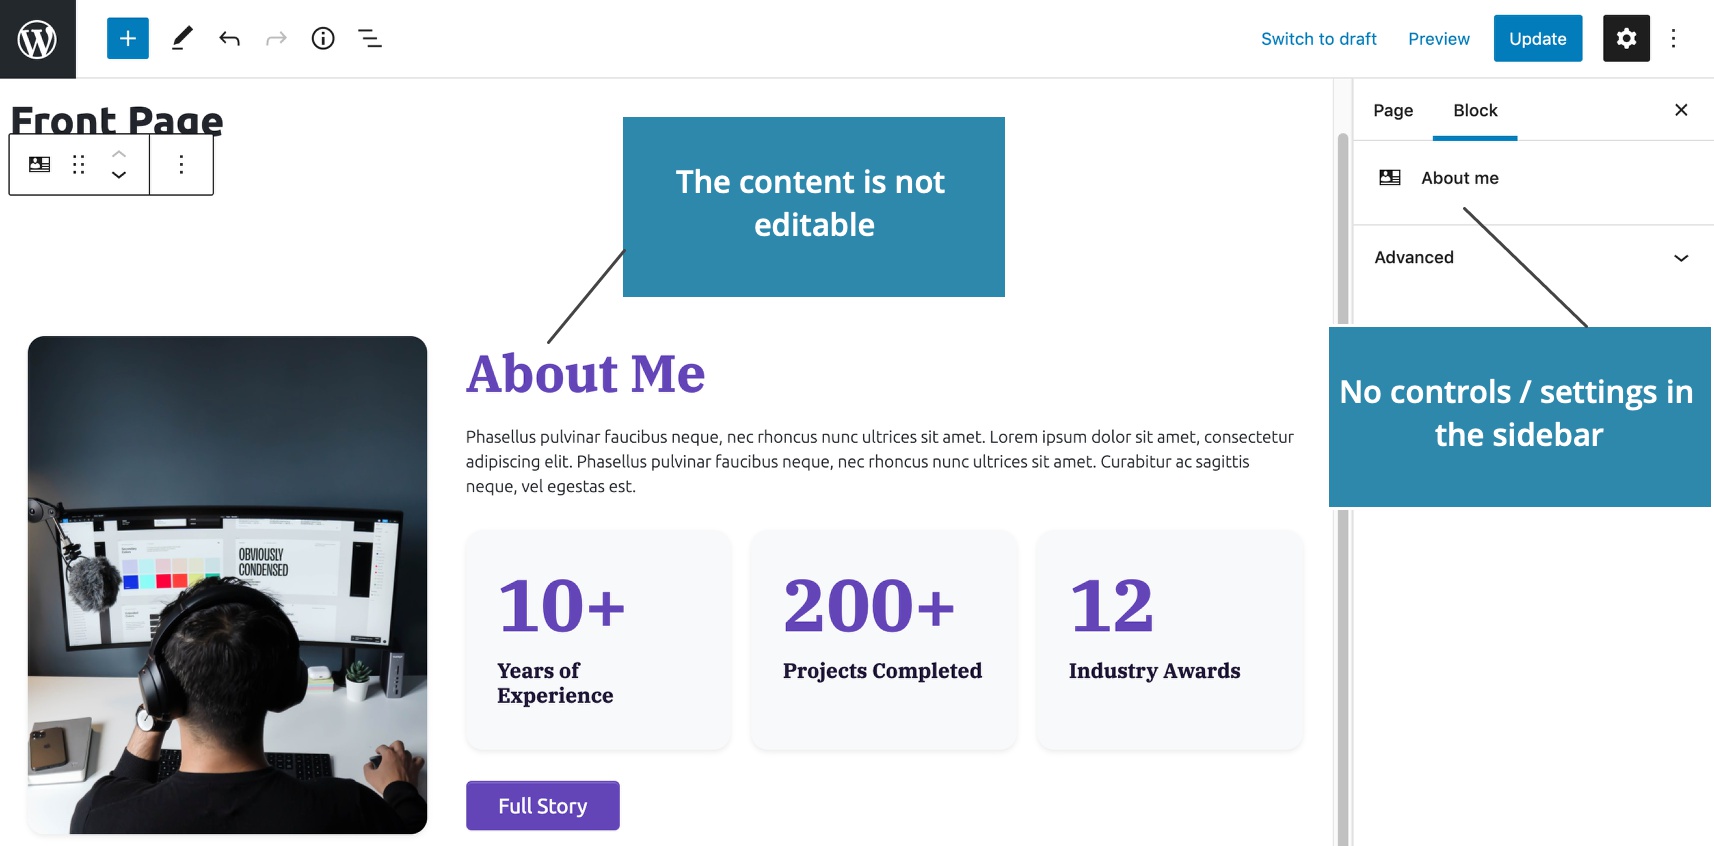
But, the block is not yet editable. We can’t change its content and it has no control fields in the sidebar:
Next step
Next step: Adding editable attributes and controls.