Post Pagination enables navigation between pages of Show Posts results, including next and previous results page links and more.
This action can only be used together with Show Posts action.
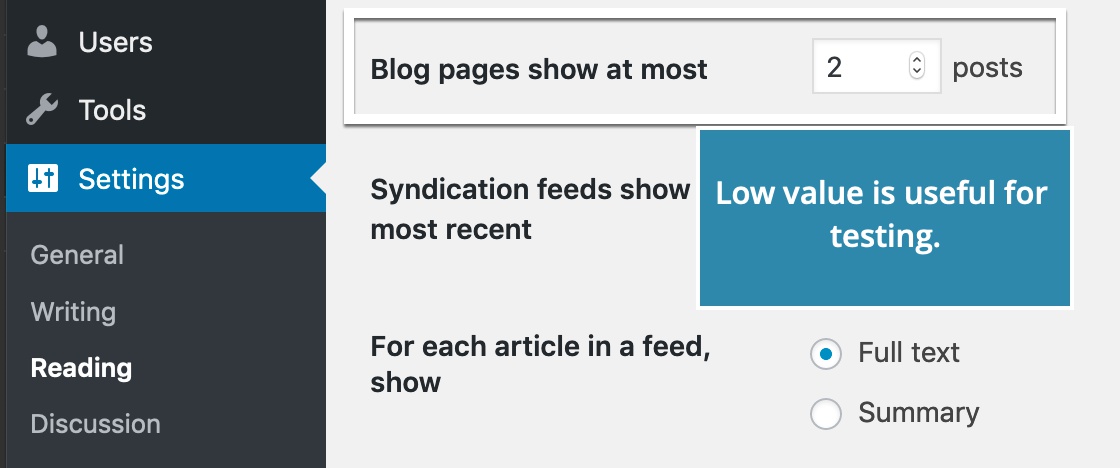
Show Posts with the Main loop is paginated by default. That means that WordPress returns posts in the batches of ten results (the number of posts per page can be changed in WordPress settings):
Show Posts with Custom query can also be paged if we set its Posts per page parameter:

Page Pagination action is used to display pagination controls.
Selecting the Show Posts loop
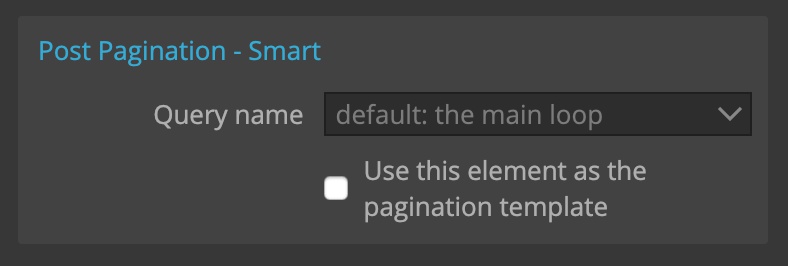
First we have to connect the pagination to its Show Posts action. By default, if the Query name is empty, pagination will be connected to the Show Posts with the Main loop.
To connect the pagination to another Show Posts query we have to enter its name in the Query name.
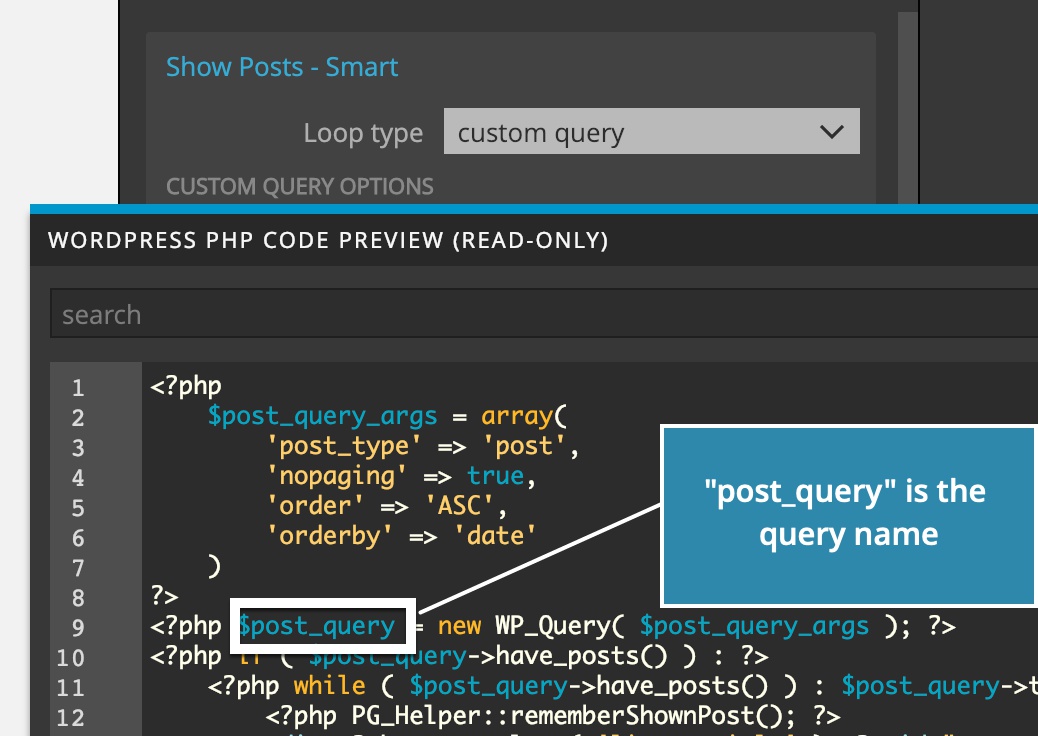
For Show Posts with Custom query the name is its Query name setting, if set, or selected Post type, appended with “_query” suffix. For example, “post_query”.
For Show Posts with Relationship the query name is its field name, appended with “_query” suffix, for example “project_services_query”.
The easiest way to find out the query name is to open the PHP preview on the Show Posts element and then look for the query name (without the “$” character):
Note, Pagination has to be shown inside or after its related Show Posts action.
Post Pagination works in two modes:
Standard WordPress pagination
When “Use this element as the pagination template” is not checked, the action will display standard WordPress pagination control with previous and next page links.
But this control uses WordPress HTML markup that most likely will not fit into our HTML structure and styling.
Using our HTML markup for pagination
On the the other hand, checking “Use this element as the pagination template” will let us add pagination elements on our existing markup. This is much friendlier, and that’s why this is the default setting.
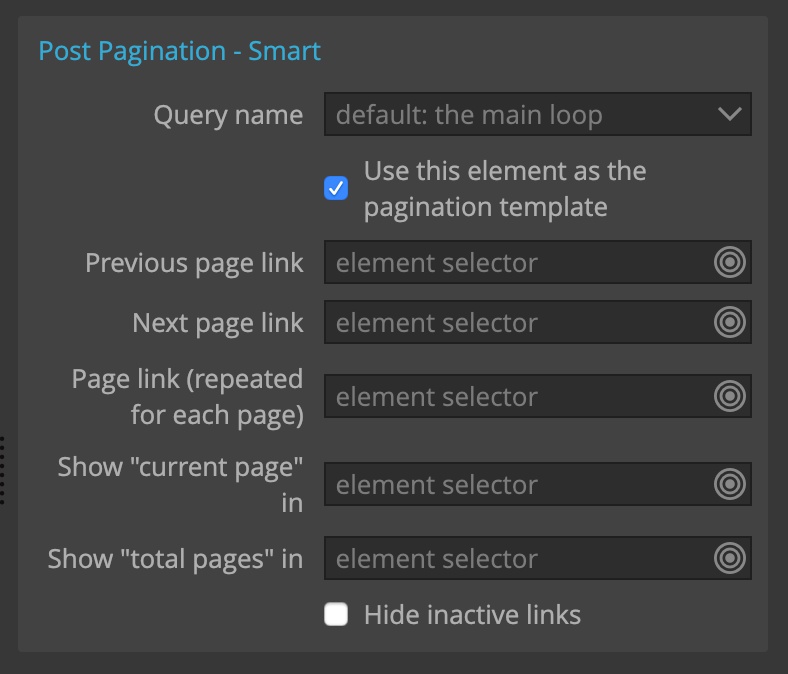
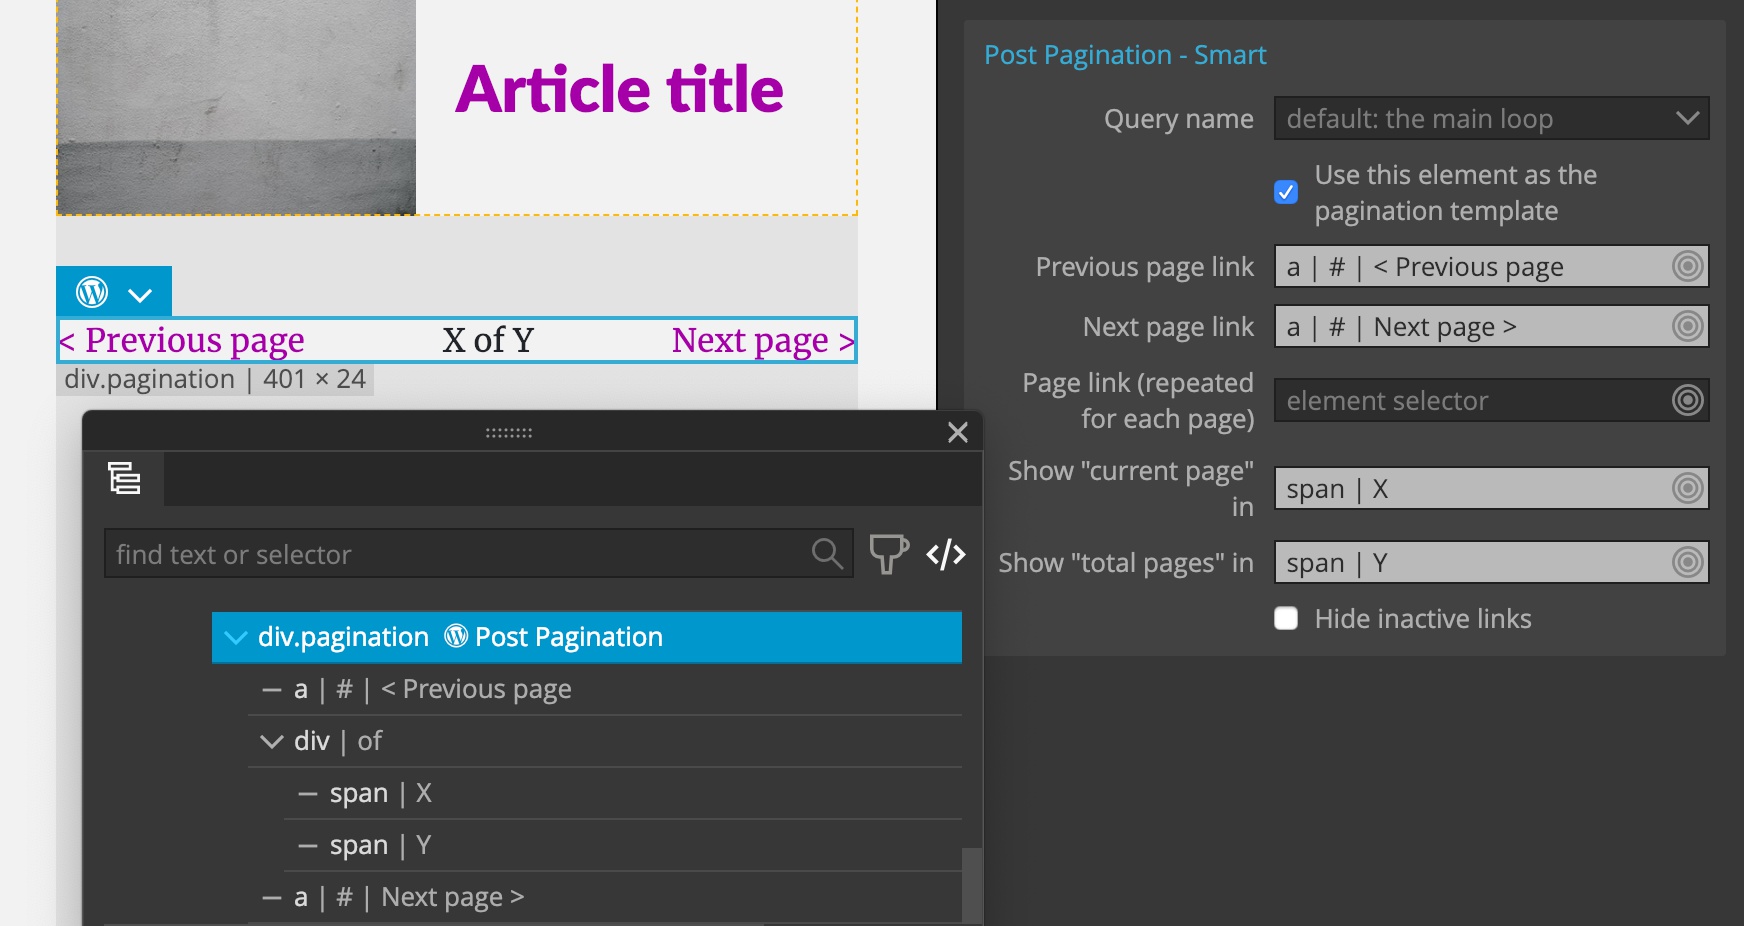
When selected, we get a bunch of selector controls for selecting elements that will play various pagination roles.
Selected elements have to be either the element with Post Pagination itself, or its sub-elements.
All selectors are optional. Pagination control doesn’t have to implement all features.
Previous page link is the <a> link element that will be used as a previous page link.
Next page link is the <a> link element that will link to the next page.
Page link (repeated for each page) is the <a> link element that should be repeated for each available page. This is used to display direct links to all available pages.
Show “current page” in, is the element that will display the number of the current page.
Show “total pages” in, is the element that will display the total number of pages.
Hide inactive links will cause next and previous links to be hidden in case they are not relevant (for example previous link is not active on the first page of results).
Although Page Pagination action can be placed on each individual pagination element, it is much better to put the Page Pagination action on the container element that contains all pagination elements.
Page Pagination wraps its element with an IF statement that causes the pagination element not to be displayed in case that the results are not paged.
Examples
Let’s take a look at the example.
Previous and next page links
We’ll implement pagination with next and previous links, and showing “page X of Y”.
We will put pagination controls on our custom HTML markup:
div.pagination         <— Post Pagination action
    a Previous page    <— Previous page element
    div
        span X         <— Current page element
        "of"
        span Y         <— Total pages element
    a Next page        <— Next page element
By setting up the Post Pagination action on the div.pagination element:
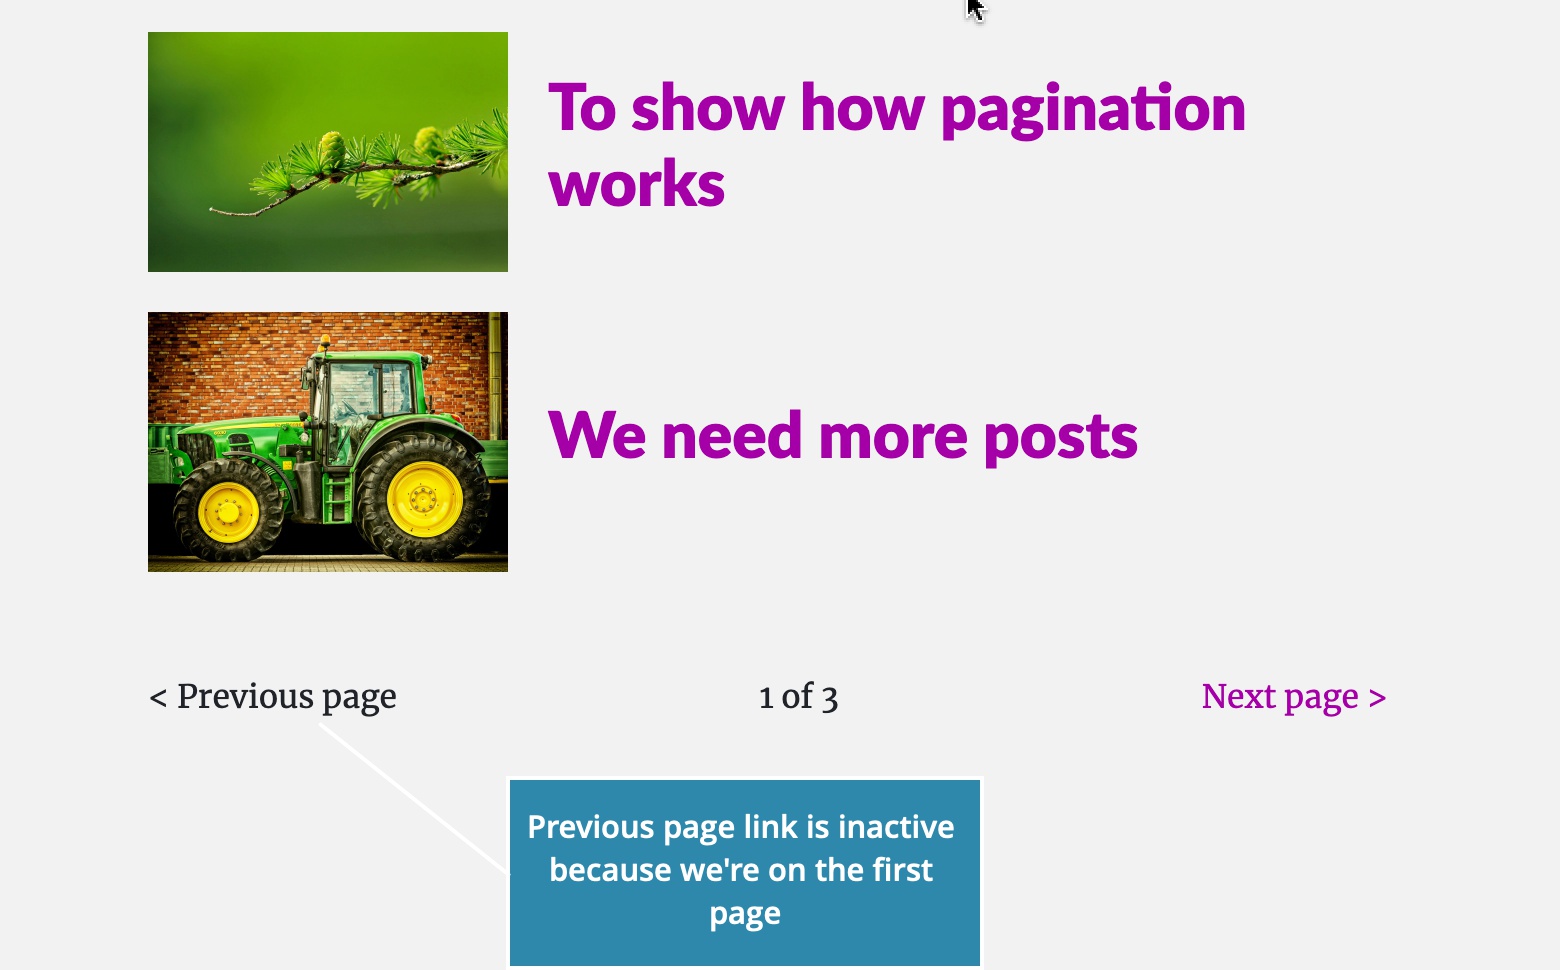
We get nice pagination controls on the site. Inactive Previous and Next page links will not have href attribute and thus won’t be styles as links:
If we check the “Hide inactive links”:
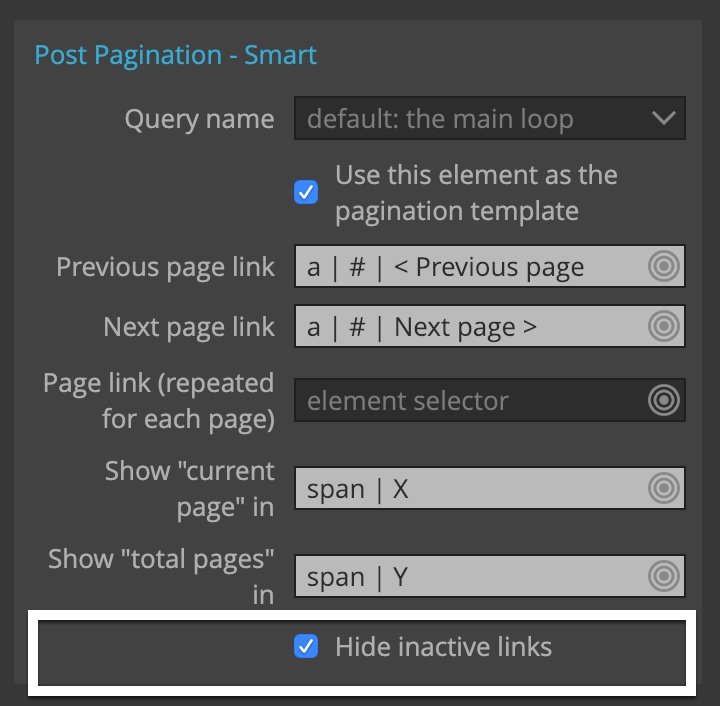
Inactive links will be omitted instead. Depending on the layout of pagination, that might not be what we need:

The generated PHP for this example is:
<?php if ( PG_Pagination::isPaginated() ) : ?>
    <div class="pagination">
        <a <?php echo PG_Pagination::getPreviousHrefAttribute(  ); ?>><?php _e( '< Previous page', 'simple' ); ?></a>
        <div>
            <span><?php echo PG_Pagination::getCurrentPage(); ?></span>
            <?php _e( 'of', 'simple' ); ?>
            <span><?php echo PG_Pagination::getMaxPages(  ); ?></span>
        </div>
        <a <?php echo PG_Pagination::getNextHrefAttribute(  ); ?>><?php _e( 'Next page >', 'simple' ); ?></a>
    </div>
<?php endif; ?>
We can see from the code that the whole element is wrapped in a conditional statement. That means that pagination controls will not be shown if results are not paginated:

Repeated page buttons
Here we’ll display links for every available page, by adding Post Pagination action on the HTML element:
ul             <- Post Pagination
  li           <- Repeated item
    a Page 1
And selecting the <li> element as the repeated item:
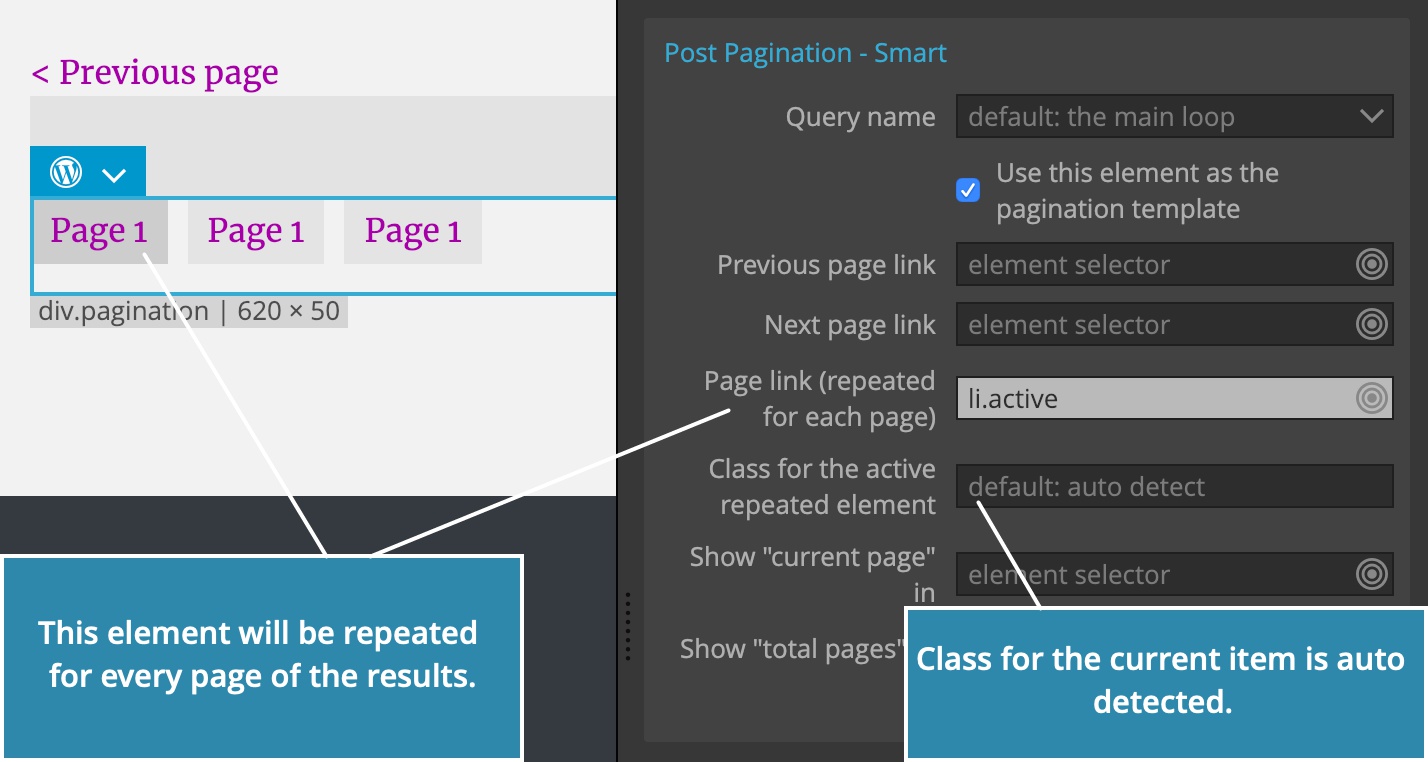
The class that marks the active item will be auto detected.
This will display the list of pages:

To customize how this action works, click on the icon next to the action name to change it into regular WordPress actions.