All editions of Pinegrow (desktop Pinegrow Web Editor, self-hosted WordPress plugin and Pinegrow Online) now let you conveniently publish projects to Netlify static HTML hosting.
Netlify is one of the best solutions for static HTML hosting with a generous free tier that lets you publish up to 500 websites, including support for custom domains.
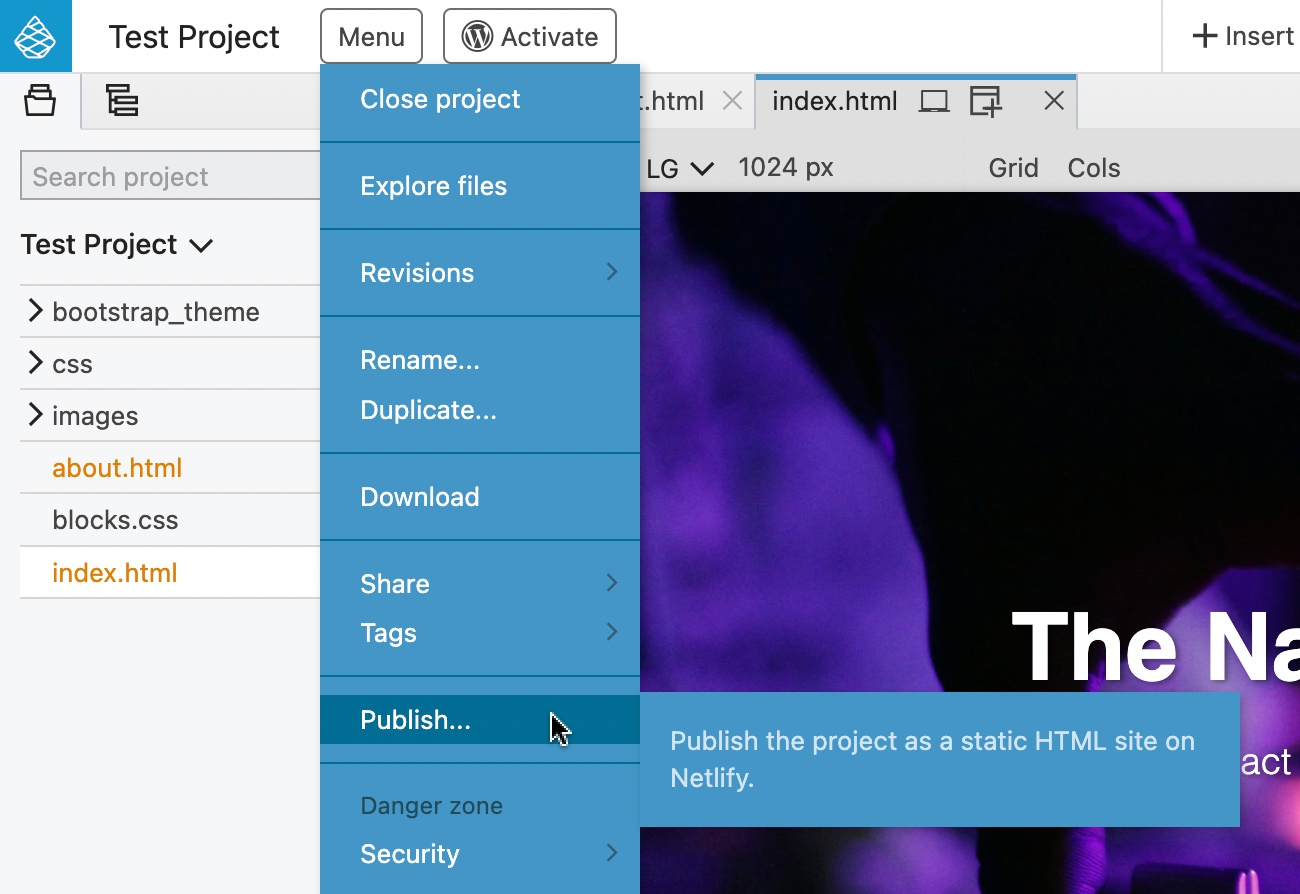
Publishing the project
To deploy the project to Netlify, open the project in Pinegrow and select Publish… from the project menu (click on the project name in the Project panel).

The Publish command is also available in the main project menu in browser-based Pinegrow WordPress Plugin and Pinegrow Online.
Setting up Netlify access
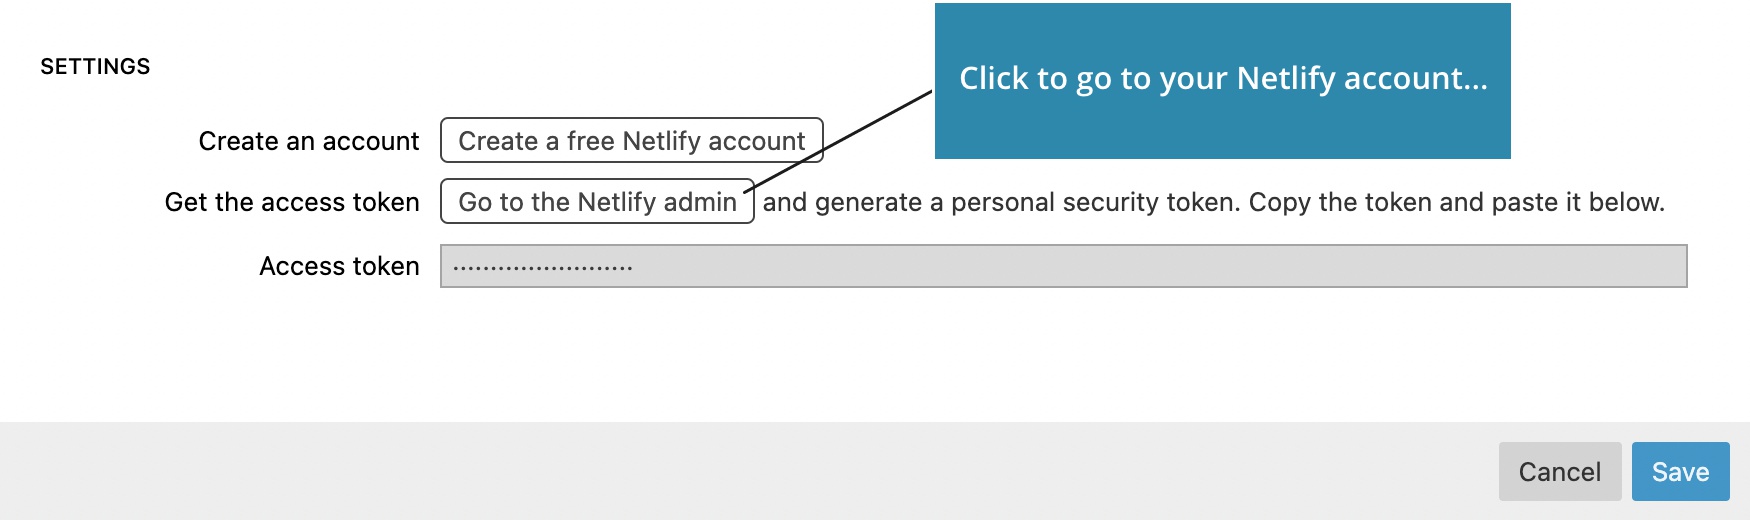
Before you can publish your first project, you will need to generate the access token in your Netlify dashboard:
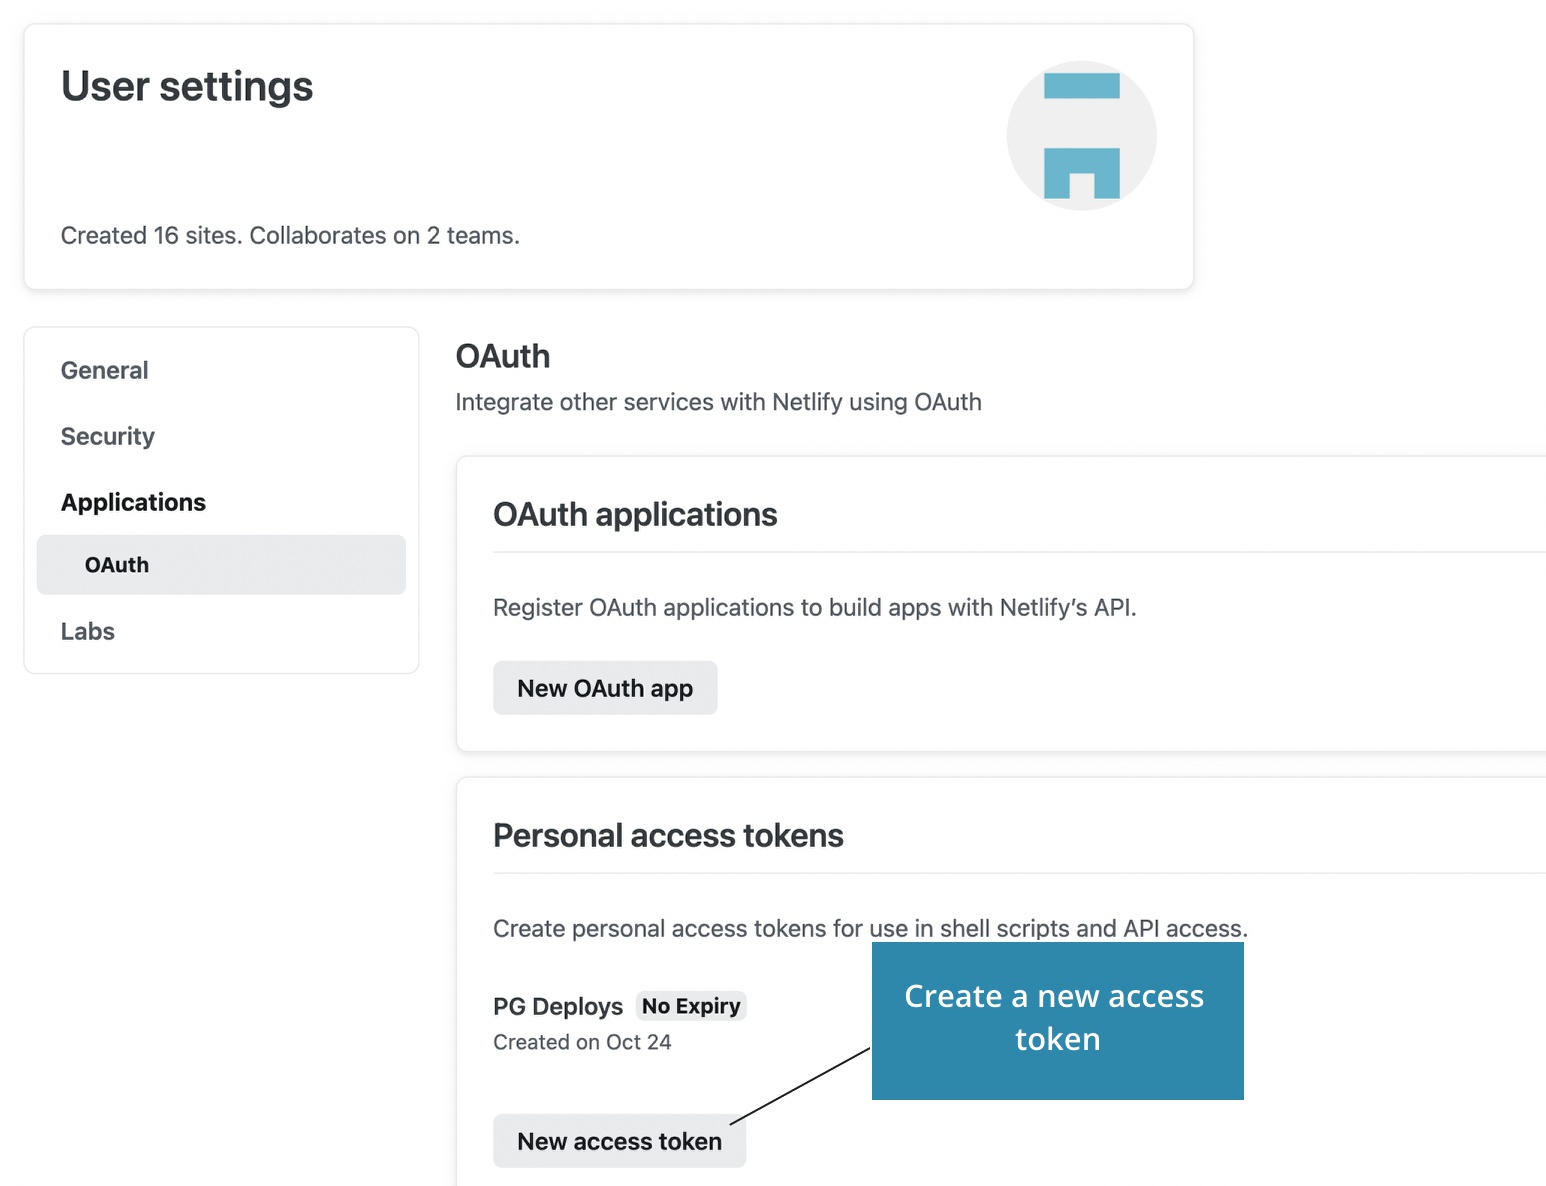
Create a new access token in User settings -> Applications -> Personal access token:
Then, enter the Netlify access token in Pinegrow Netlify settings dialog.
Keeping the access token safe
At the moment, Netlify does not support limiting access tokens to certain sites or operations. This means that access token gives anyone full access to your Netlify account – including all sites that are published there.
Pinegrow helps protect your security by:
- Storing the access token only in your local storage and never transmitting the token to our servers.
- Not displaying the token again, after you enter it into the Settings dialog.
Hint: store the token securely in your password manager to access it on different devices.
Creating a new site
To create a new Netlify site, open the Target site dropdown and select Create new… at the bottom of the list.
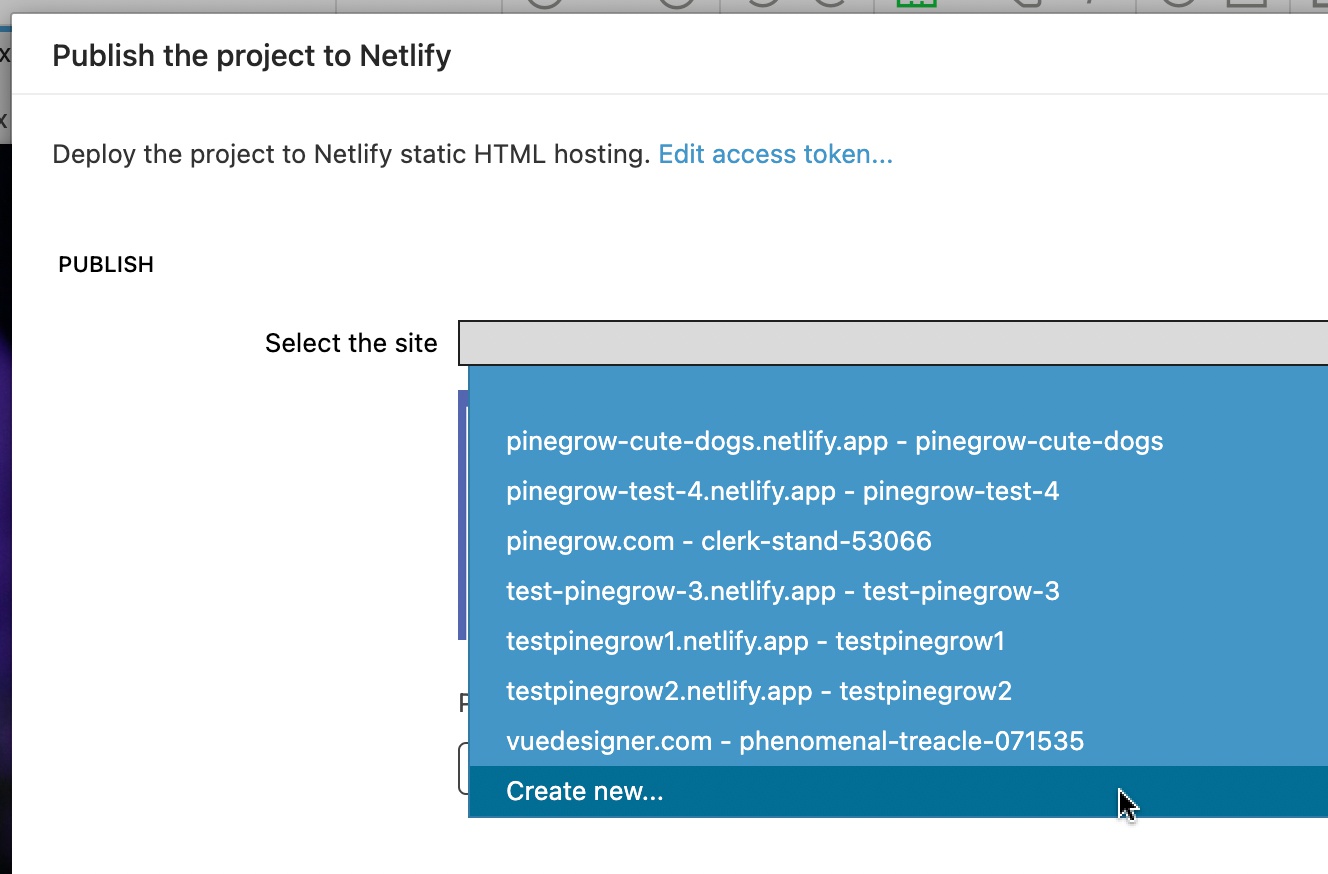
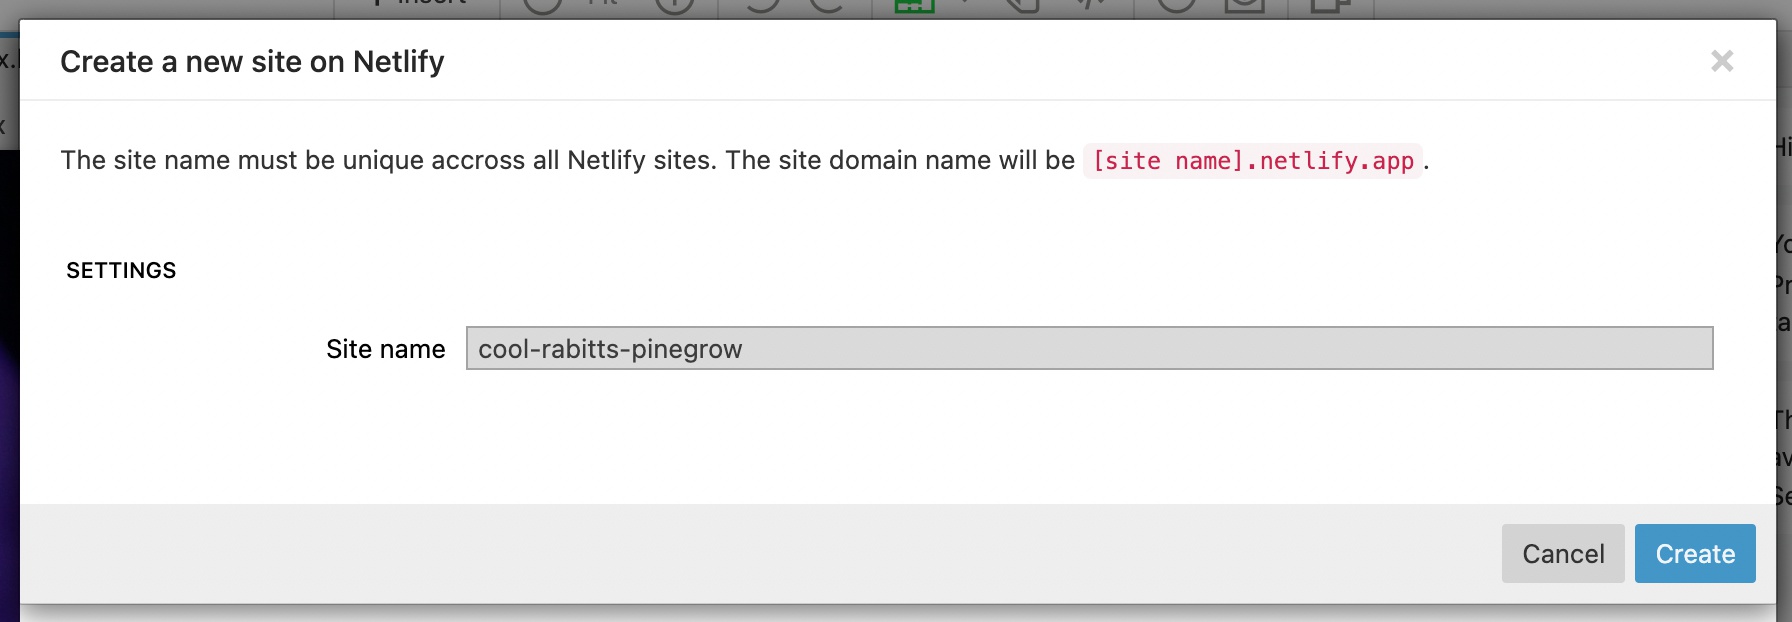
Enter a site name or leave the name empty to let Netlify generate an unique site name. Names must be unique not only across your Netlify account, but across all Netlify. A good practice is to use a unique prefix or suffix for all site names, for example cute-dogs-<my company name>.
Publishing the project
Pinegrow gathers the site content and uploads it to Netlify. At the moment, the publishing process works fine for smaller sites (less than 100MB of data, including images). There is some room for improvements, so do let us know if you run into any issues.
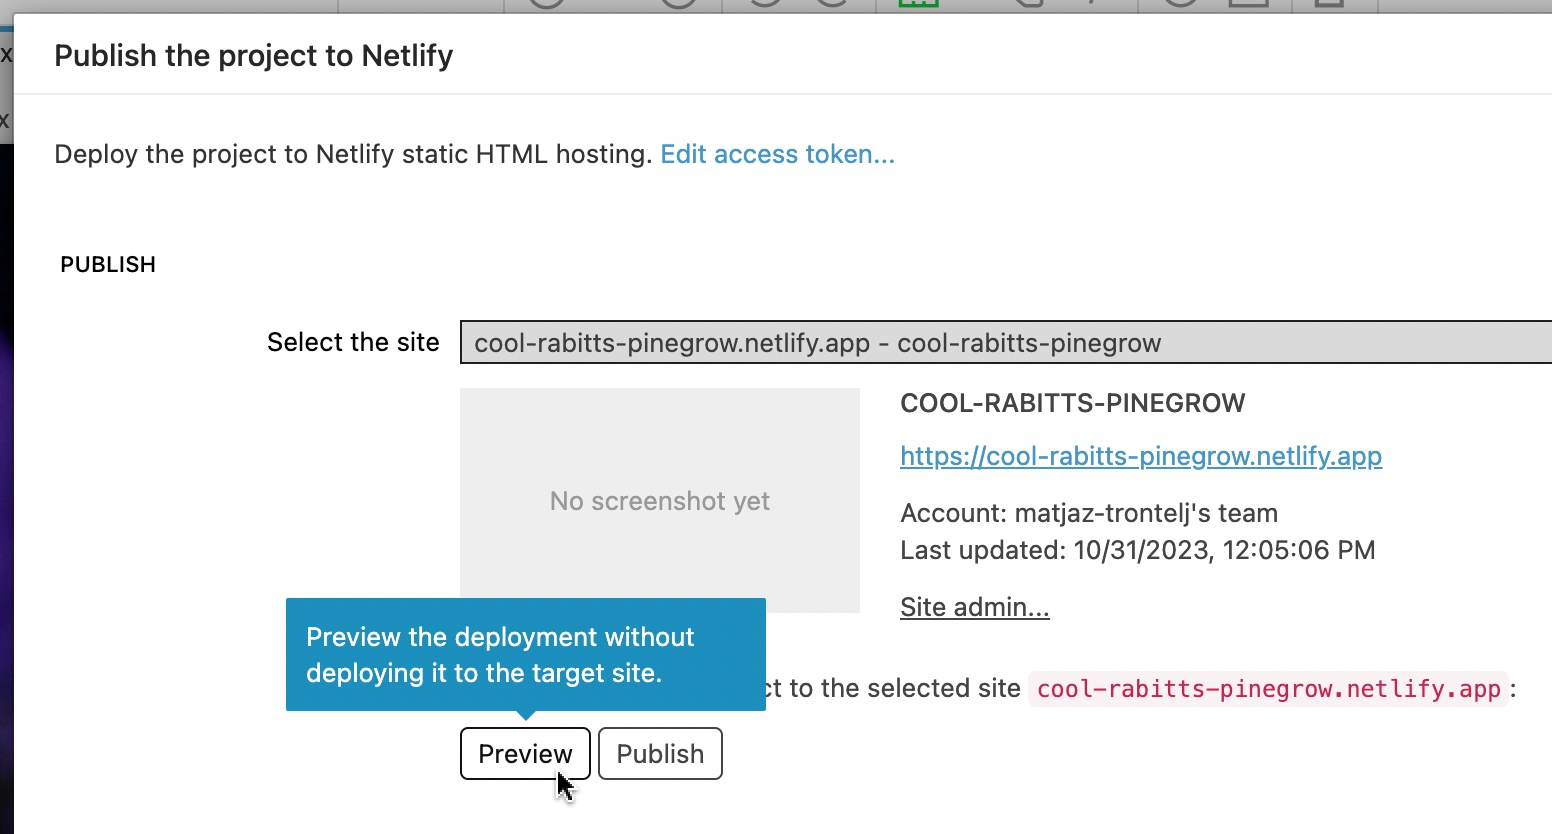
Preview the deployment
Click on the Preview button to create a draft deploy so that you can preview the site without publishing it.
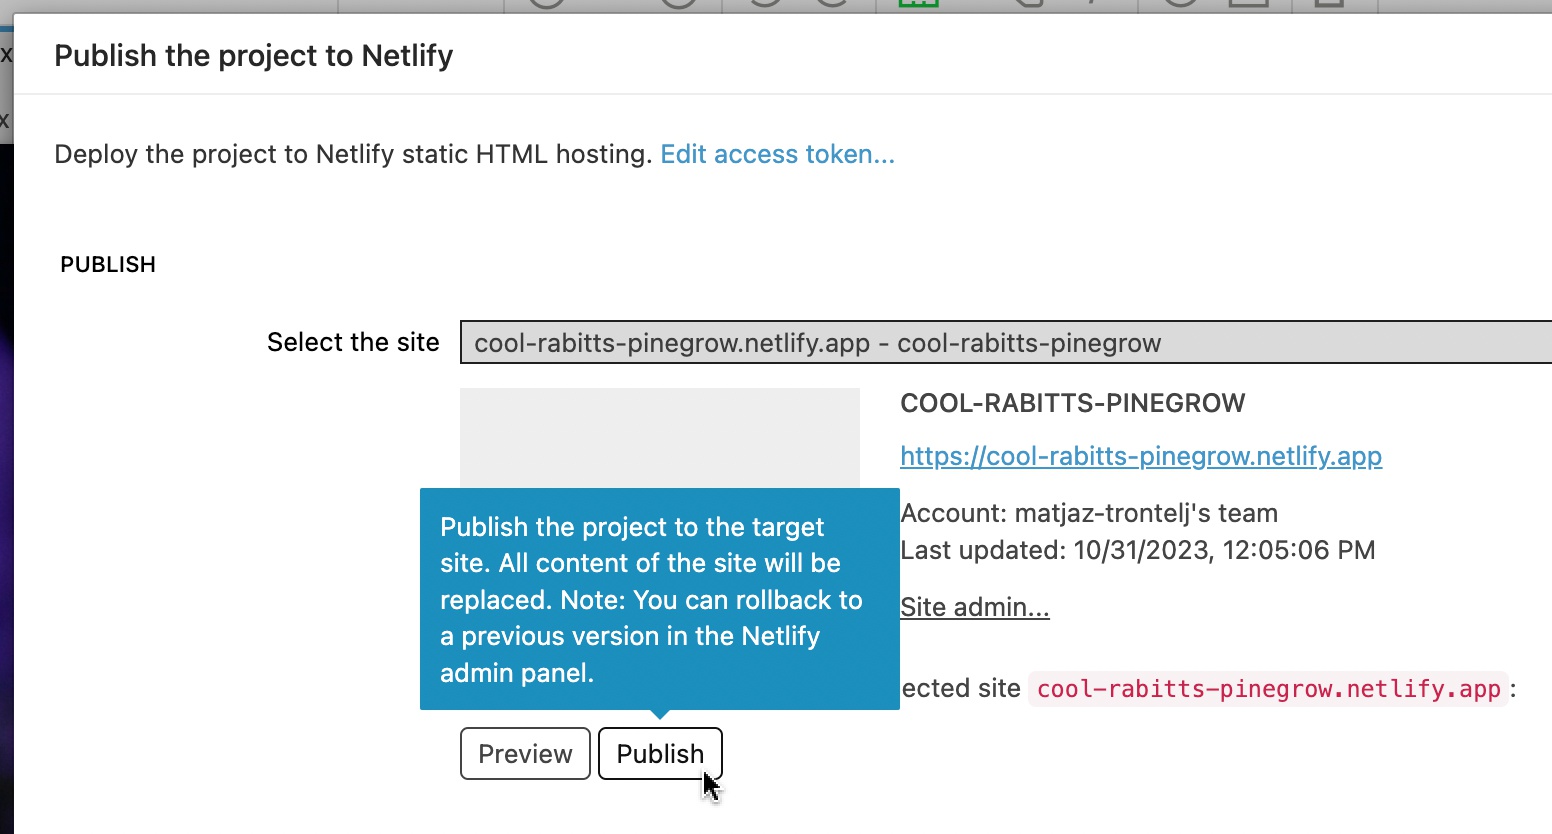
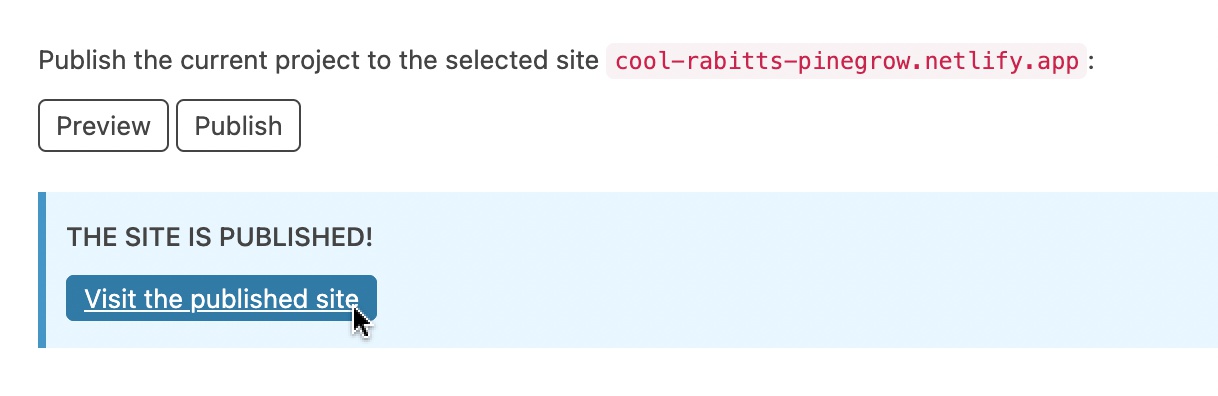
Publish the site
Click on the Publish button to publish the project on the target site.
Visit the site
In both cases, use the Visit the site button to open the preview or the published site in the default browser:
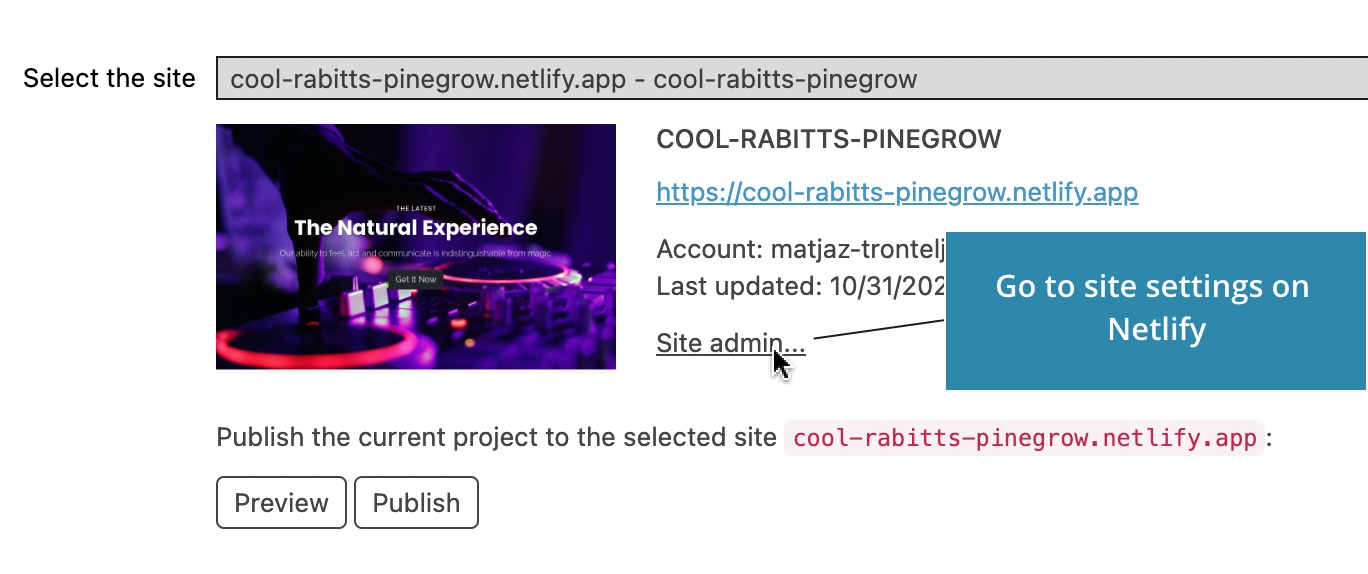
Undoing the changes
If something goes wrong, or if you publish the project to a wrong target site, go to your Netlify dashboard (click on Site admin… link to go there directly):
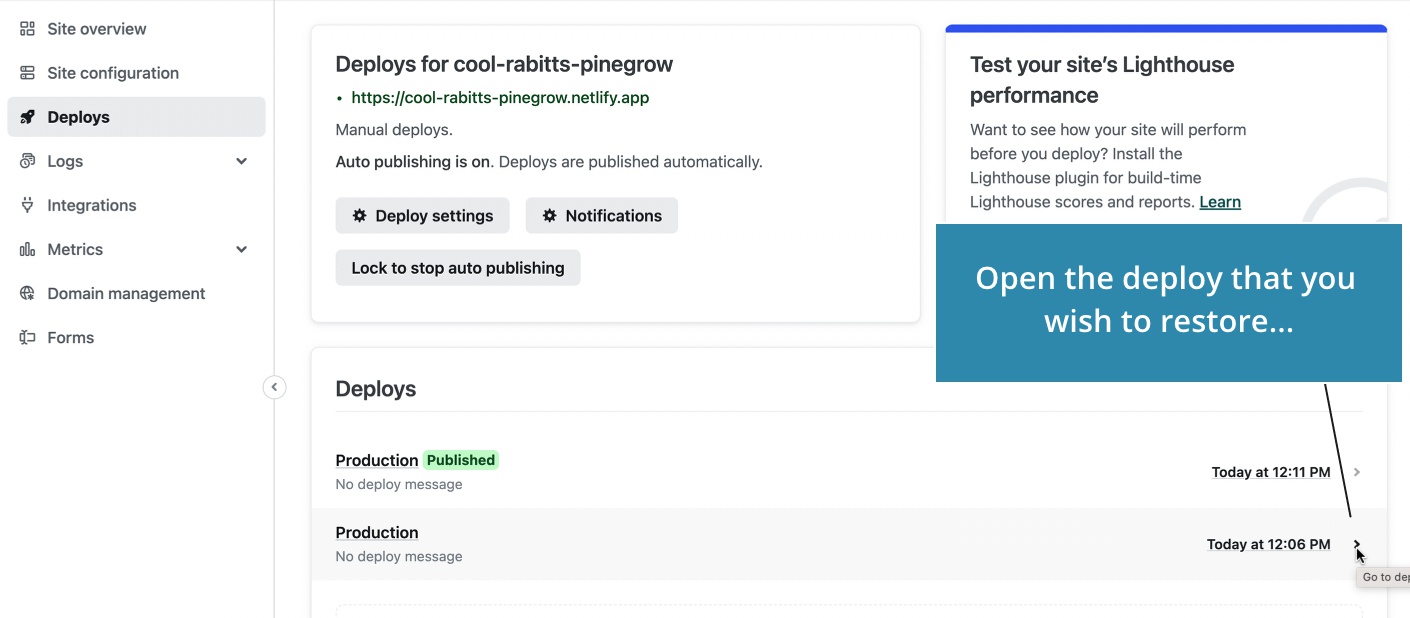
Then go to Deploys and open the previous deploy that you wish to restore:
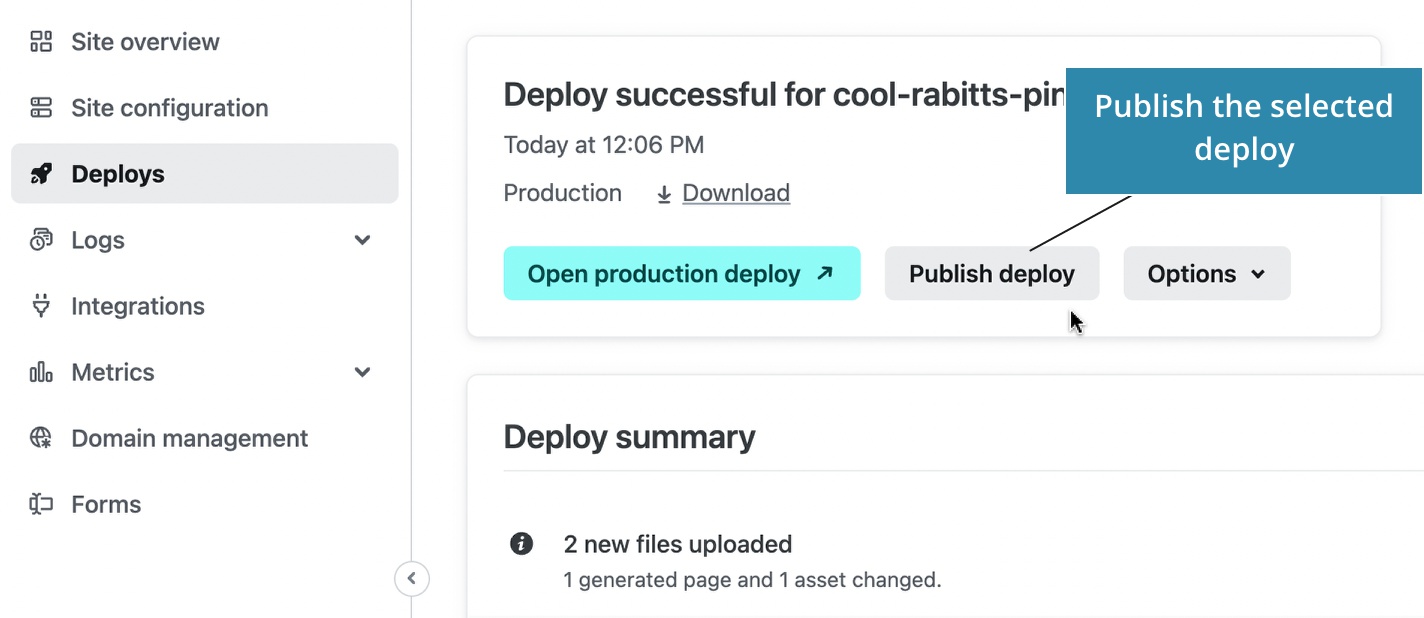
Then, select the Publish deploy option:
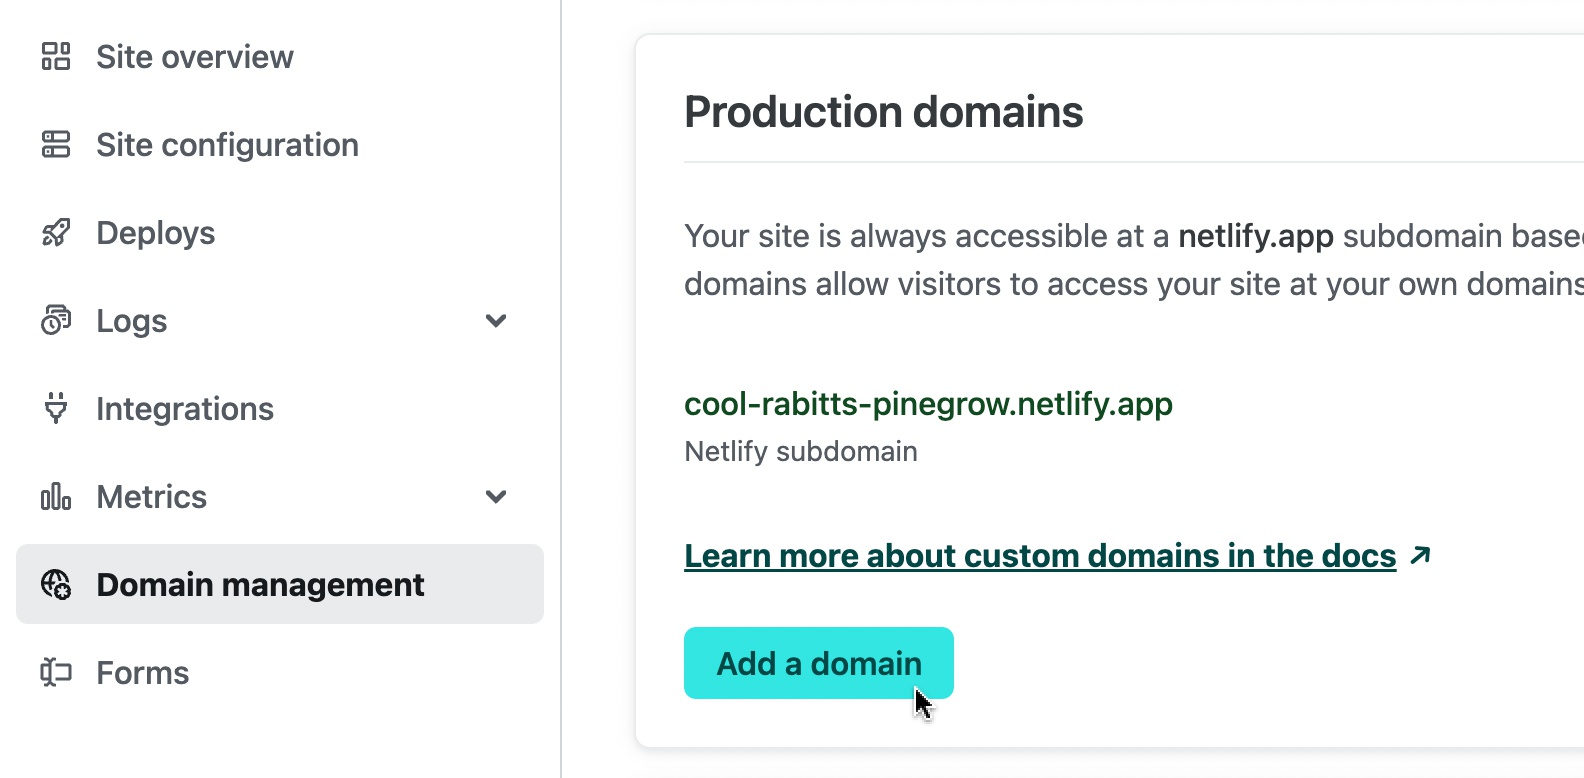
Using custom domains
Setup the custom domain for the site in your Netlify dashboard: