We will use custom WordPress blocks to create a versatile and fully customizable front page for our website.
IIn this series of short tutorials we will convert the Pinegrow Bootstrap 5 template “Agency” to a multi-page WordPress theme using Gutenberg blocks and the built-in WordPress theme controls. Let’s get started!
Prefer to read? Scroll past the video.
This tutorial is available in video and textual form. Watch the video, or continue reading. Of course, you can also do both!
Creating editable theme blocks
Note: After finishing the shooting of this video I realized we can use the ‘Select’ control for our final block attribute. This will allow us to present a list of potential classes to the end user. Scroll down to read about this now, or wait for me to cover it briefly at the beginning of video 3.
In this second tutorial, we are going to accomplish a few tasks. You should already have the Agency template set-up for export as a WordPress theme and have divided the main page into header, main body, and footer sections.
Task List
- We will duplicate our
index.htmlpage and use the new page to construct our blocks. - We will edit our main template page to remove the existing template content and add WordPress actions to display our post and page content.
- We will turn the top hero content of the template into our first block and look at how we add styling to our editor.
Let’s get started!
Creating a block page and cleaning up the template
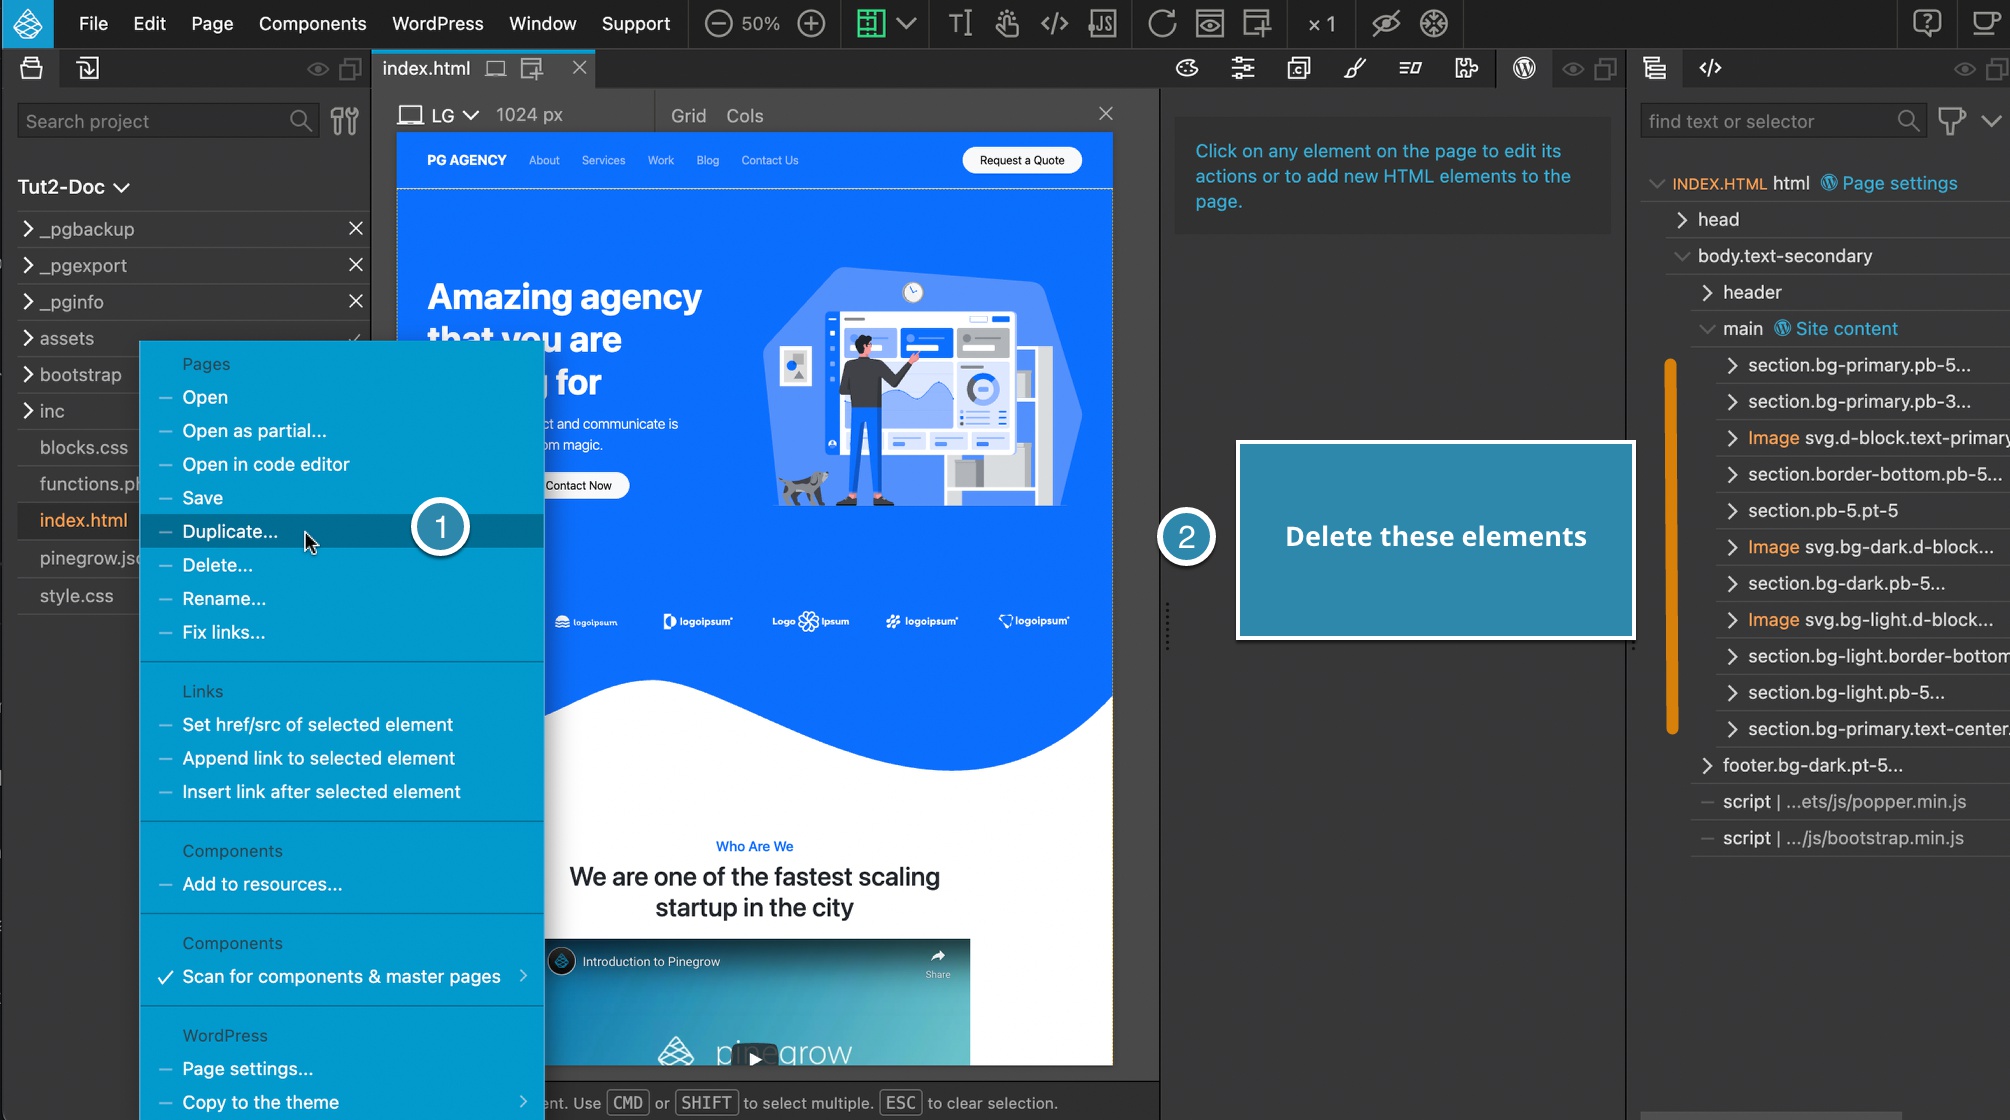
- Right-click the
index.htmlfile in the Project panel to bring up the context menu and then click duplicate. Name the new file ‘blocks.html’.

- From the modal that appears click on “Use the original master page”.

-
 In the Page Settings section of the WordPress panel click on “Don’t export this page”.
 - In the original
index.htmlfile, remove all the HTML nested in the ‘main’ section that has the ‘Site content’ action
 In the Page Settings section of the WordPress panel click on “Don’t export this page”.
If you save and export the theme at this point you will end up with a template page that has only the header and the footer, without any editable content displayed.
Adding editable areas to our template
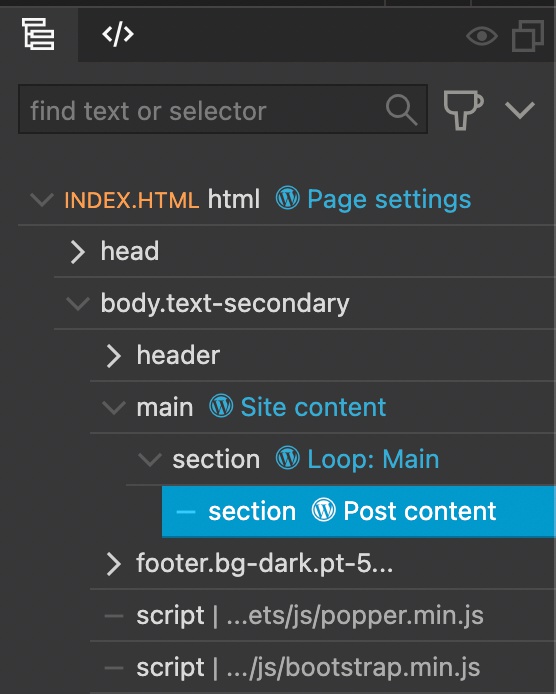
- From the Library panel, drag a section element into the ‘main’ area of the Page View or Tree panel. Then add a second section nested inside of the first.
- Select the outer section and from the WordPress Actions panel, open the ‘Post Smart Actions’ section and add the ‘Show Posts’ action. This will add the main loop to this section. No options need to be altered at this time.
- Select the inner section and add the ‘Post Content’ WordPress action.
Now when we export our theme, any blocks that we add in the editor will show up in between our header and footer on the front-end.
Block Creation
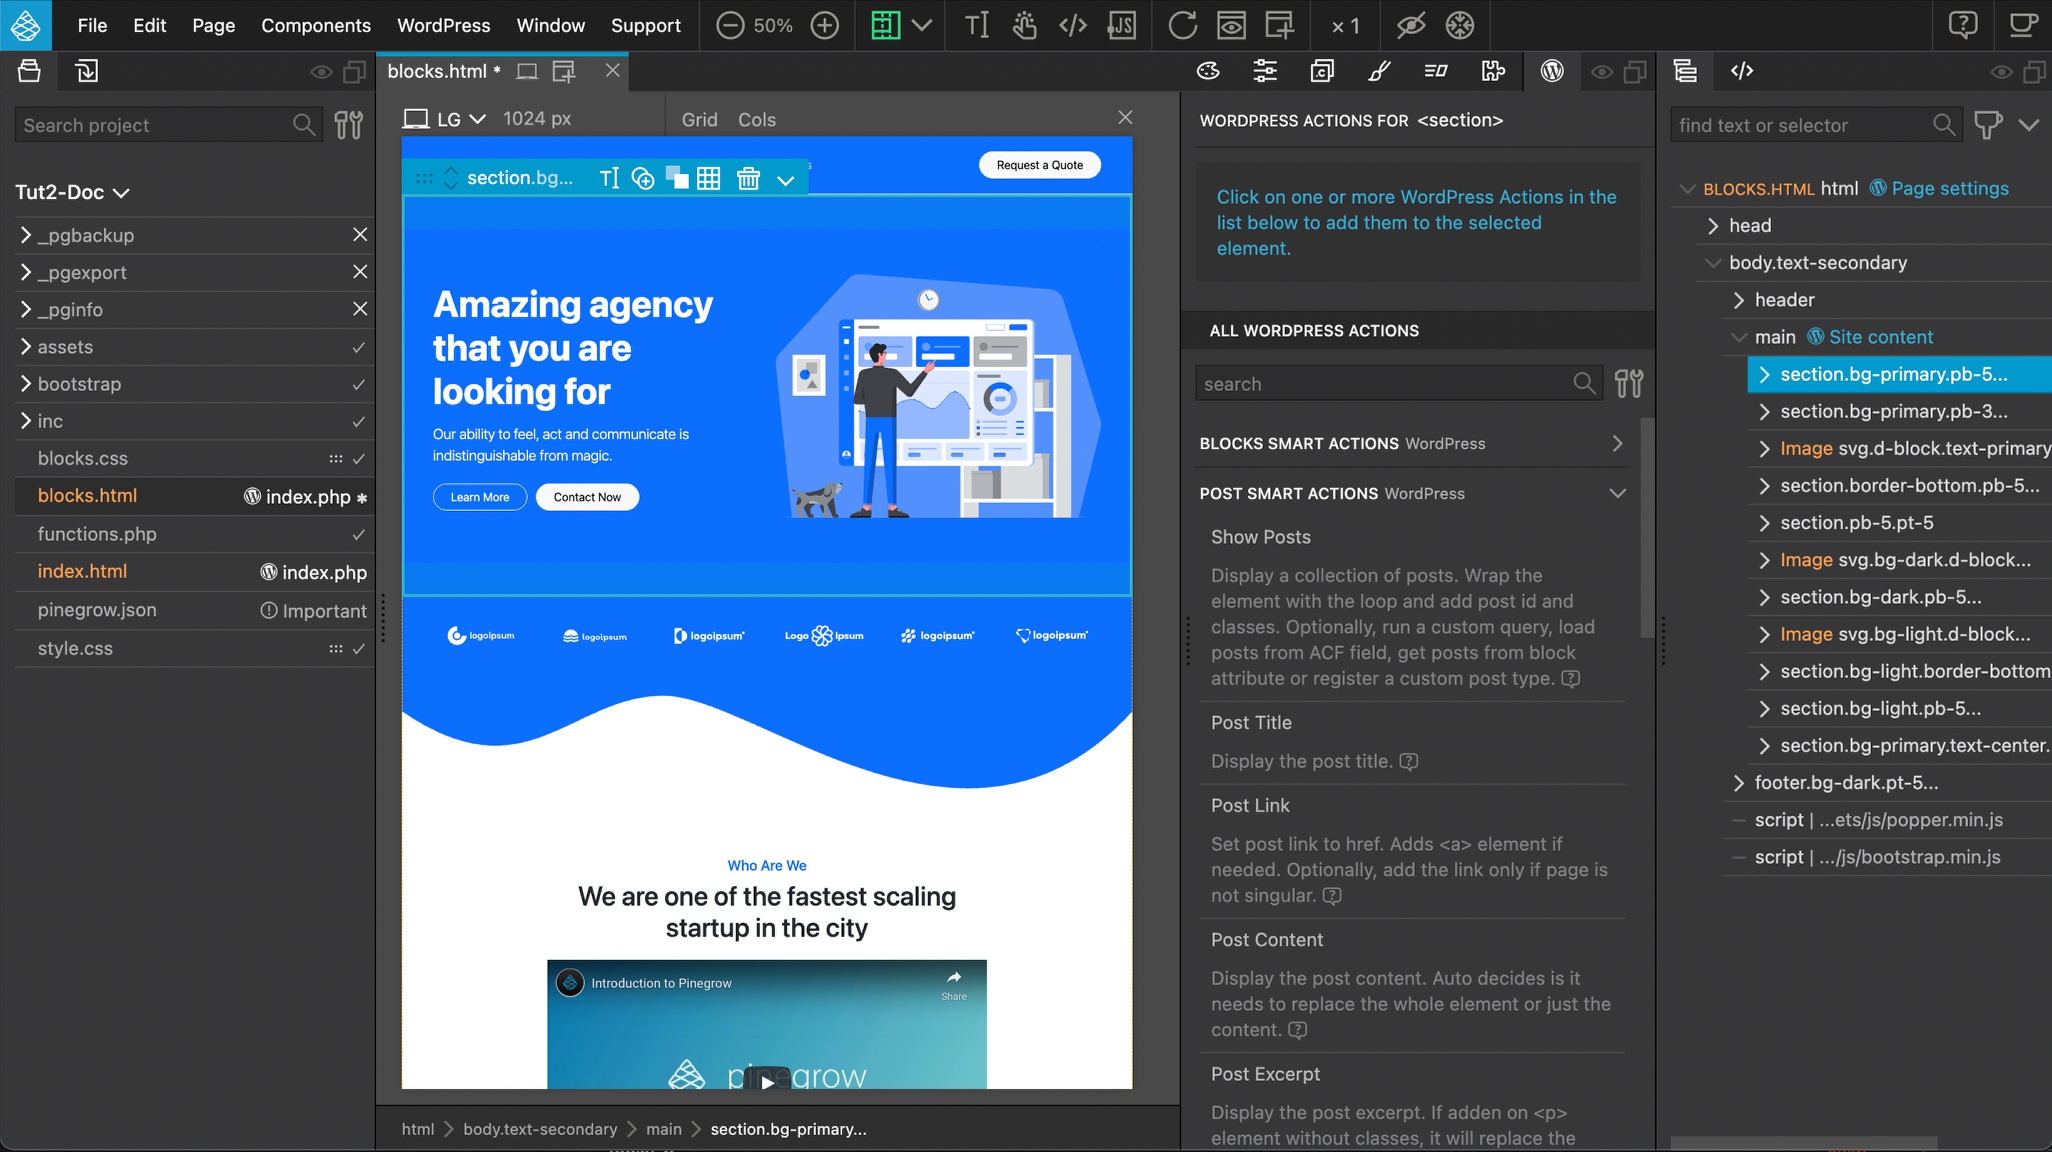
- Switch to the
blocks.htmlfile and select the first section within the ‘main’ area. This contains all of the HTML for the top hero section. - In the WordPress actions panel open the ‘Blocks Smart Actions’ section and select the ‘Block’ action.

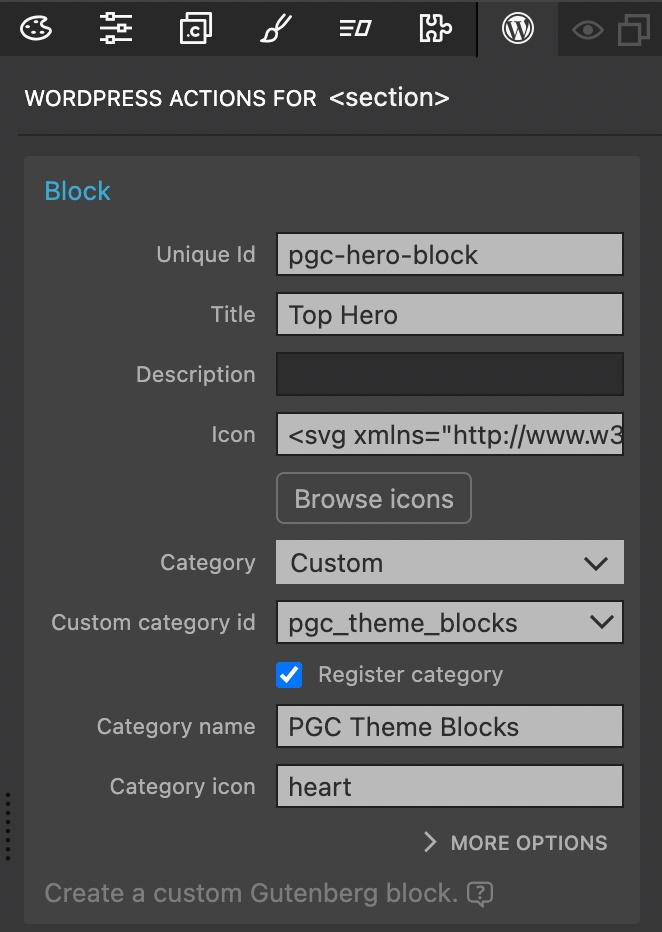
- Give the block a unique id, title, and icon. 3a) There are three different icon sets. The first is the WordPress dashicon set. To add one of these icons just enter the icon name without the
dashicon-prefix. For the Bootstrap or Remix icons copy and paste the SVG into the input. - Select a category of ‘Custom’ to add our blocks to our own theme section.
- Add a category id and name. At the moment the icon can only be a dashicon. Finally, check the ‘Register category’ box. This only needs to be done once for each custom category.
After saving and exporting our theme will result in our new category and block being displayed in the Blocks panel for addition to our page.
Styling our blocks in the editor
All of the CSS styling for the front-end is being added by the header element. However, if you look at the block in the editor you will see that it is unstyled. We need to tell WordPress to bring our stylesheets into the backend. For a single block, this is done through adding the stylesheet to the ‘Editor style’ input under ‘More Options’ of the block action. For multiple blocks (like we are putting together), it is done through the WordPress -> Theme/Plugin settings menu item.

- Open the WordPress menu and select the ‘Theme/Plugins settings’ item.
- Scroll to the bottom of the modal and add the
bootstrap.min.cssfile from your original Pinegrow project. - Add any additional block-specific styling from the original project to additional stylesheet inputs.
Now when we save and export our theme the blocks will be properly styled on the back-end.
Making block elements editable
Right now, we can add the block to our page, but none of the inside elements are editable. Converting this to be editable is straight-forward. For each element we want to be editable we add the ‘Block Attributes’ action give an id, title, and identify what we want to add.
Making the title text editable

- Select the ‘h1’ element in the hero block either in the Page view or the Tree panel, then select the ‘Block Attributes’ action.
- Give an Attribute id – this id must be unique within the block, but does not need to be unique in the project.
- Give a descriptive Title that will be visible in the Block properties area of the editor.
- Select a ‘Use as’. This will determine what aspect of the element will be altered by the user input.
- The attribute options are optional and allow for using the default if the element is left empty, changing the input type in the editor, using some conditional logic, and adding a help string.
Making the lead text editable
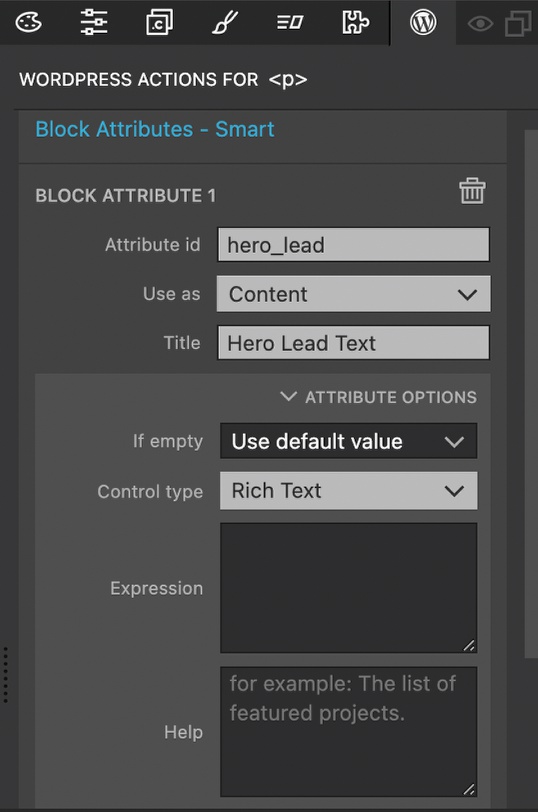
The steps for making the lead text ‘p’ element are essentially the same as for the title text. The only difference here is that we are changing the ‘Control type’ to ‘Rich Text’. This will allow us to add formatting, like italics and bold styling, to our lead text.
Making the buttons editable
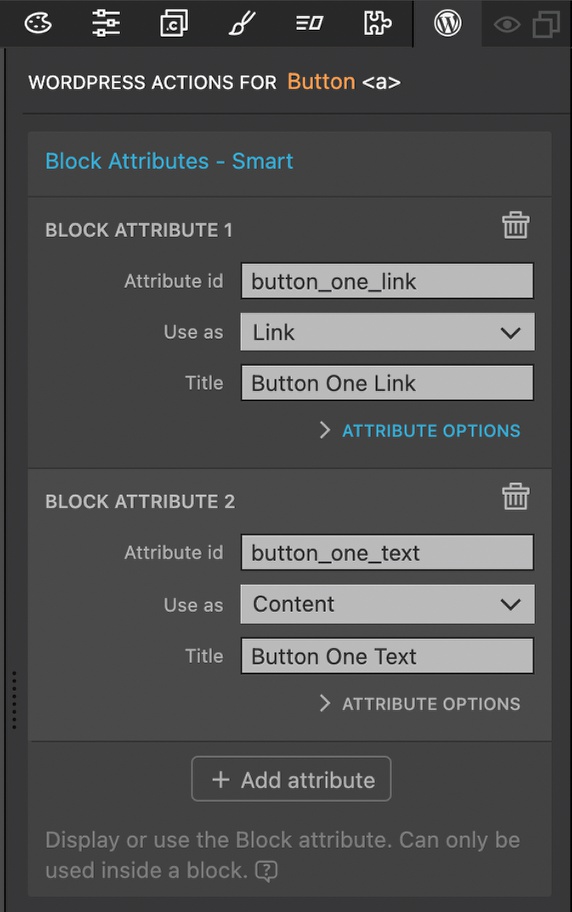
The buttons require two ‘Block Attributes’ actions. The first will be used to alter the anchor link and the second the text of the button. After filling out the input fields of the first action, simple add another by clicking on the ‘+ Add attribute’ button at the bottom.
Making the picture editable
Again, this is as simple as adding a block attributes action.
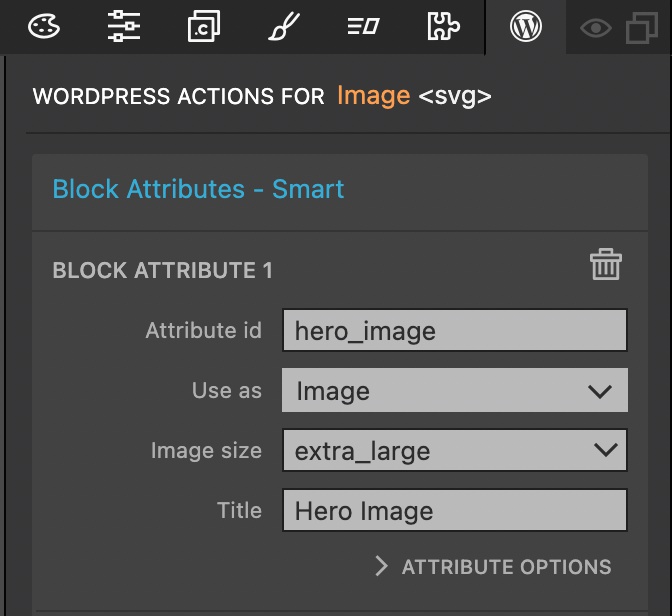
- Select the image and add a ‘Block Attributes’ action.
- Add a unique id and title.
- For ‘Use as’ select ‘Image’.

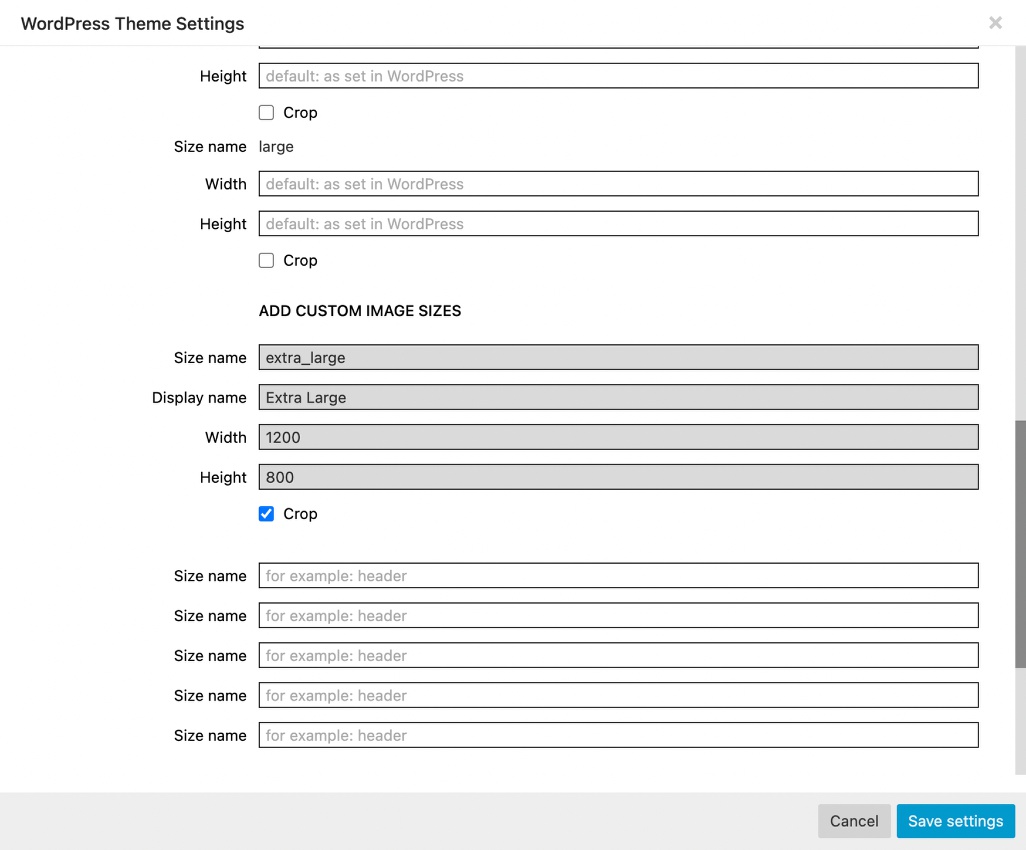
- For ‘Image size’ you can use the built-in WordPress sizes or define a custom size in the WordPress -> Theme/Plugins settings. Note, if you choose to do this, any media already in the library will need to be resized.
Making the background color editable
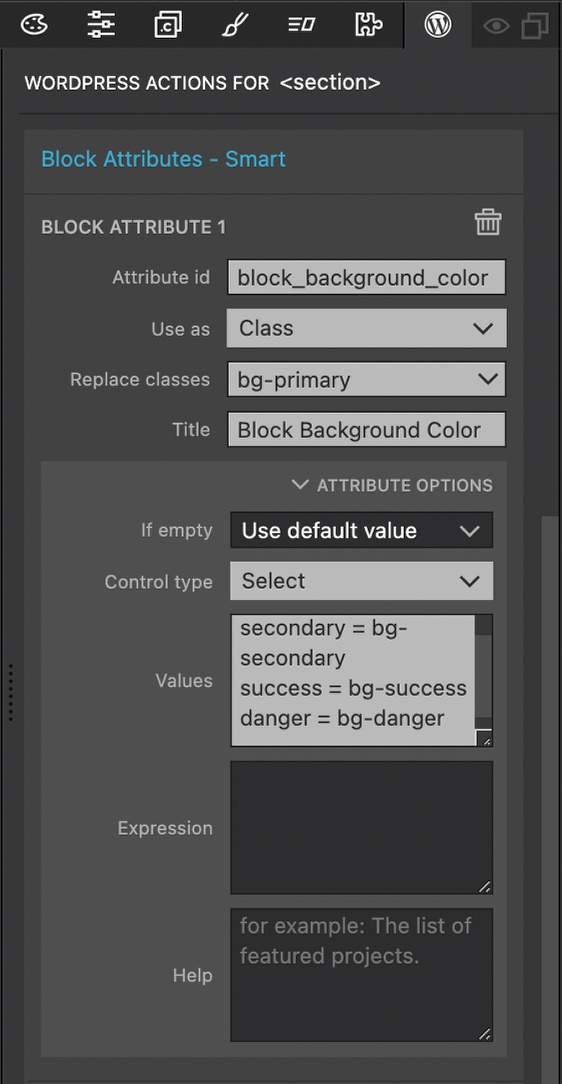
The background color for the block is set using a Bootstrap class on the main section. So in this case, we need to change the class to another of the appropriate color. We can use a ‘Control type’ of ‘Select’ to present our user with the colors available in our theme.
- Select the main section of the block – this is the same one we added the ‘Block’ action on. Add a ‘Block Attributes’ action.
- Add an id and title.
- Select ‘Class’ for the ‘Use as’.
- For ‘Replace classes’ add ‘bg-primary’.
- In the ‘Attribute Options’ choose ‘Select’ for ‘Control Type’.
- In the ‘Values’ either enter each of the possible Bootstrap classes, one per line, or you can make the presentation a little prettier by adding a displayed name and the actual class separated by an equals sign, e.g. ‘success = bg-success’.
Wrap-up
You can see from this tutorial that making Gutenburg blocks is quite simple with the Pinegrow Web Editor. In the next tutorials we will explore making more complex nested blocks and prepare additional template pages for our theme.
Until then, have fun designing with Pinegrow!
Discuss this tutorial
Have questions or comments about this tutorial? Let’s talk about it on our forum.
Get in touch
Would you like to see your favorite theme or blocks library featured in the next tutorial? Let us know in the forum or by email!